The World Leader In Commercial Embroidery Hooping Systems

How-to’s

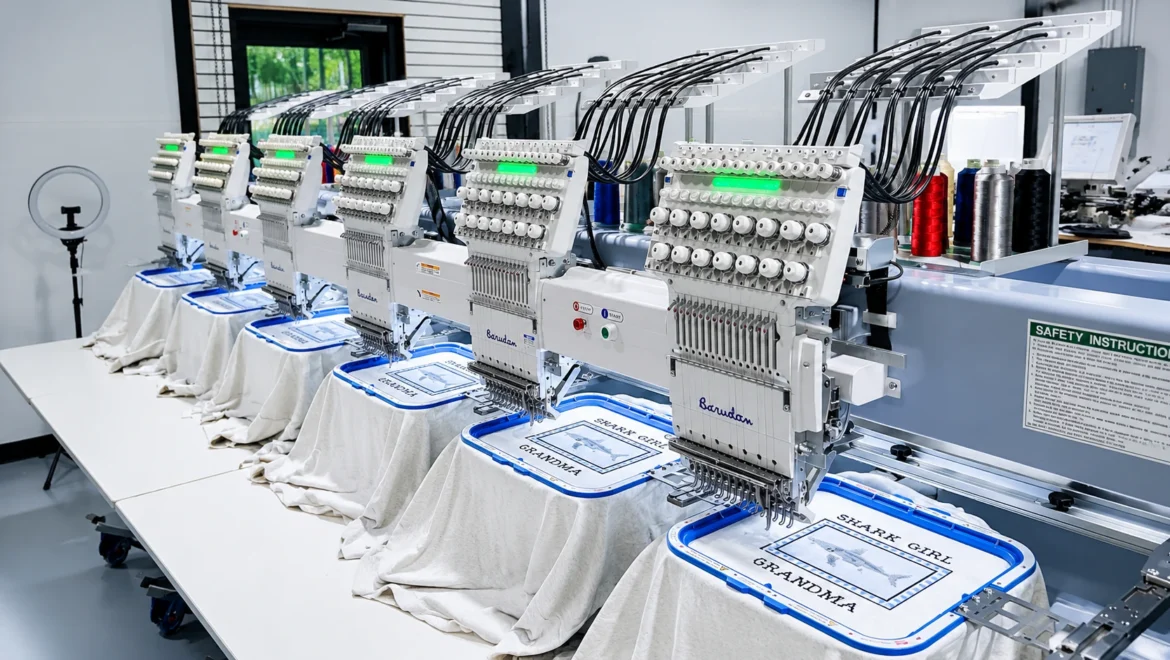
Multi-head commercial embroidery machine running matching logo placement across a production run
How-to's

How to Get Consistent Embroidery Placement Across a Production Run
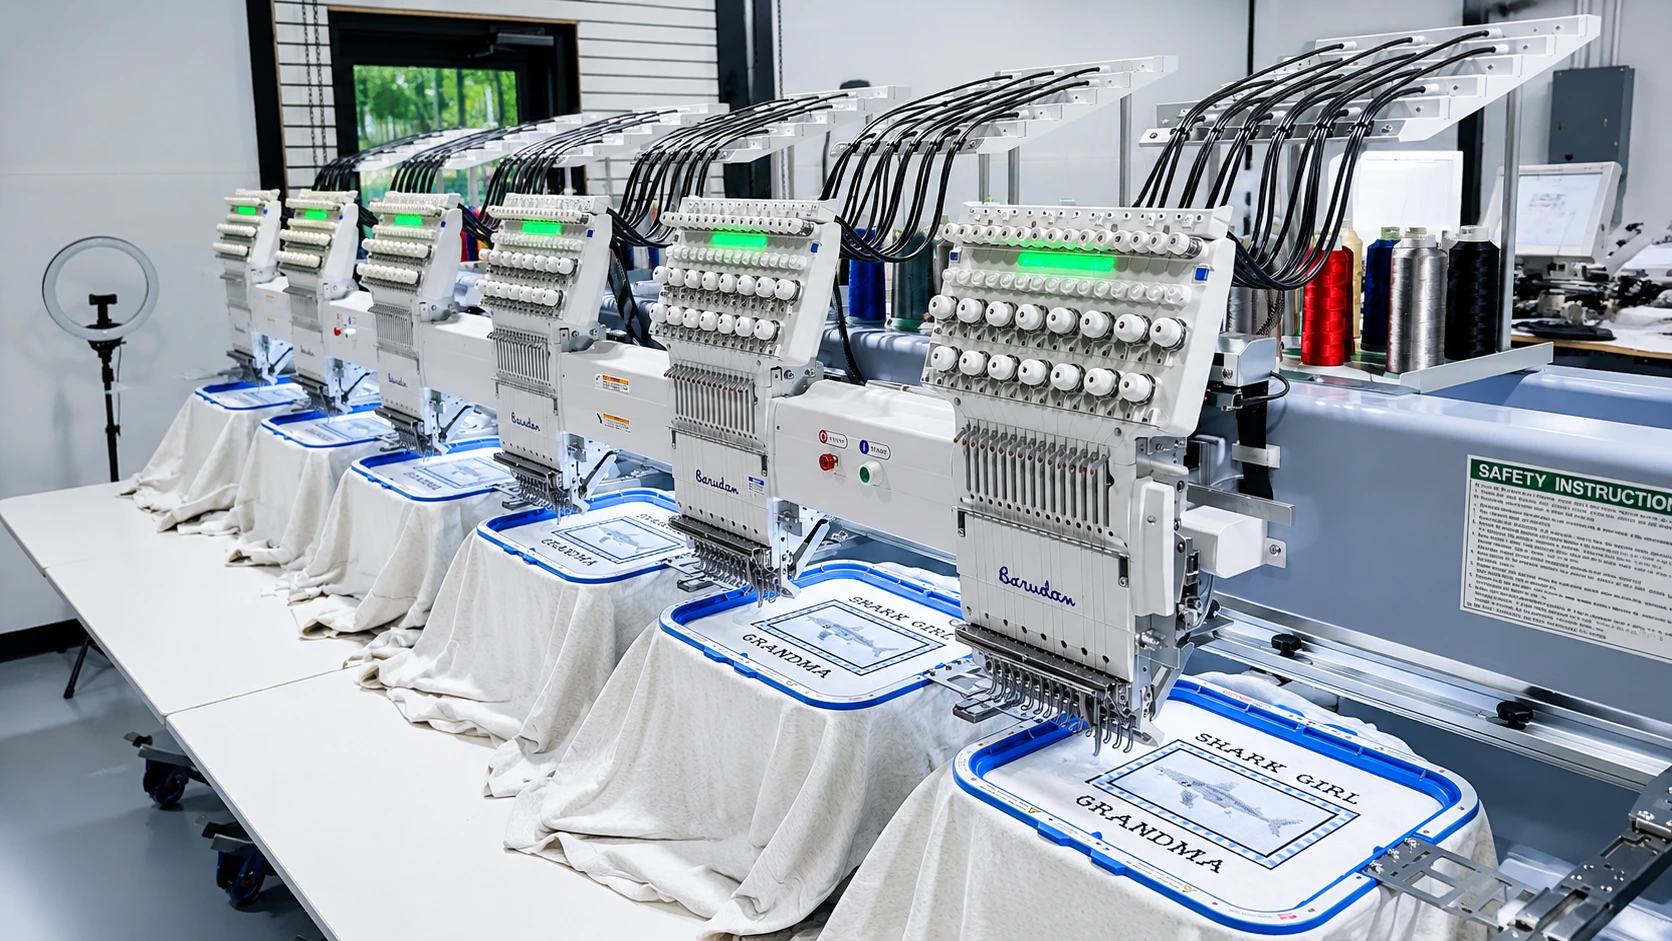
Multi-head commercial embroidery machine running matching logo placement across a production runPhoto provided by Beverly Bradley from www.shop1091.com

Getting the same logo in the same spot on every piece in a run comes down to a repeatable system, not careful measuring on each garment. Standardize the placement once from stable points on the garment, write that exact position down so anyone can reproduce it, and hoop every piece with a station and fixture that hold the design square in the same place. Keep the hooping tension even from the first piece to the last so nothing distorts out of registration.

At HoopMaster, we build the world’s number one selling commercial hooping system, used by embroiderers in more than 100 countries. We started out as a high-volume contract embroidery shop with this exact problem. We built the hooping station to solve our own placement bottleneck, then invented the magnetic Mighty Hoop to keep tension consistent piece to piece.

Why embroidery placement drifts across a production run
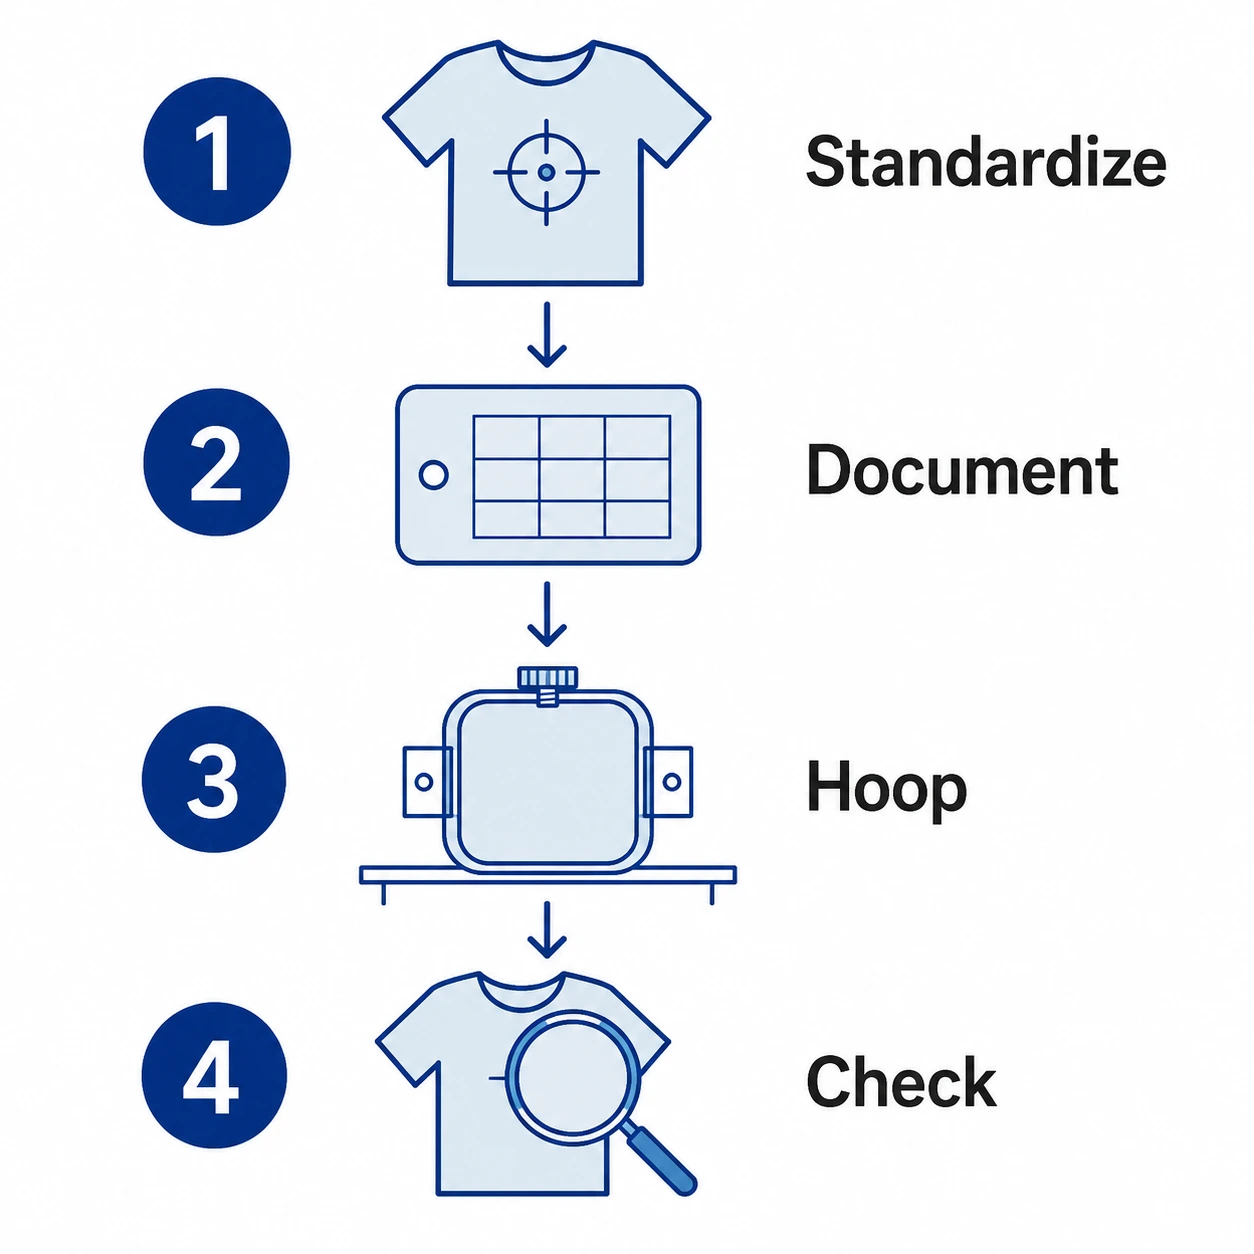
The problem is rarely that someone measured one shirt wrong. It is that the position was never locked down in a way the whole shop can repeat. A few things cause the drift:

  • Measuring and marking each garment by hand introduces small variations that stack up over a run.
  • Different operators read the artwork and the garment landmarks slightly differently, so the same job lands in slightly different places.
  • Reorders go wrong when the original position was never recorded and the operator who set it up is gone.
  • On multi-head machines, one setup mistake repeats across every head in the row instead of ruining a single piece.

Placement errors are also expensive. Every piece that is hooped in the wrong place becomes rework or scrap, and can cost you a reorder or a customer. Quality organizations classify these as internal and external failure costs, and in a production shop they add up quickly. Building the placement into a repeatable process is what keeps those costs from piling up.

Standardize placement from stable garment reference points

The first step is deciding the placement once, from points on the garment that stay consistent across the size range and across reorders. One option is to measure from where the neck seam and shoulder seam meet, and set your horizontal position from the true center front or the placket. If the garment doesn’t have a placket, find the center front by folding the garment in half and using that fold as your reference.

Avoid measuring from loose or unstable references like armholes, side seams, or a casual fold in the body. Those move around from garment to garment and from size to size, which is exactly the variation you are trying to remove.

Standard starting measurements for common placements
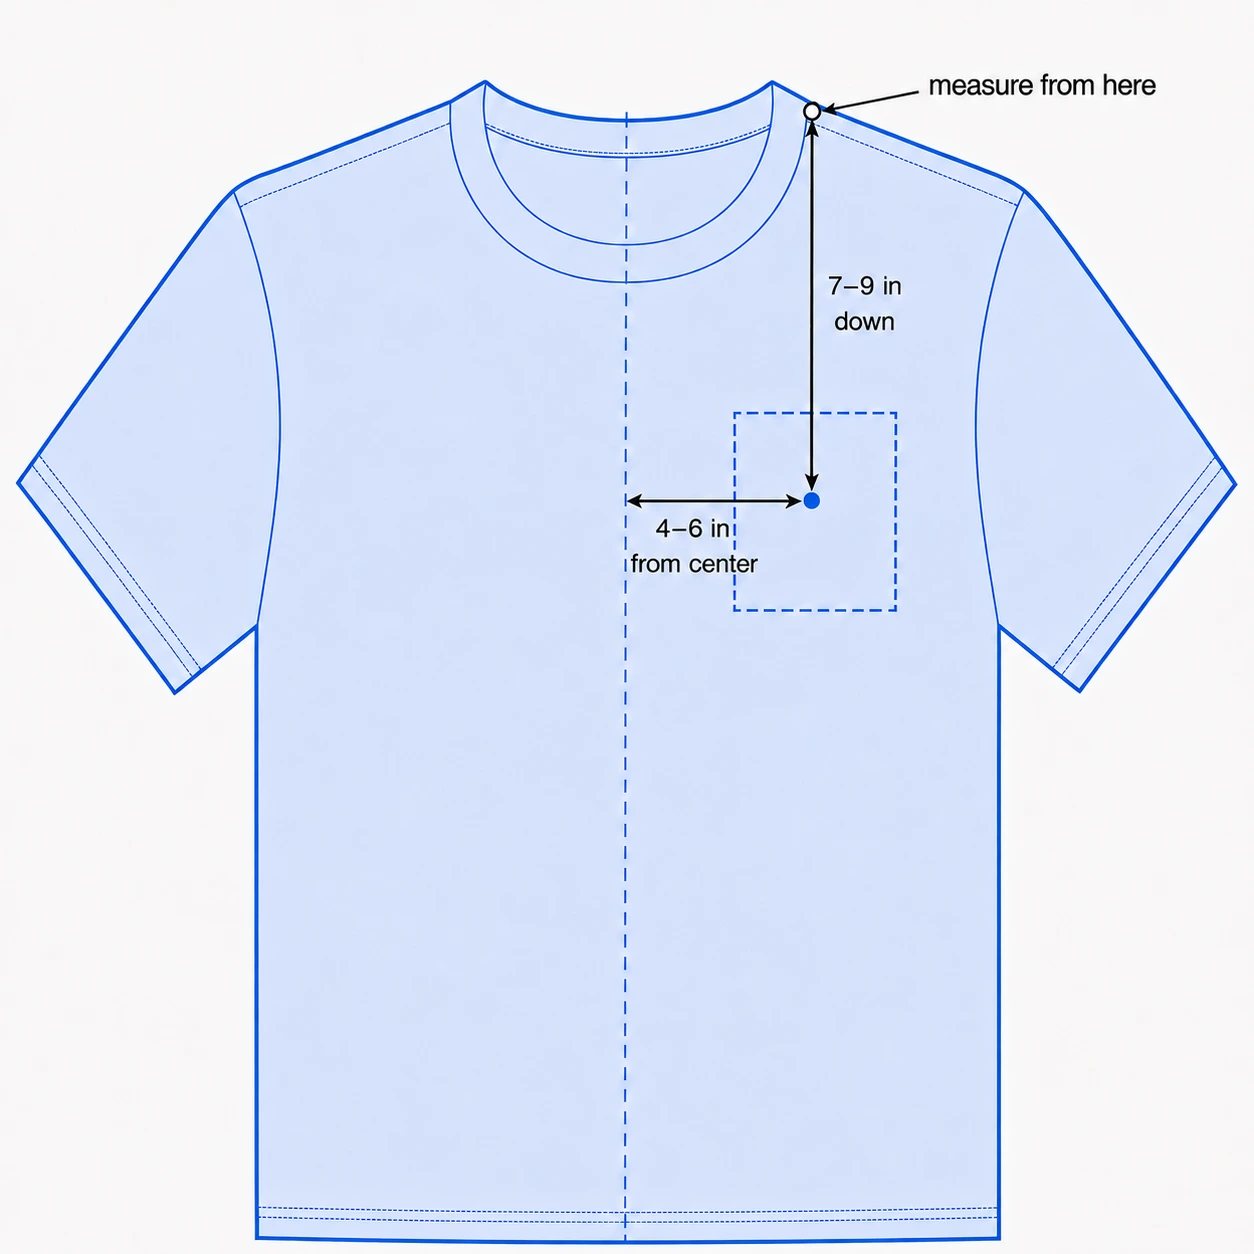
These are useful starting points for common placements, drawn from placement guidance of many sources in the industry. Treat them as a reference for building your own shop standard, not as fixed rules, and confirm the look with a full-size paper template before you commit to a run.

Placement Starting measurement Reference point
Left or right chest 7 to 9 inches down, 4 to 6 inches in From where the collar and the shoulder seam meet and the center of the garment
Center front 2 to 4 inches down From the neckline
Center back (tees and tops) 5 to 6 inches down From the back neck seam
Center back (hoodies, sweaters, jackets) 7 to 10 inches down From the back neck seam, varies with style and design size
Sleeve Centered, about 0.5 to 1 inch above the hem From the sleeve hem

Jacket and full-back placements vary the most, since the right position depends on the jacket style and how large the design is. For those, use the center seam and shoulder seams as your alignment references and prove the placement on a sample. You can find machine-manufacturer starting ranges in a published embroidery placement guide.

Scaling placement by garment size

A single adult measurement will not stay balanced from Small through 3XL. As the garment gets larger, both the vertical drop and the horizontal position need to move so the logo stays visually centered on the chest. The reliable approach is to define the placement by garment class and size band, then document those numbers so every operator uses the same scale instead of eyeballing it. Our recommended Mighty Hoop sizes for popular placements and garments can help you match hoop sizes to those placements as you build the standard.

Document the placement so any operator can reproduce it
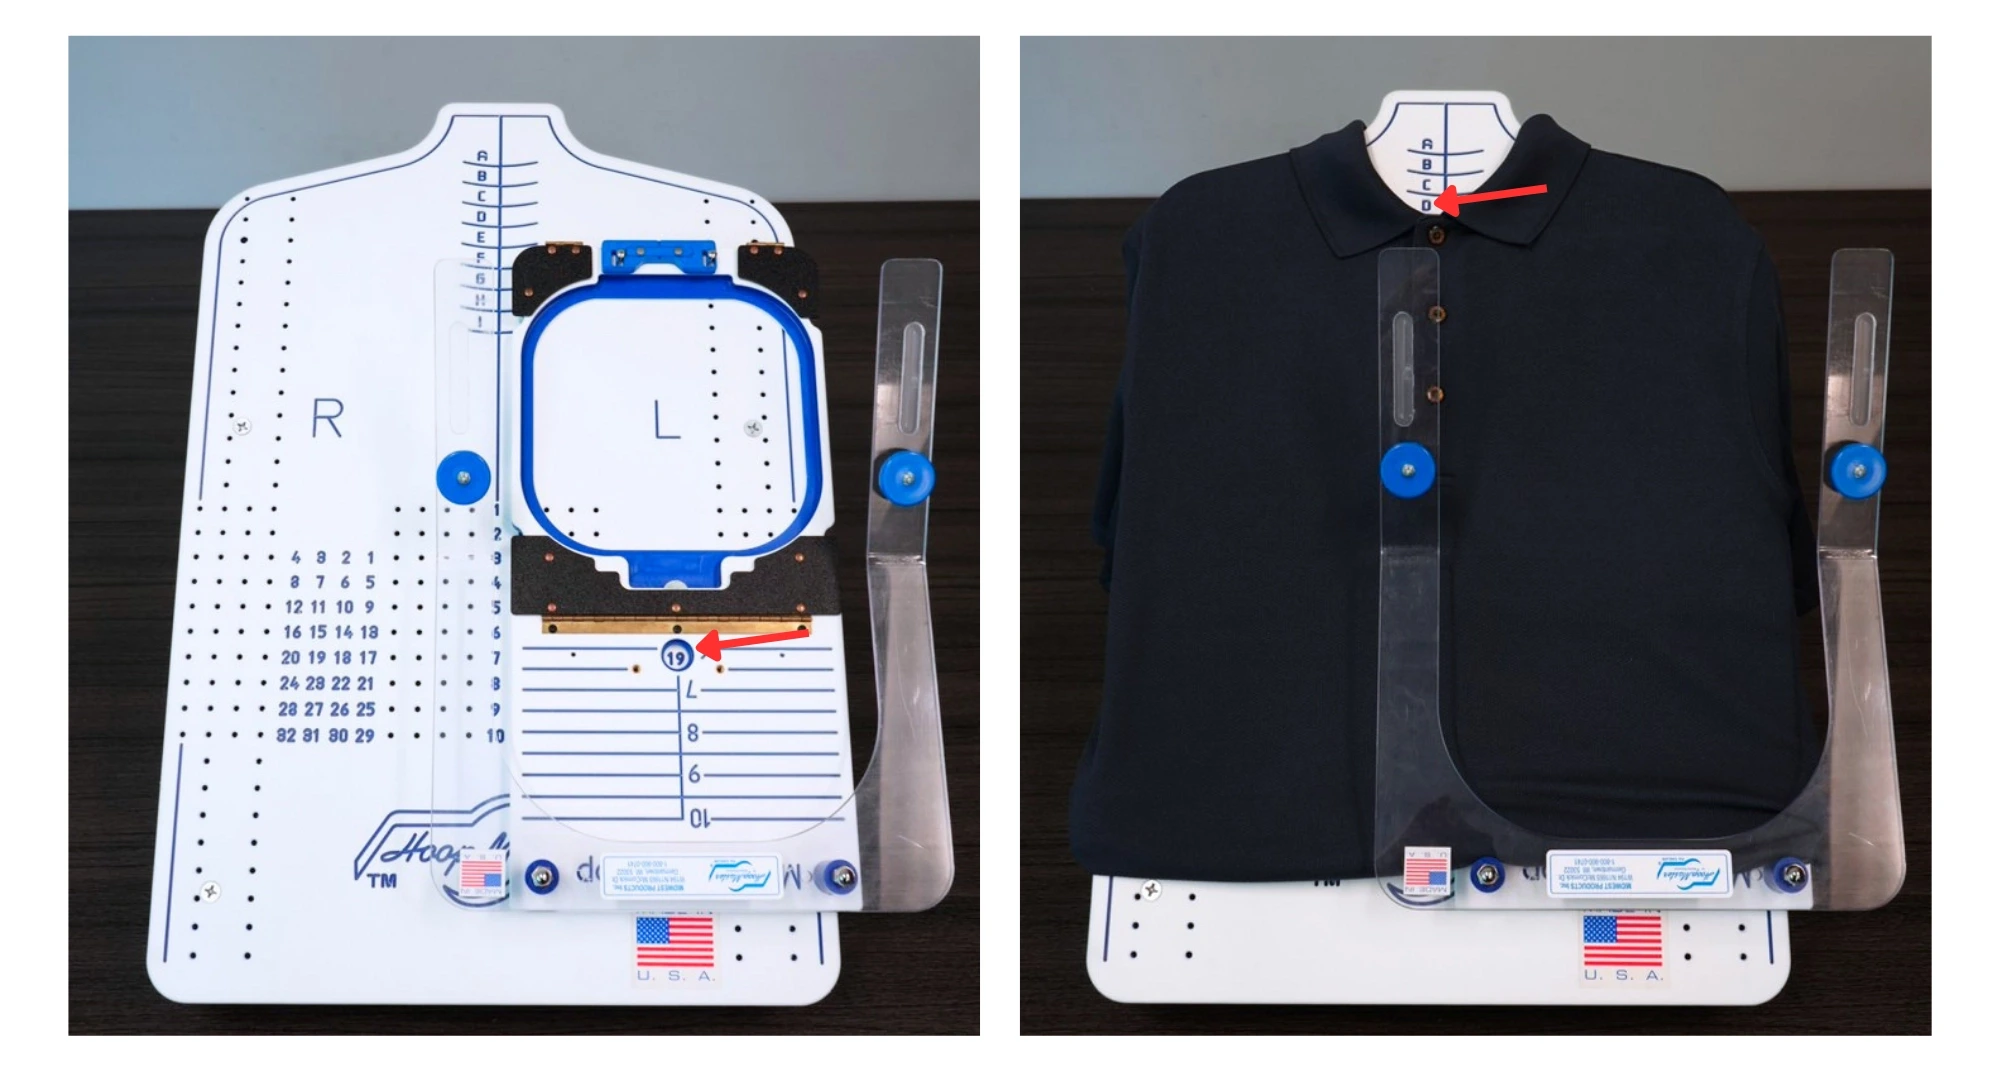
Once you have standardized a position, record it so it can be repeated without re-measuring the garment.

On a HoopMaster station, the work surface has a lettered and numbered grid. You note the coordinate where the fixture sits for a given design, garment type, and size, something like D19. Record that alongside the fixture and station size you used. On the next piece, or on a reorder six months later, any operator sets the fixture back to that recorded number and pulls the top of the shirt to the same letter making the placement consistent. There is no measuring and marking each garment.

Keep the rest of the job record with that coordinate so a reorder starts from the standard instead of from scratch:

  • The approved, digitized design file and the exact version used.
  • The signed-off first-article sample.
  • Thread colors by manufacturer number and name, since “blue” alone will not match on a reorder.
  • Garment style number and size.
  • The fixture, station size, and letter and number coordinate for each placement.

A job packet that travels with the order, holding the approved sample and these setup details, is a long-standing shop-management practice. It keeps the setup out of any one operator’s memory and in something the whole shop can follow. You can read more on the station side of this in our HoopMaster hooping station overview.

Embroiderers tell us this is what protects them on repeat work. As Eddie at A1A Embroidery put it, “We use the HoopMaster and have found it to be amazing for hooping. We have had other aids as well but have found this one to be the most fool proof. It adds consistency to all the jobs that we do. When a customer reorders we know that we can place the design in the same spot every time.”

Remove freehand variation from the hooping step

Documentation only holds up if the hooping itself is repeatable. If each garment is eyeballed and marked by hand, you reintroduce the variation you just designed out.

A hooping station with a fixture holds the hoop square to the work surface and directly over the lower ring, so the design lands in the same position every time instead of depending on how carefully each garment was marked. This is what makes the documented coordinate actually repeat. It also lowers the training barrier. A new or fill-in operator can learn to hoop accurately on their first day, because the station does the aligning instead of relying on years of practice.

Correct hooping is one of the biggest drivers of placement fidelity, and most misalignment traces back to it. Common causes include slack in the fabric, a hoop that is too large for the design, a missing stabilizer on thin or stretchy fabric, and loose frame-holder screws. Two habits reduce those problems: use the smallest hoop that comfortably fits the design, and hoop the garment cleanly rather than re-tightening it afterward.

Keep hooping tension consistent piece to piece
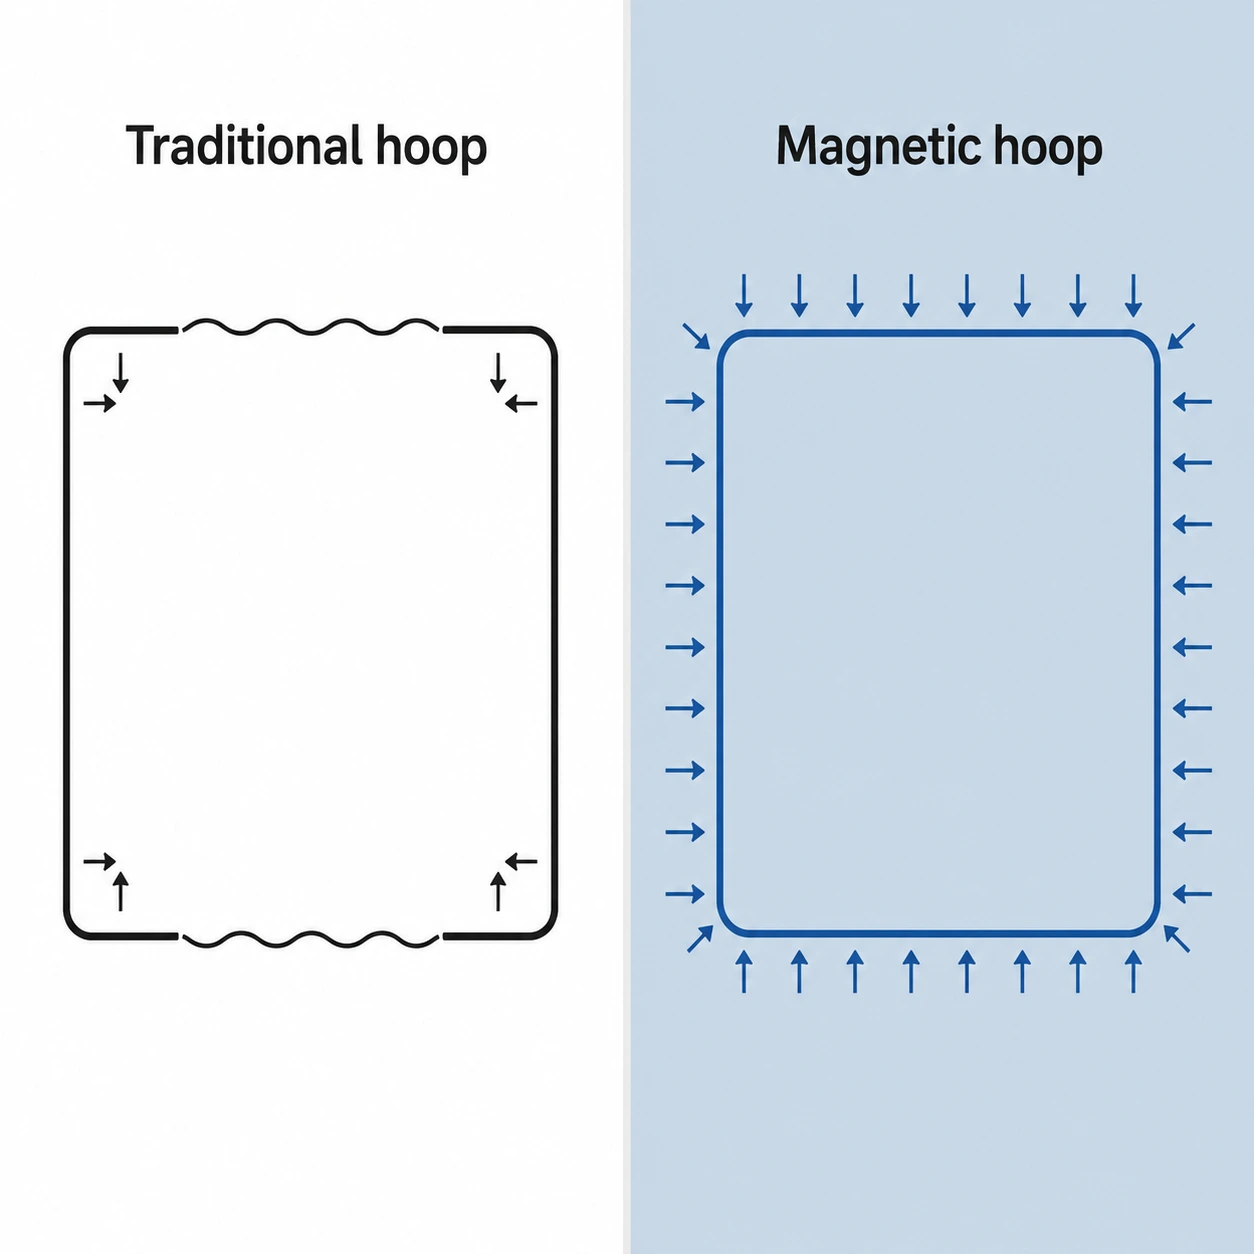
Uneven tension reads as inconsistency even when the position is correct. Puckering, distortion, and shifted registration all make a correctly placed logo look wrong. So consistent tautness, piece to piece and across different fabrics in a mixed run, is part of consistent placement.

The patented Mighty Hoop uses neodymium magnets that allow the hoop to grip with even tension across the entire hoop, every time, and they self-adjust to the thickness of the garment. That means a lightweight tee and a heavy jacket back both get held taut without the operator pre-tensioning anything or fighting a screw. Traditional and standard hoops rely on manual tensioning and can loosen along their long sides between the corners, which is where mid-run distortion creeps in.

Keep the roles of the two products clear when you build your system. Placement and repeatability are the HoopMaster station’s job, through its grid and fixtures. Even tension is the Mighty Hoop’s contribution. Both matter, and they solve different halves of the problem. We break down that distinction in our guide to HoopMaster vs Mighty Hoop, and you can see the hoop itself on our Mighty Hoop magnetic hoop page.

Prove the setup before the run and check it during

Even a well-documented, fixture-based setup should be proven before you commit a full batch. Stitch a first-article proof on the actual fabric you are running, in the actual colors, and get it approved by the customer. If possible, keep that approved sample at the workstation as the visible standard for the run.

Then check the first piece of the production run against the approved sample, and spot-check at intervals rather than waiting until the end. Catching a drift at piece three is a quick fix. Catching it at piece 200 is a reorder. This is standard quality-control practice in commercial decoration, and it is cheap insurance on a long run.

The first article also catches problems that look like placement errors but are not. If a design keeps distorting on a stretchy or high-nap fabric, the issue is often pull compensation, underlay, stabilizer choice, or digitizing issues, not the physical placement. There is no single universal recipe for every material, so the sample is where those problems surface before they scale across the run.

Keep placement consistent when the operator changes
Staffing changes mid-run and reorders come back months later, often to a different operator. A documented, fixture-based system is what protects consistency through those handoffs. Because the placement lives in a recorded coordinate and a fixture setup rather than in one person’s habits, a new operator can reproduce the exact position and hoop accurately without a long ramp-up.

When you train operators, cover your shop placement standards, how to find and mark reference points, the hooping procedure, when to use a holding fixture, and how to run a first-article test. That shared standard is what lets any operator step onto a job and keep it matching the pieces that came before.

Frequently asked questions

How far down should a left chest logo sit?

For most adult tops, a left chest logo starts about 7 to 9 inches down from where the collar and the shoulder seam meet and 4 to 6 inches in from center front. Scale both numbers up as the garment size increases so the logo stays balanced.

How do you reproduce the same placement on a reorder?

Record the station grid coordinate, the fixture, and the station size used for each placement, and keep the approved digitized file and signed-off sample with the job. On the reorder, set the fixture back to the recorded coordinate rather than measuring the garment again.

Why does placement look inconsistent even when the measurements are right?

Sometimes a logo can appear crooked or out of place when you are simply holding the garment by the seams or laying it flat on a table. For a more accurate view of the logo placement, it is best to put the garment on a person or mannequin and see how it looks when worn. 

Ready to make placement repeatable?

If you run repeat and bulk orders, a hooping system is what lets you reproduce that careful placement on demand. Our HoopMaster Station gives every operator a grid to document and repeat an exact position, and the Mighty Hoop makes the hooping process easy and keeps your tension even across the whole run. We started as a contract shop with your exact problem, so if you want help choosing the right station, fixtures, and hoop sizes for the garments you run most, our team is glad to walk through it with you. Give us a call at 262-257-0930 or reach out through our contact page, and we will help you build a setup that lands the design in the same spot every time. Happy Hooping!
Two Easy to Hoop Sleeves with Magnetic Mighty Hoops
How-to's

Two Easy Ways to Hoop and Embroider Sleeves with Magnetic Hoops

Hooping sleeves can be tricky, but the right tools make the process simple, especially when you’re working with magnetic Mighty Hoops. Mighty Hoops allow an easy process of hooping inside a narrow sleeve and gives you better control of the stabilizer in tight spaces. We are going to walk through two different methods of how to hoop sleeves with the help of the Mighty Hoop with the Adjustable FreeStyle Fixture or the Mighty Hoop Backing Holder.

Note: In the examples below, we use the 9×3” Mighty Hoop and 9×3” Backing Holder. However, the 4.25×13”, 12×3.25”, and 9×4.25” Mighty Hoops and Backing Holders are additional sizes available for sleeve embroidery. Be sure to choose a Mighty Hoop that will fit your embroidery machines sewing field. This information is available on our website.

Mighty Hoop and Adjustable FreeStyle Fixture Hooping Option

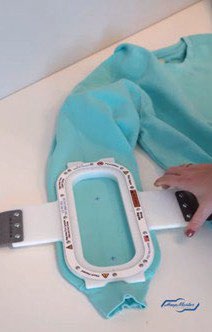
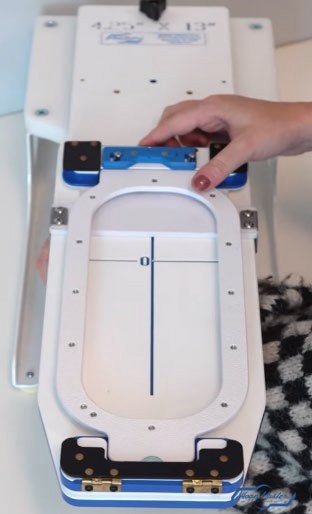
First, place the bottom ring of the Mighty Hoop onto the Adjustable FreeStyle Fixture. Then clip in the stabilizer with the magnetic stabilizer holding clips.

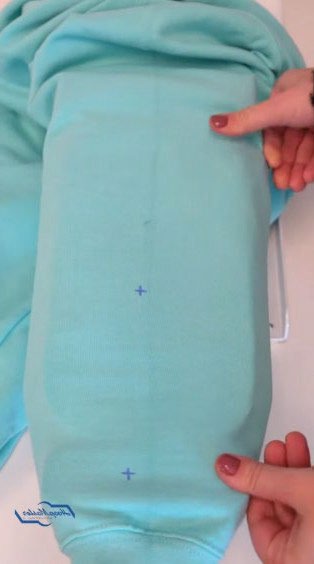
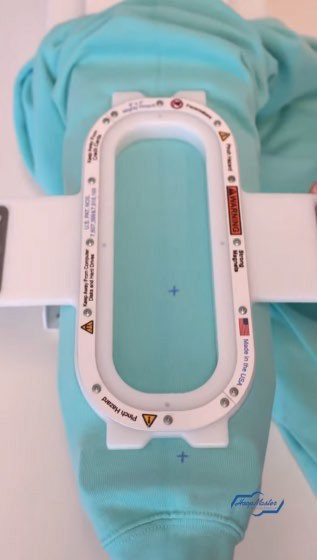
Next, pull the sleeve onto the hooping Fixture, aligning the center of the sleeve with the center line of the Adjustable FreeStyle Fixture shown above. If you cannot see the centerline, you can feel it through the garment as it is engraved in the Fixture. Hoop the sleeve, and you’re ready to embroider.

*Note: Using the Adjustable FreeStyle Fixture is recommended when hooping larger sleeves or the upper area of a sleeve. Smaller sleeves may have a difficult time fitting over the Adjustable FreeStyle Fixture. This is when the Mighty Hoop Backing Holders are particularly helpful.

Mighty Hoop and Backing Holder Option

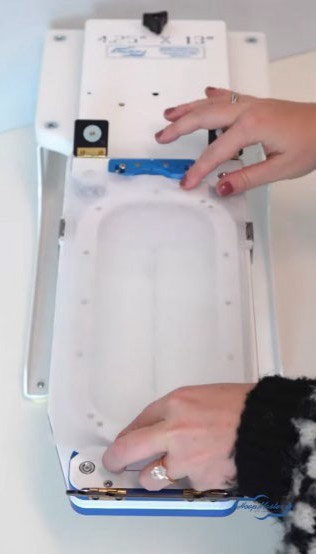
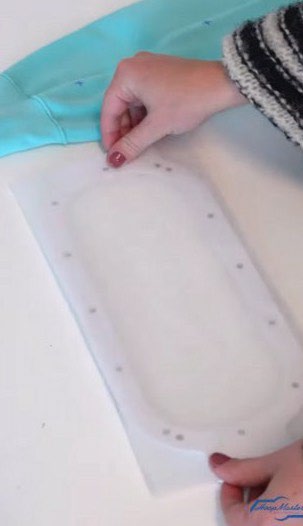
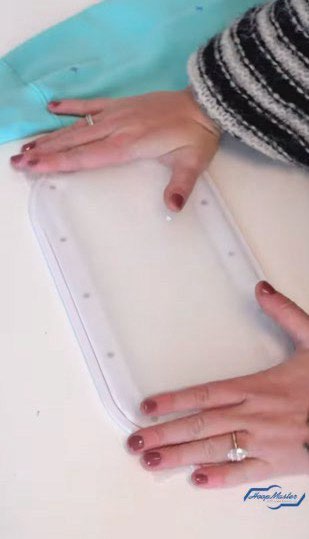
Using Mighty Hoop Backing Holders are extremely helpful when hooping in smaller sleeves or near the cuff. First, lay your embroidery stabilizer onto the bottom ring. Place the Backing Holder on top of the stabilizer and bottom ring and sandwich them together.

Using a 1.8oz-2.5oz stabilizer works best with the Backing Holders. When using thinner stabilizer, add a piece of medical or electric tape to opposite sides of the Backing Holder to keep the Backing Holder snug to the bottom ring.

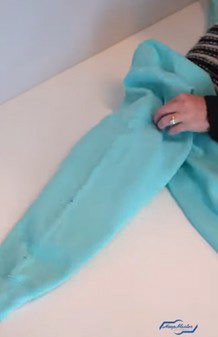
Slide the bottom ring into the sleeve through the collar and position it for the embroidery placement. Then remove the backing holder and you’re ready to embroider.

*ALWAYS remember to remove the Backing Holder before placing the Mighty Hoop on the machine. Only one Backing Holder is necessary per hoop size, as they are removed before embroidering.

Click HERE to watch the tutorial!

Mighty Hoop Hoopmaster Placement Guides
How-to's

Mighty Hoop and HoopMaster Placement Guides

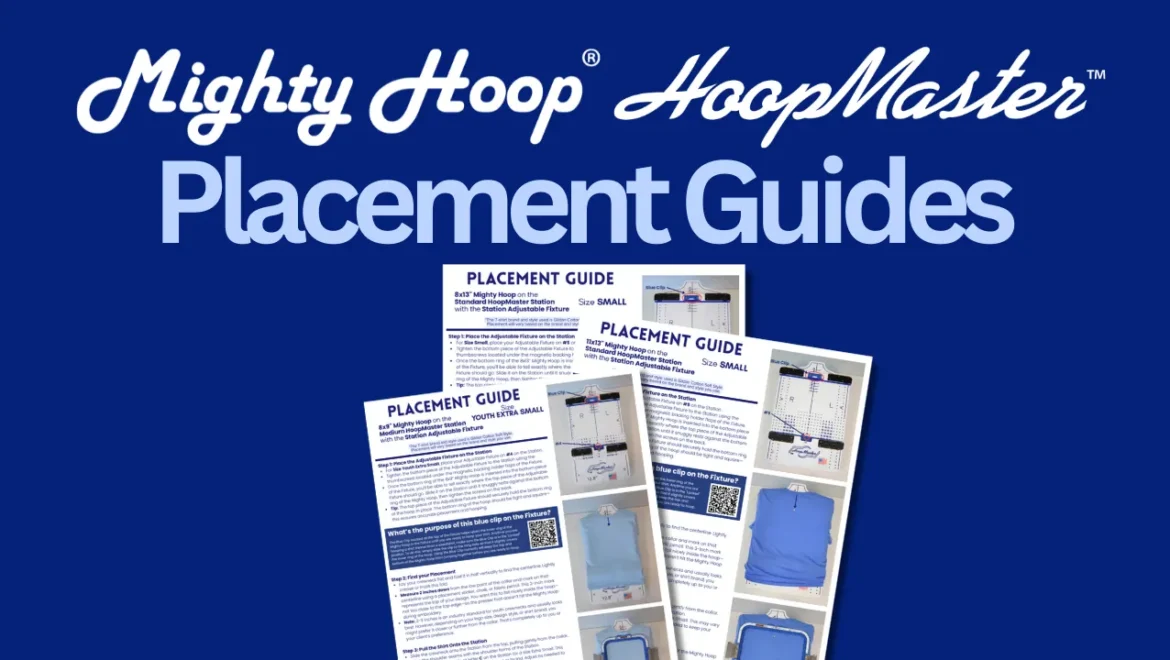
The following embroidery placement guides offer step-by-step recommendations for positioning various garment sizes on the HoopMaster Station using different Mighty Hoop sizes and Fixtures. Each guide highlights a specific magnetic hoop size and suggested design placement area on the HoopMaster hooping system, providing clear setup instructions to help you achieve consistent, professional embroidery results.

These embroidery hooping guides are intended as reference tools, not exact rules or guaranteed placements. Factors such as garment brand and cut, embroidery design size, and individual client preferences can all influence final placement. Use these hooping instructions as a helpful starting point and adjust as needed to suit each job. Think of these guides as foundational tools that help simplify setup and support consistent, repeatable results.

Not sure how to set up your HoopMaster hooping system or Fixtures? Head to our YouTube channel for full length tutorials on our patented, innovative embroidery tools and how to use them effectively and easily.

5.5” Mighty Hoop Placement Guide

  • Demonstrates how to position and hoop left and right chest designs using the Standard HoopMaster Station, 5.5” Mighty Hoop Fixture, and 5.5” Mighty Hoop.
  • Provides placement instructions for small, medium, large, and extra large garments.
  • Click to Download PDF Guide

8×13” Mighty Hoop Placement Guide

  • Demonstrates how to position and hoop center chest designs using the Standard HoopMaster Station, Standard Adjustable Fixture, and 8×13” Mighty Hoop.
  • Provides placement instructions for small, medium, large, and extra large garments.
  • Click to Download PDF Guide

11×13” Mighty Hoop Placement Guide

  • Demonstrates how to position and hoop center chest designs using the Standard HoopMaster Station, Standard Adjustable Fixture, and 11×13” Mighty Hoop.
  • Provides placement instructions for small, medium, large, and extra large garments.
  • Click to Download PDF Guide

4.25” Mighty Hoop Placement Guide

8×9” Mighty Hoop Placement Guide

  • Demonstrates how to position and hoop center chest designs using the Medium HoopMaster Station , Medium Adjustable Fixture, and 8×9” Mighty Hoop.
  • Provides placement instructions for youth extra small, youth small, youth medium, youth large, and youth extra large garments.
  • Click to Download PDF Guide
How to Avoid Hoop Burn from Embroidery Hoops
How-to's

How to Avoid Hoop Burn

Say Goodbye to Hoop Burn: Why Mighty Hoops Are the Burn-Free Solution for Embroidery

We’ve all been there—you finish a beautiful embroidery design, unhoop the fabric, and boom… hoop burn. That awful ring around your design where the fabric was pinched too tight. Whether it’s a plush sweatshirt, a soft tee, or a specialty garment, traditional embroidery hoops can leave behind unwanted marks that ruin the look (and the customer experience).

But here’s the good news: Magnetic Mighty Hoops have entered the chat—and hoop burn is officially canceled.

What Is Embroidery Hoop Burn?

Hoop burn happens when a traditional hoop—especially one with a tight outer ring—compresses the fabric so much that it leaves a permanent mark or crease. It’s most common on:

  • Soft cotton or tri-blend T-shirts
  • Sweatshirts and hoodies
  • Plush fabrics like fleece or minky
  • Any garment that’s sensitive to pressure or stretch

In short, hoop burn is what happens when your fabric says, “Ouch.”

Why Mighty Hoops Don’t Cause Hoop Burn

Unlike traditional hoops that pinch, twist, and pull the material to stay in place, Mighty Hoops use magnetic force to gently but firmly secure your fabric. That means:

✅ No over-compression
✅ No harsh pressure points
✅ No weird rings left behind

Instead of squishing the fabric, Mighty Hoops hold it evenly and effortlessly—perfect for delicate materials and high-stakes projects where appearance matters.

How It Works: The Magnetic Advantage

Mighty Hoops are designed with powerful rare-earth magnets that snap together around your fabric and stabilizer. The pressure is distributed evenly across the hoop, which keeps the material flat without crushing the fibers.

That’s why you can use them on everything from thick Carhartt jackets to soft onesies and come away with a clean, professional finish—every single time.

Traditional Hoops vs. Mighty Hoops

Feature Traditional Hoop Mighty Hoop
Hoop Burn Risk High Practically zero
Pressure Points Tight rings pinch fabric Magnetic grip holds evenly
Time to Hoop Slow, requires adjustment Fast snap-and-go
Wrist/Hand Strain Common with tight hoops Minimal with ergonomic design
Best for Plush or Stretchy? Not ideal Perfectly suited

Real Talk: You’ll Never Go Back

Once you hoop a T-shirt, sweatshirt, or jacket with a Mighty Hoop, you’ll instantly notice the difference:

  • No visible rings or marks after unhooping
  • No need to steam out pressure lines
  • No tug-of-war with screw-tightening hoops
  • Just smooth, centered embroidery that looks professional

It’s a game-changer for custom apparel shops, high-volume embroiderers, or hobbyists who just want things to look perfect without the stress.

Pair with a HoopMaster Station for Even More Magic

Want to avoid hoop burn and get perfect placement every time? Use Mighty Hoops with the HoopMaster Station and adjustable fixture. It lines up your garments perfectly and helps you hoop faster—without the guesswork, stretching, or misalignment that can cause damage to your fabric.

Ready to Ditch Hoop Burn for Good?

Explore the full lineup of Mighty Hoops and placement tools at www.hoopmaster.com

Your embroidery should turn heads—not leave marks. Let Mighty Hoops help you stitch clean, smooth, and stress-free.

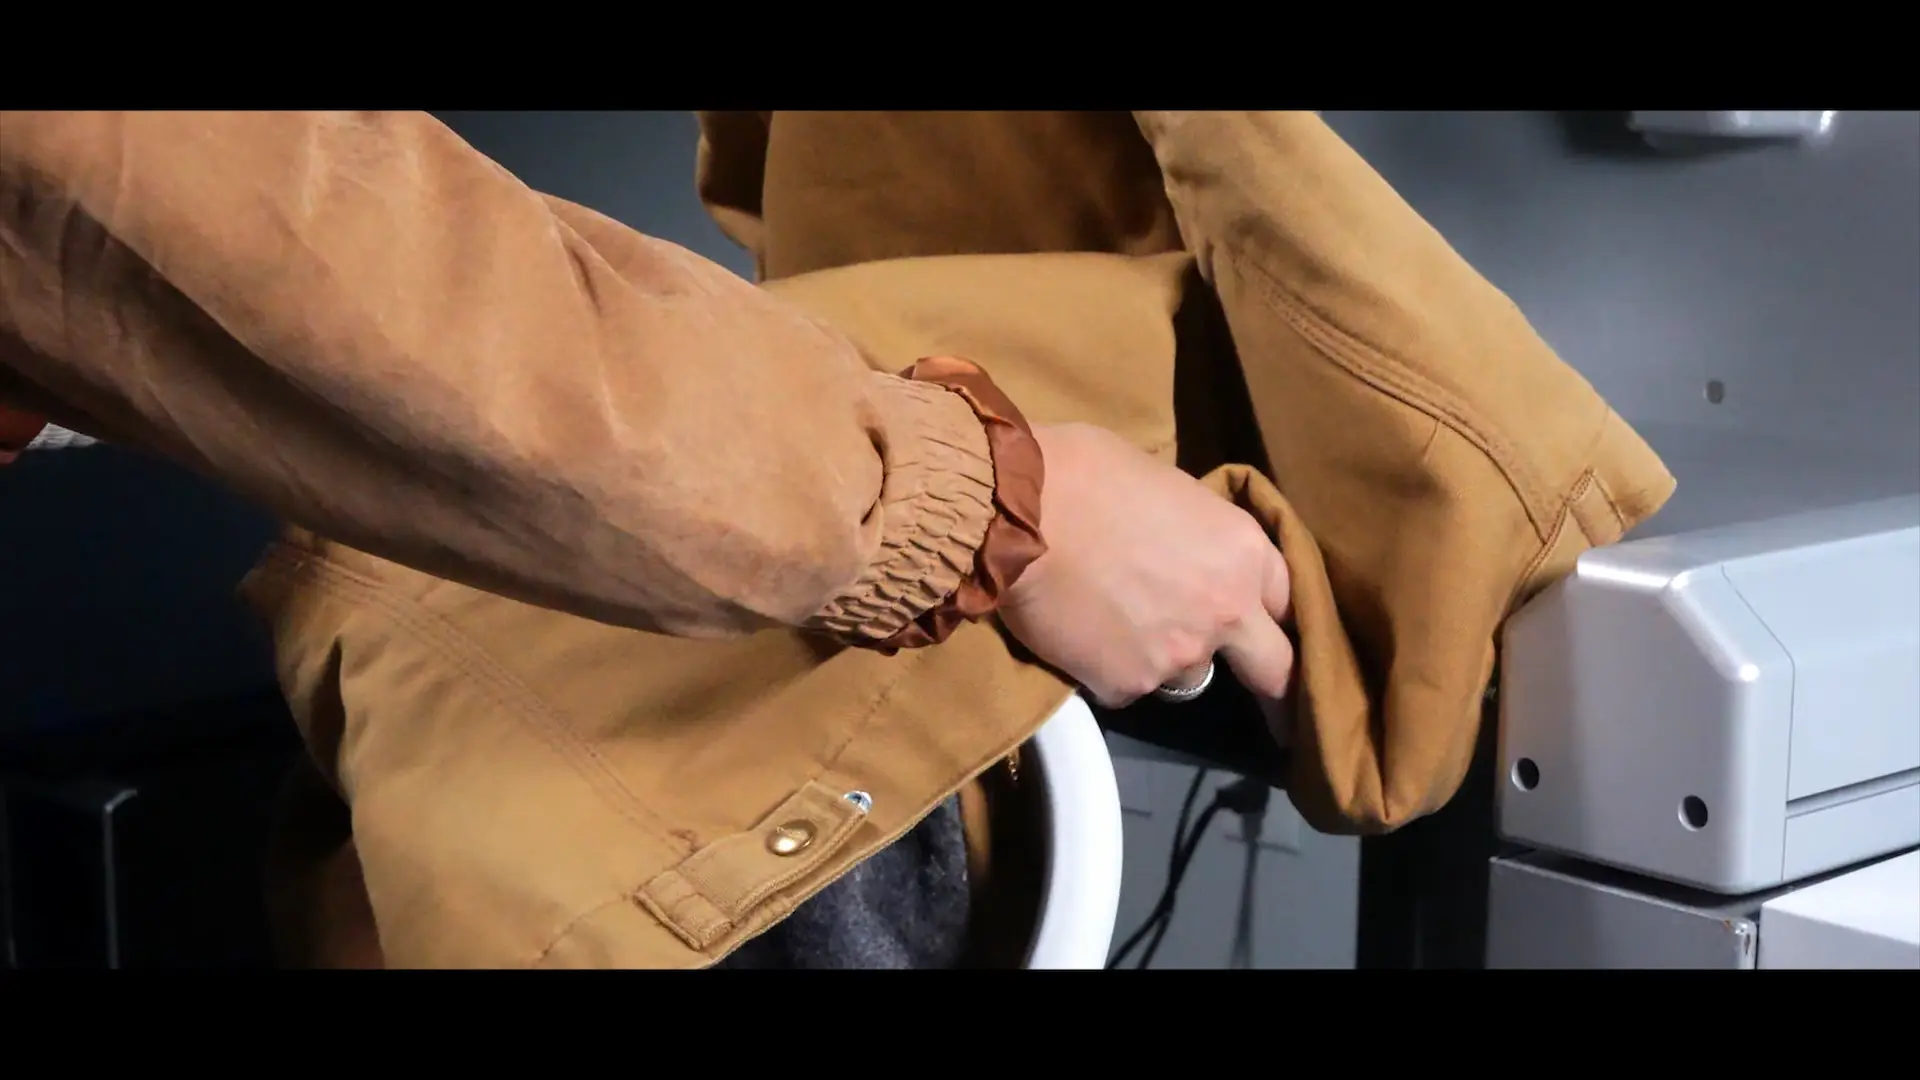
How to hoop Carhartt jacket fronts using the Mighty Hoop magnetic frame and HoopMaster station
How-to's

How to Hoop Thick Jackets with Magnetic Hoops

Embroidering thick jackets like Carhartt, canvas, and insulated workwear can be one of
the trickiest jobs in commercial embroidery. Traditional hoops often struggle with the
bulk, and misalignment is common. 

But with the magnetic Mighty Hoop and the HoopMaster System, hooping thick
garments becomes consistent, accurate, and far less frustrating.

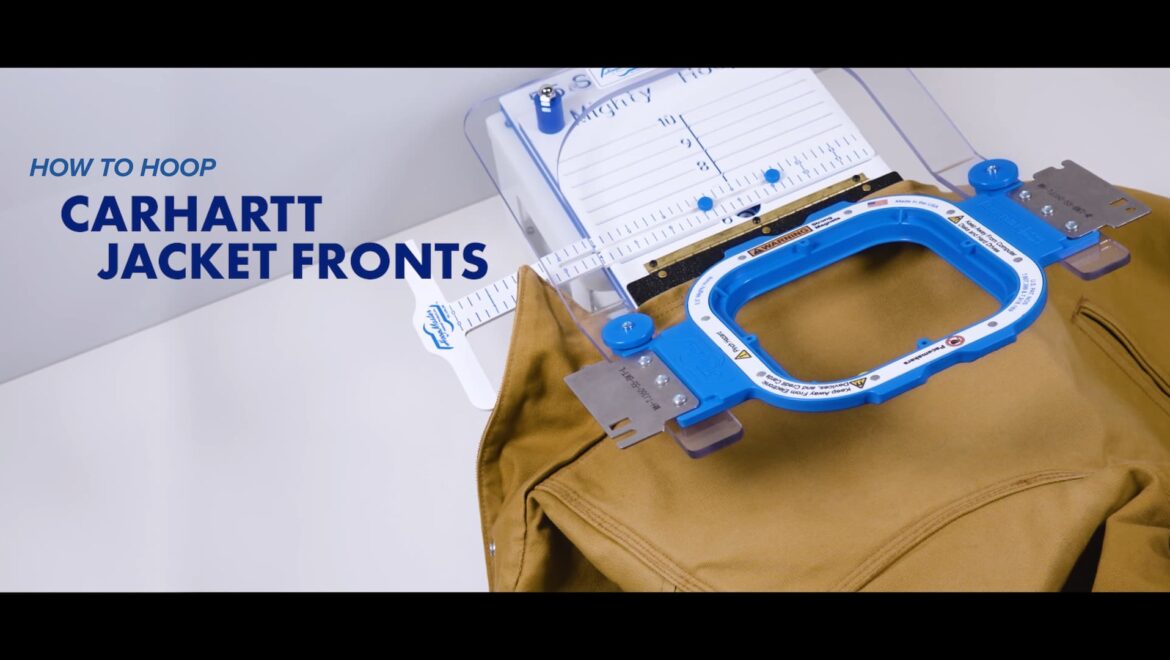
In this step-by-step guide, we’ll show you how to properly hoop heavyweight jackets
using the 5.5″ Mighty Hoop, the 5.5″ Fixture with FreeStyle Arm, and other helpful
accessories.

What You’ll Need to Hoop a Thick Jacket With Magnetic Hoops

Using the right tools makes all the difference. Here’s the setup we recommend when
hooping thick or insulated outerwear:
 5.5″ Mighty HoopÂŽ â€“ A strong magnetic hoop that can clamp over seams,
zippers, and heavy fabrics without excessive pressure.
 5.5″ Fixture with Freestyle Arm â€“ Holds the hoop steady and allows for
consistent placement.
 Portable Mounting Base â€“ A lightweight, compact surface to stabilize the
Fixture during the hooping process.
 T-Square Attachment â€“ Helps ensure exact placement from garment to
garment, using fixed reference points.

These tools are designed to work together, making hooping not just possible—but fast
and repeatable.

These tools are designed to work together, making hooping not just possible—but fast and repeatable.

Step 1: Marking Placement for Repeatability

carhartt jacket

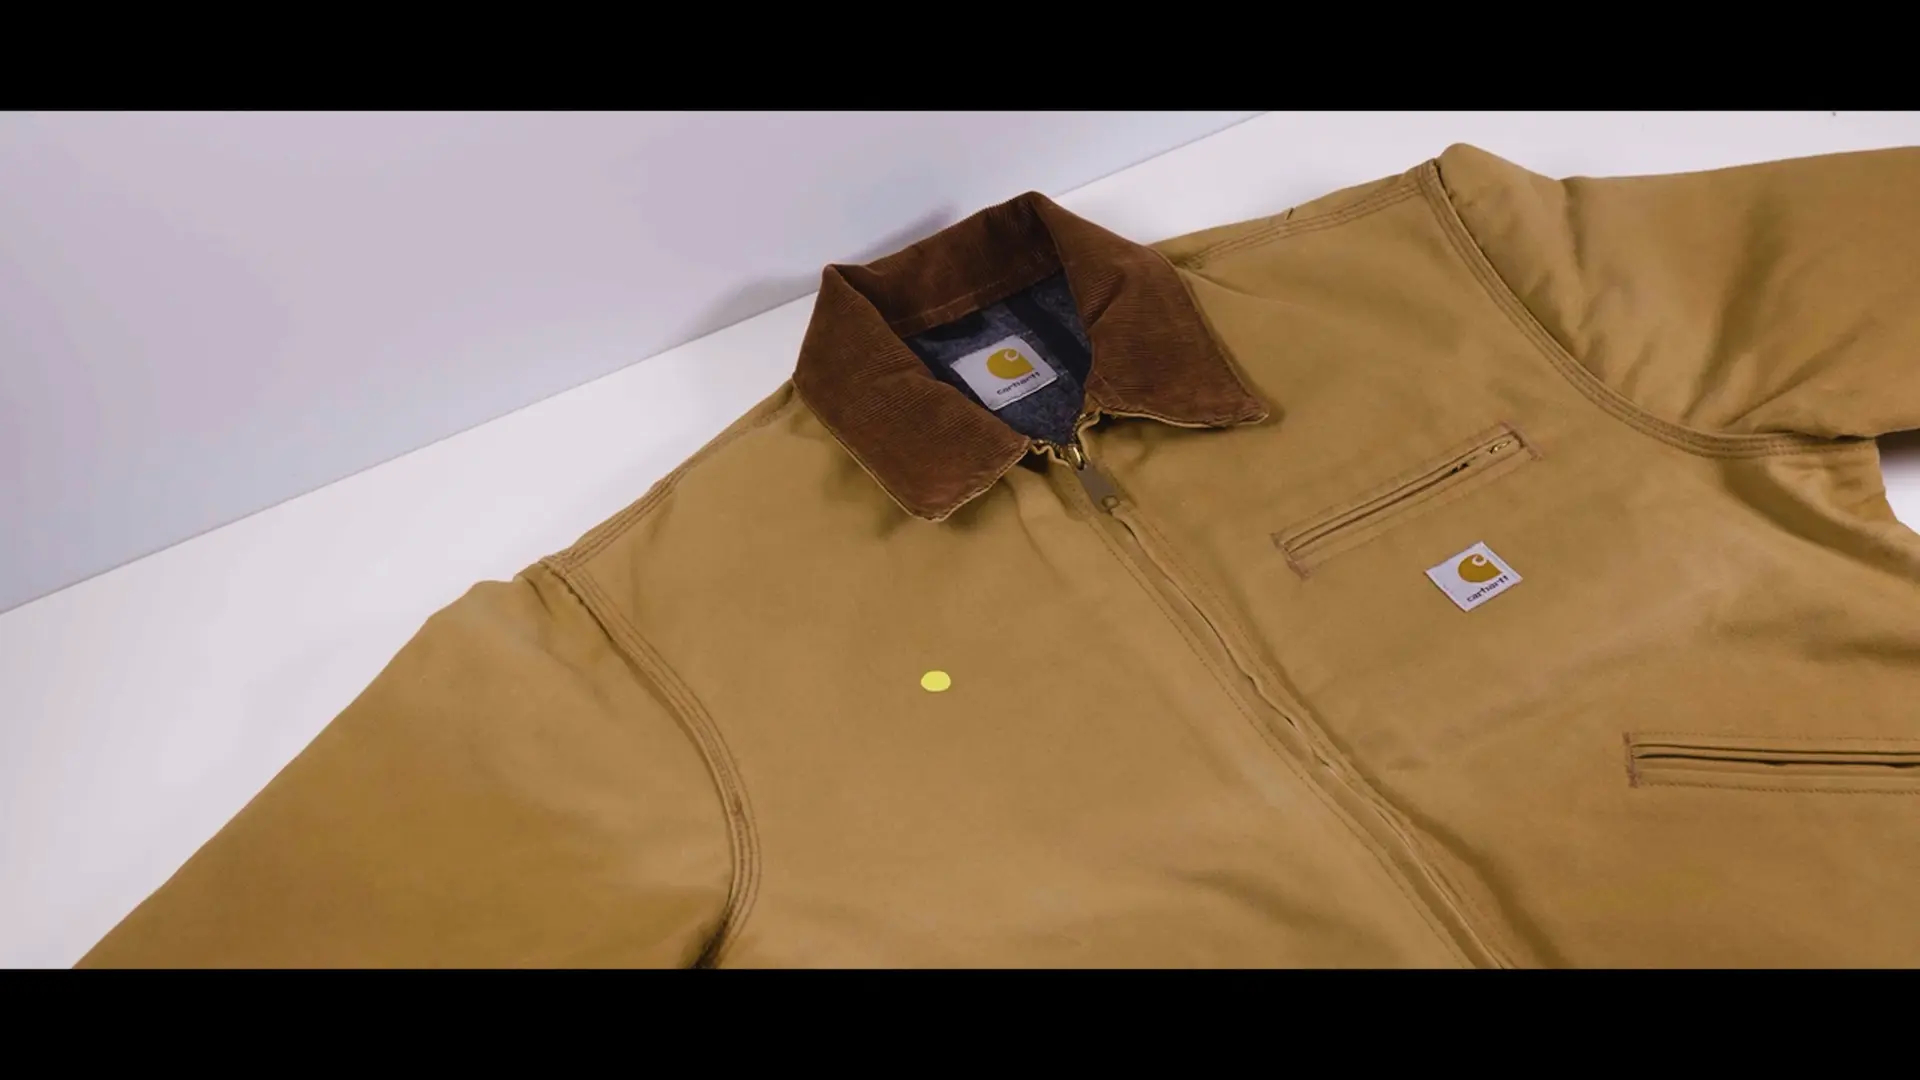
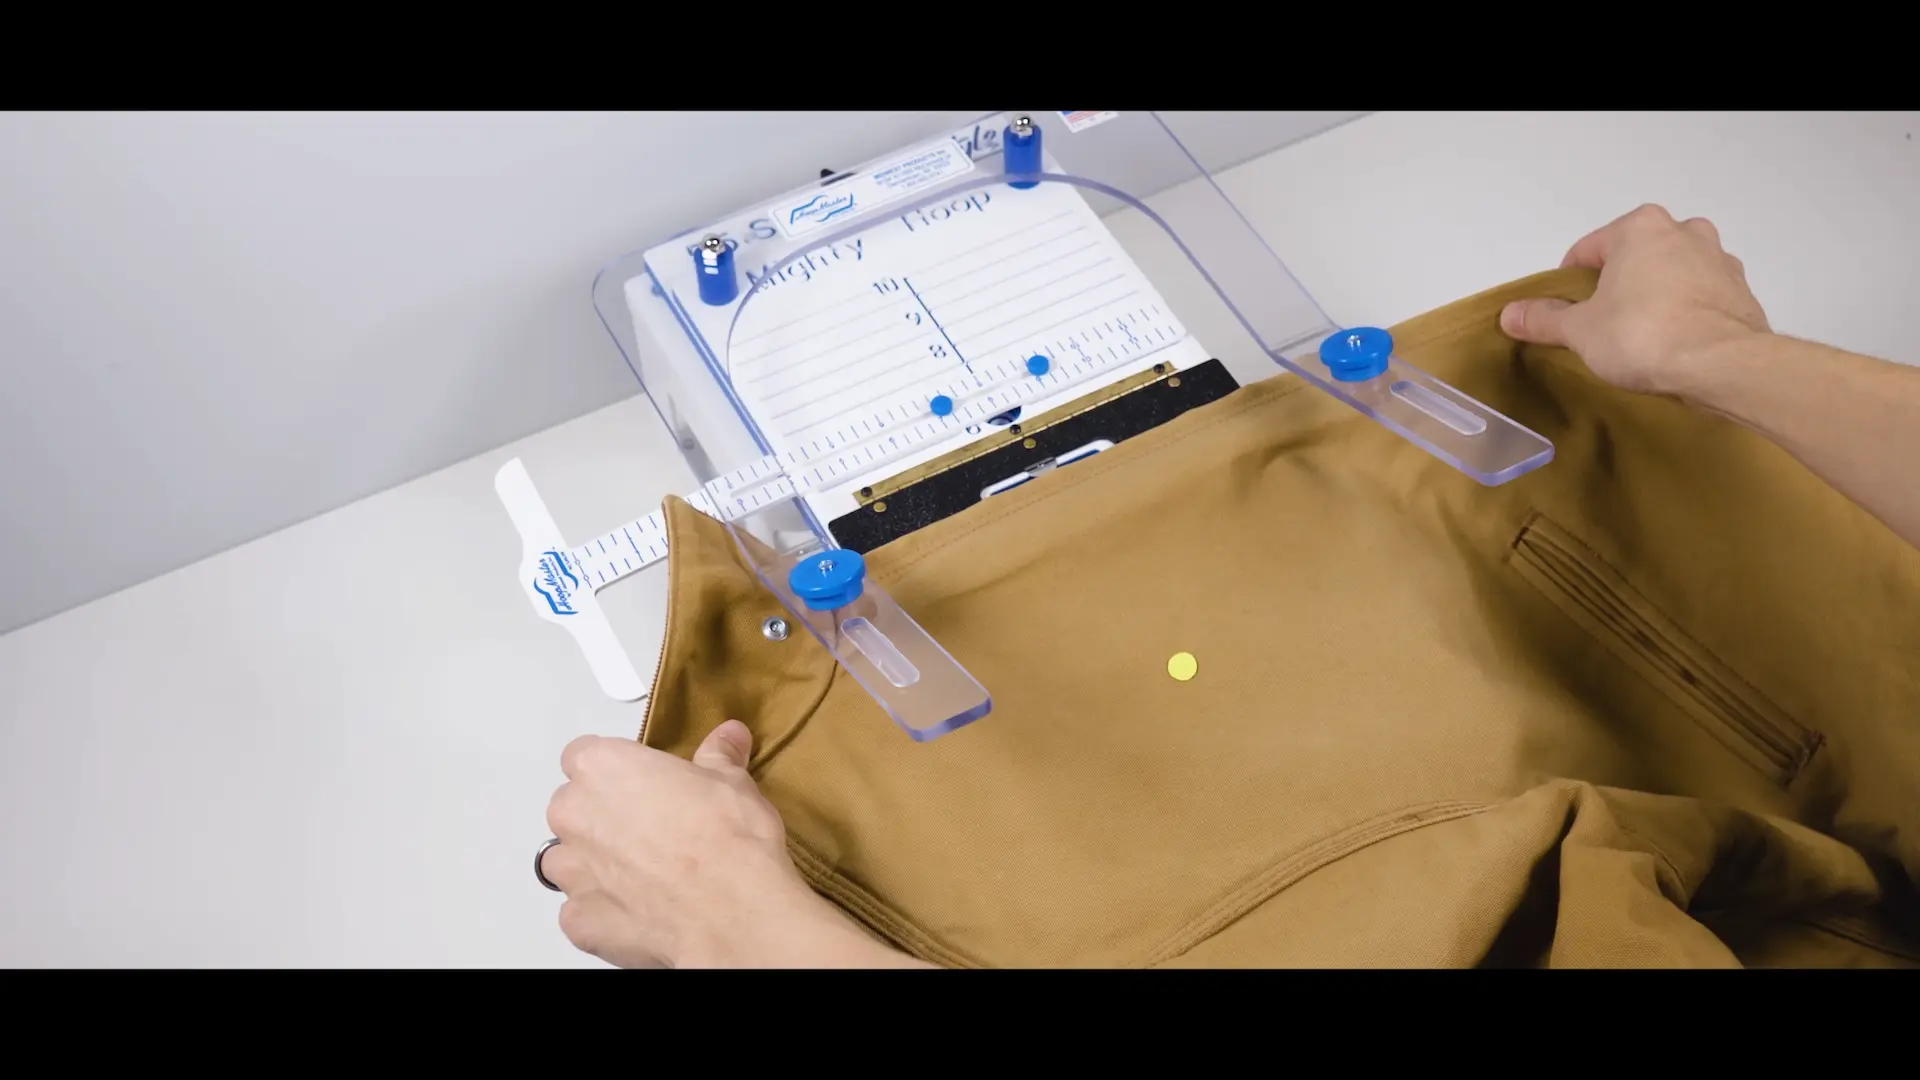
If you’re hooping the left or right chest area, start by determining logo placement on
the first jacket of each size. Getting this step right means you won’t have to measure
again for every jacket.
Here’s how to mark and measure efficiently:

  • Pick repeatable reference points—for example, the base of the collar or the
    edge of the pocket.
  • Unzip or unbutton the jacket so it lays flat.
  • Place it sideways on the fixture so the left or right chest is accessible.
  • Mark the logo placement using a washable fabric pen or placement sticker.
  • Use the placement mark to align your T-square and Fixture measurement
    lines so you can repeat this placement on future jackets of the same size.

By locking these placements in, you reduce human error and save significant time when
hooping large orders of multiple garments.

Step 2: Adjust the Fixture for Heavy Fabrics

hoopmaster fixture

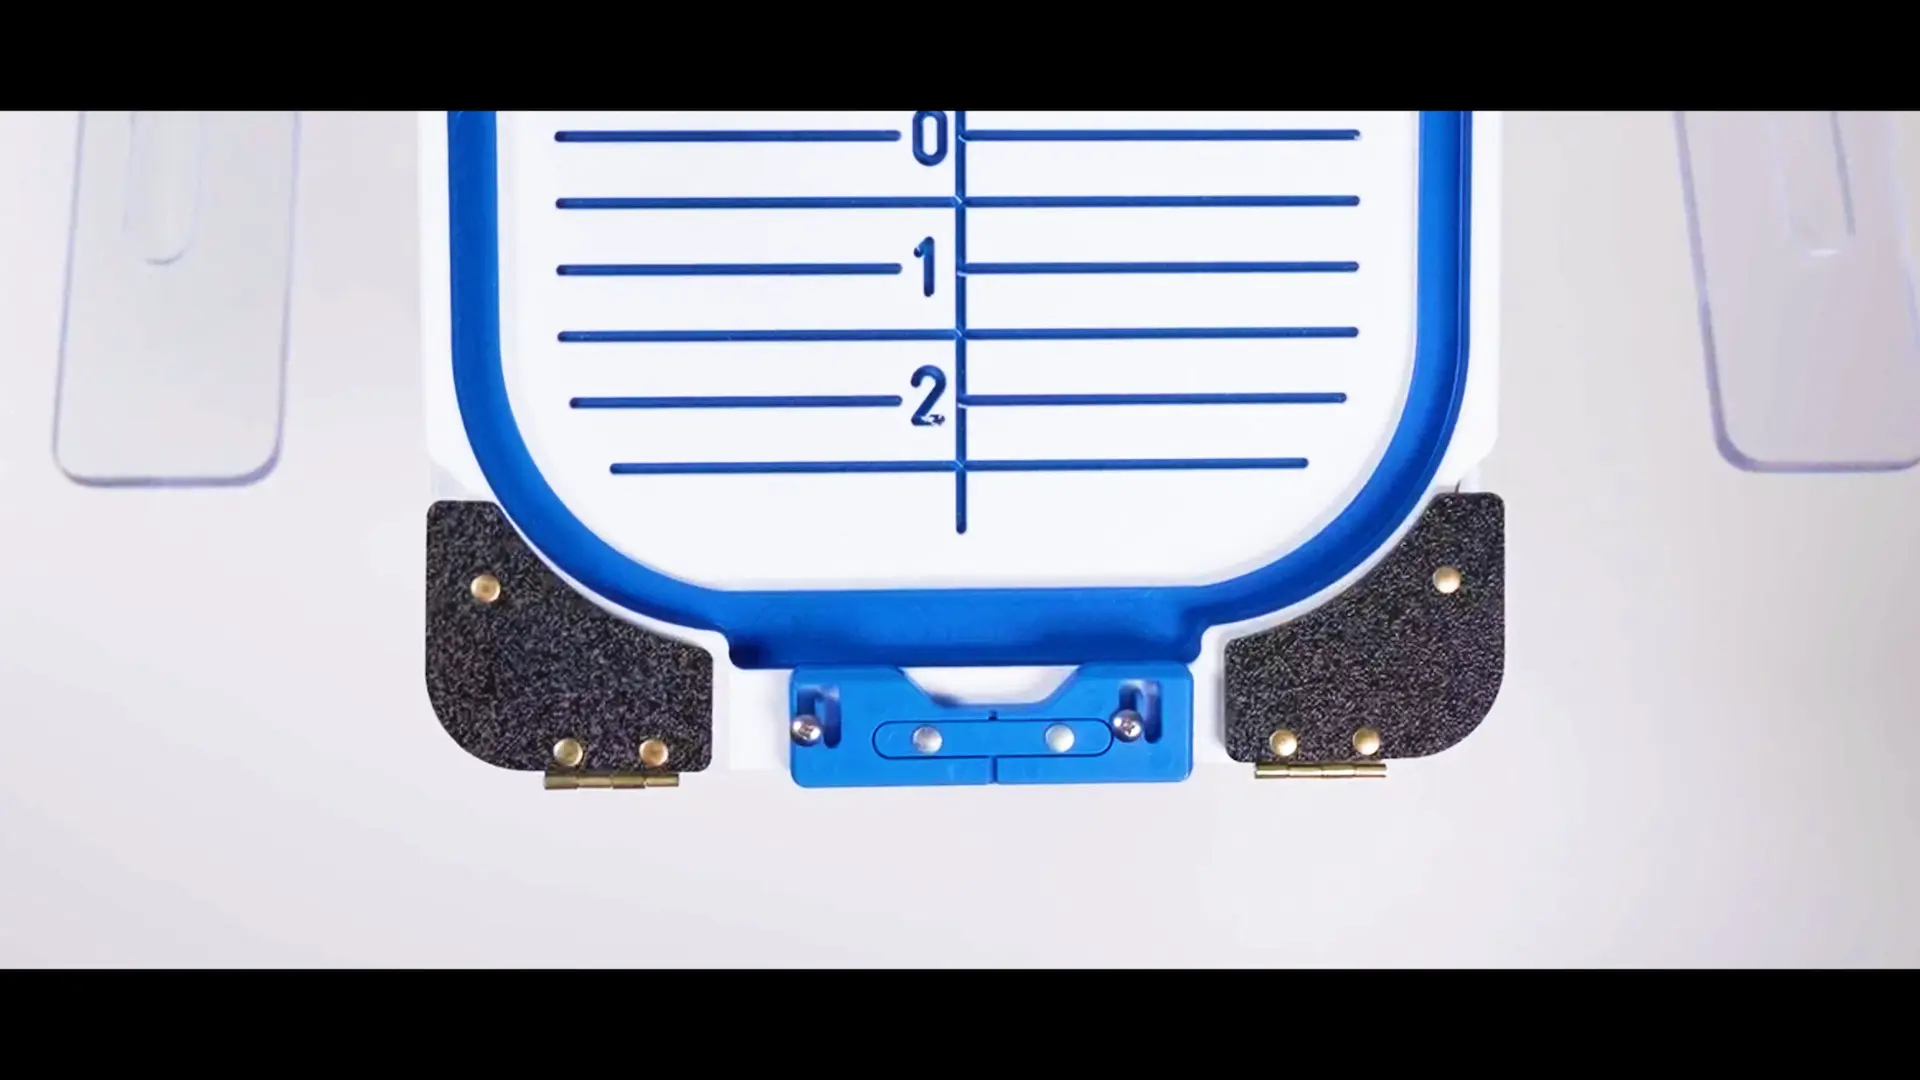
The HoopMaster Fixture includes a blue sliding clip that affects how the lower hoop
ring releases during hooping. For thick jackets, move this clip to the shorter slot
position.
 This change allows the bottom ring of the hoop to easily attach to the top ring
when hooping.
 Using the blue clip in this position is recommended for any garment heavier than
a basic sweatshirt, including canvas, denim, quilted linings, and Carhartt-style
workwear.
 This position keeps the bottom ring from getting stuck in the Fixture when you
remove the hoop.
This small adjustment is one of the easiest ways to avoid frustration when hooping thick
materials.

Step 3: Hooping the Jacket

hooping a jacket

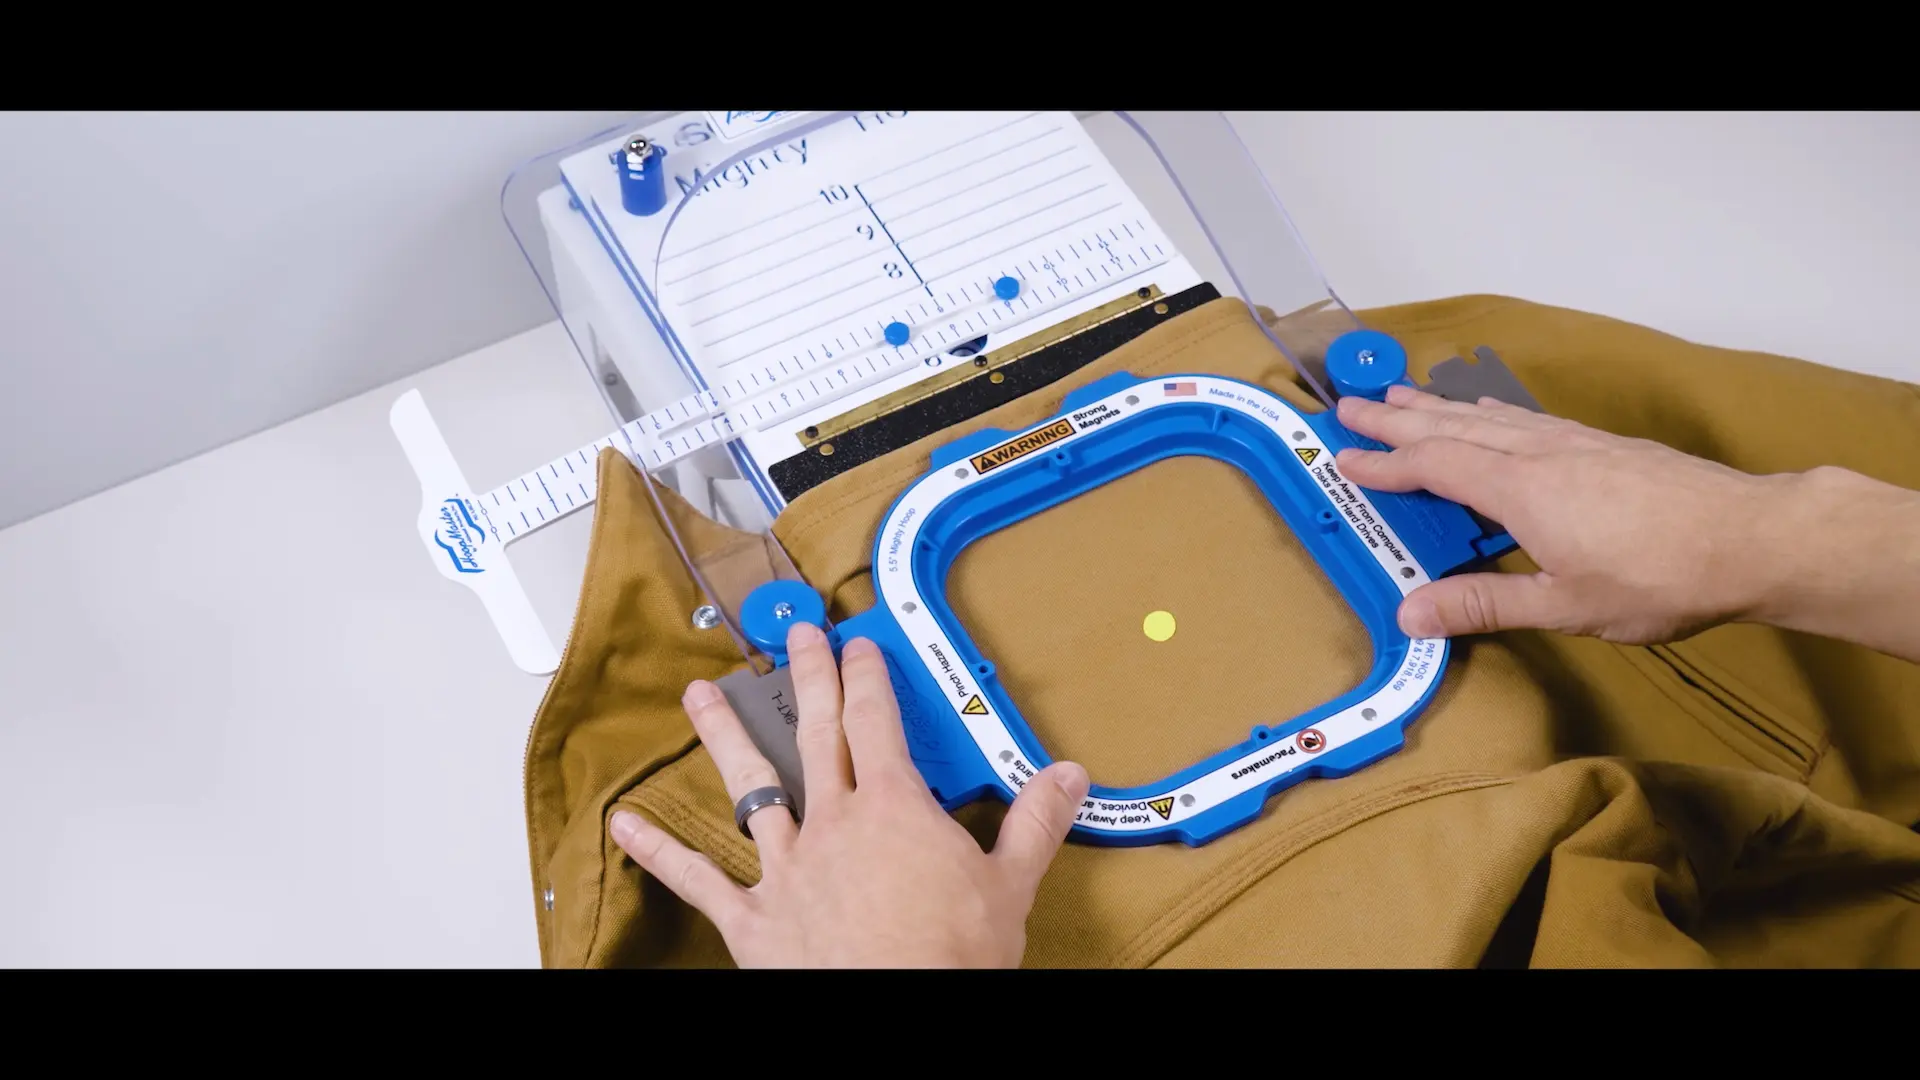
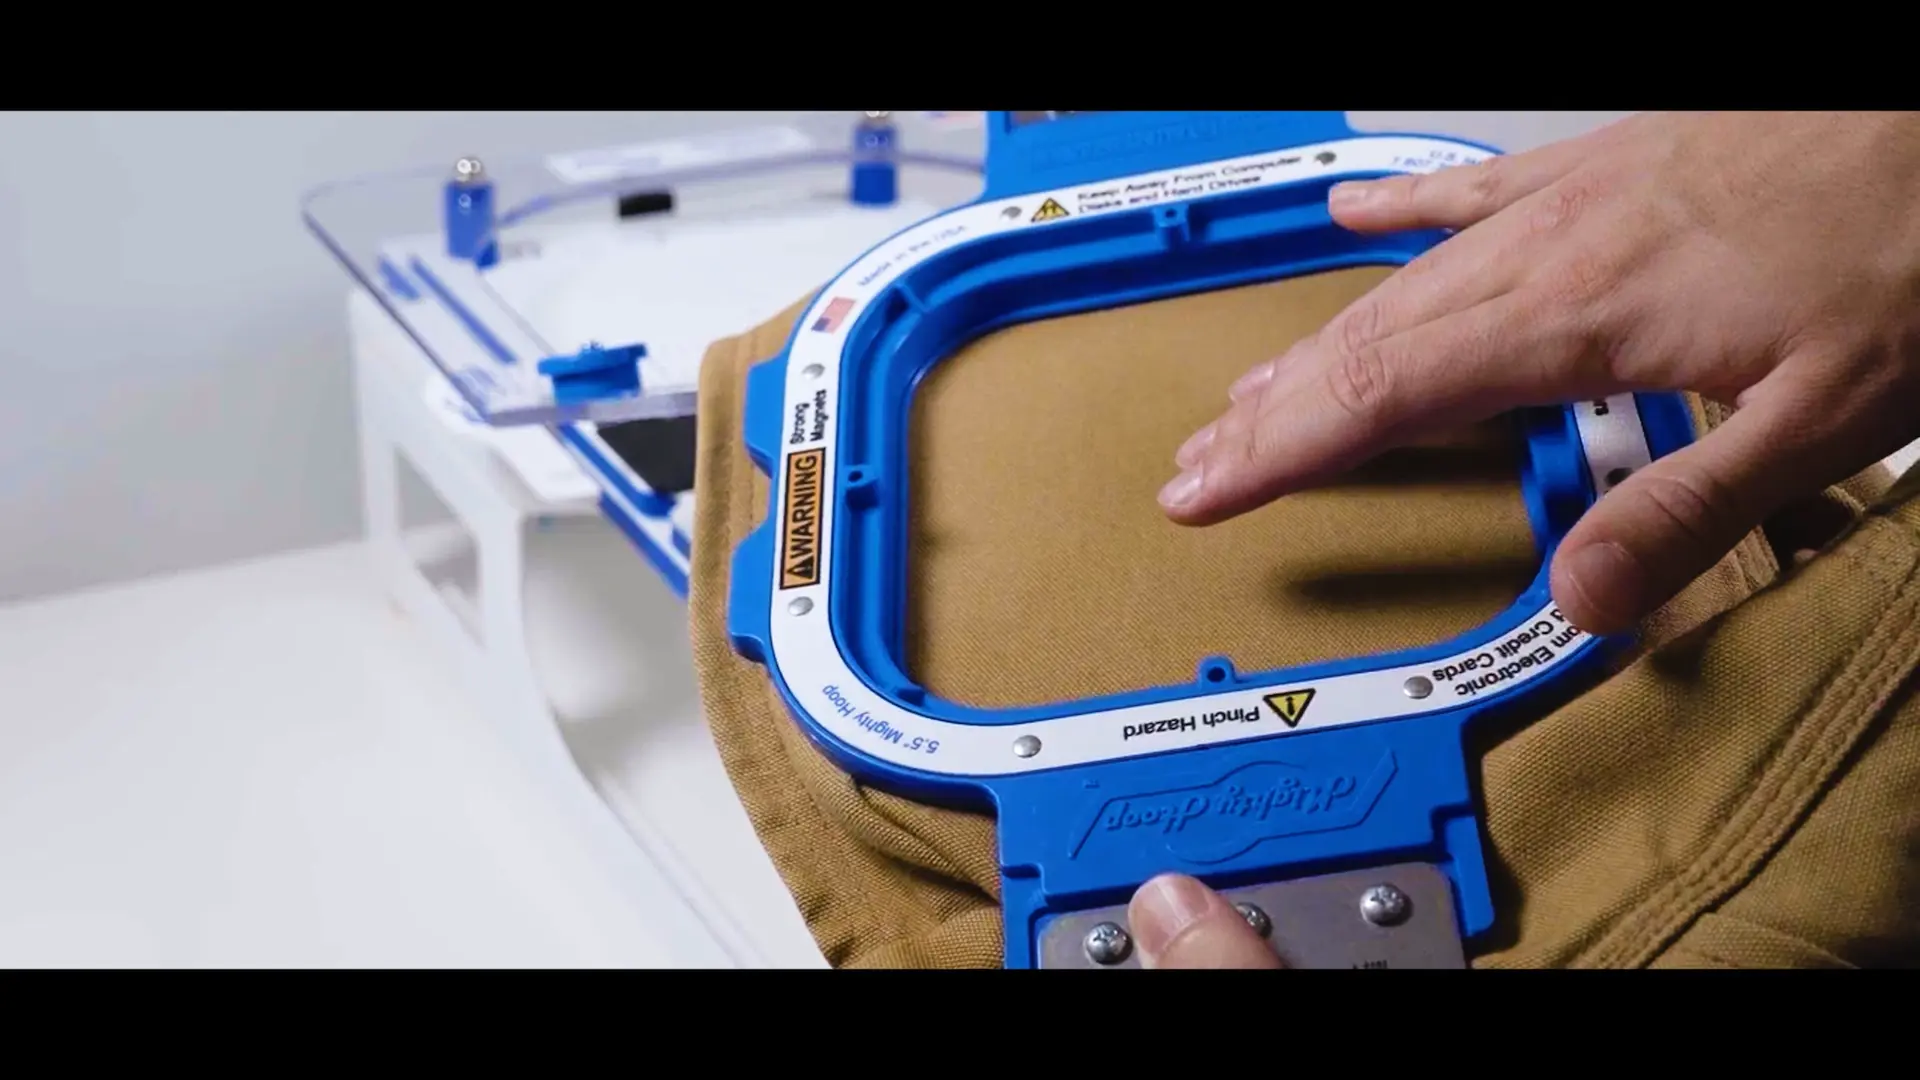
With your placement marked and your fixture adjusted; it’s time to hoop the jacket:

  1. Place the lower ring of the Mighty Hoop into the fixture. Make sure the warning
    labels are facing down.
  2. Lay the jacket on top, positioning the placement mark roughly in the center of
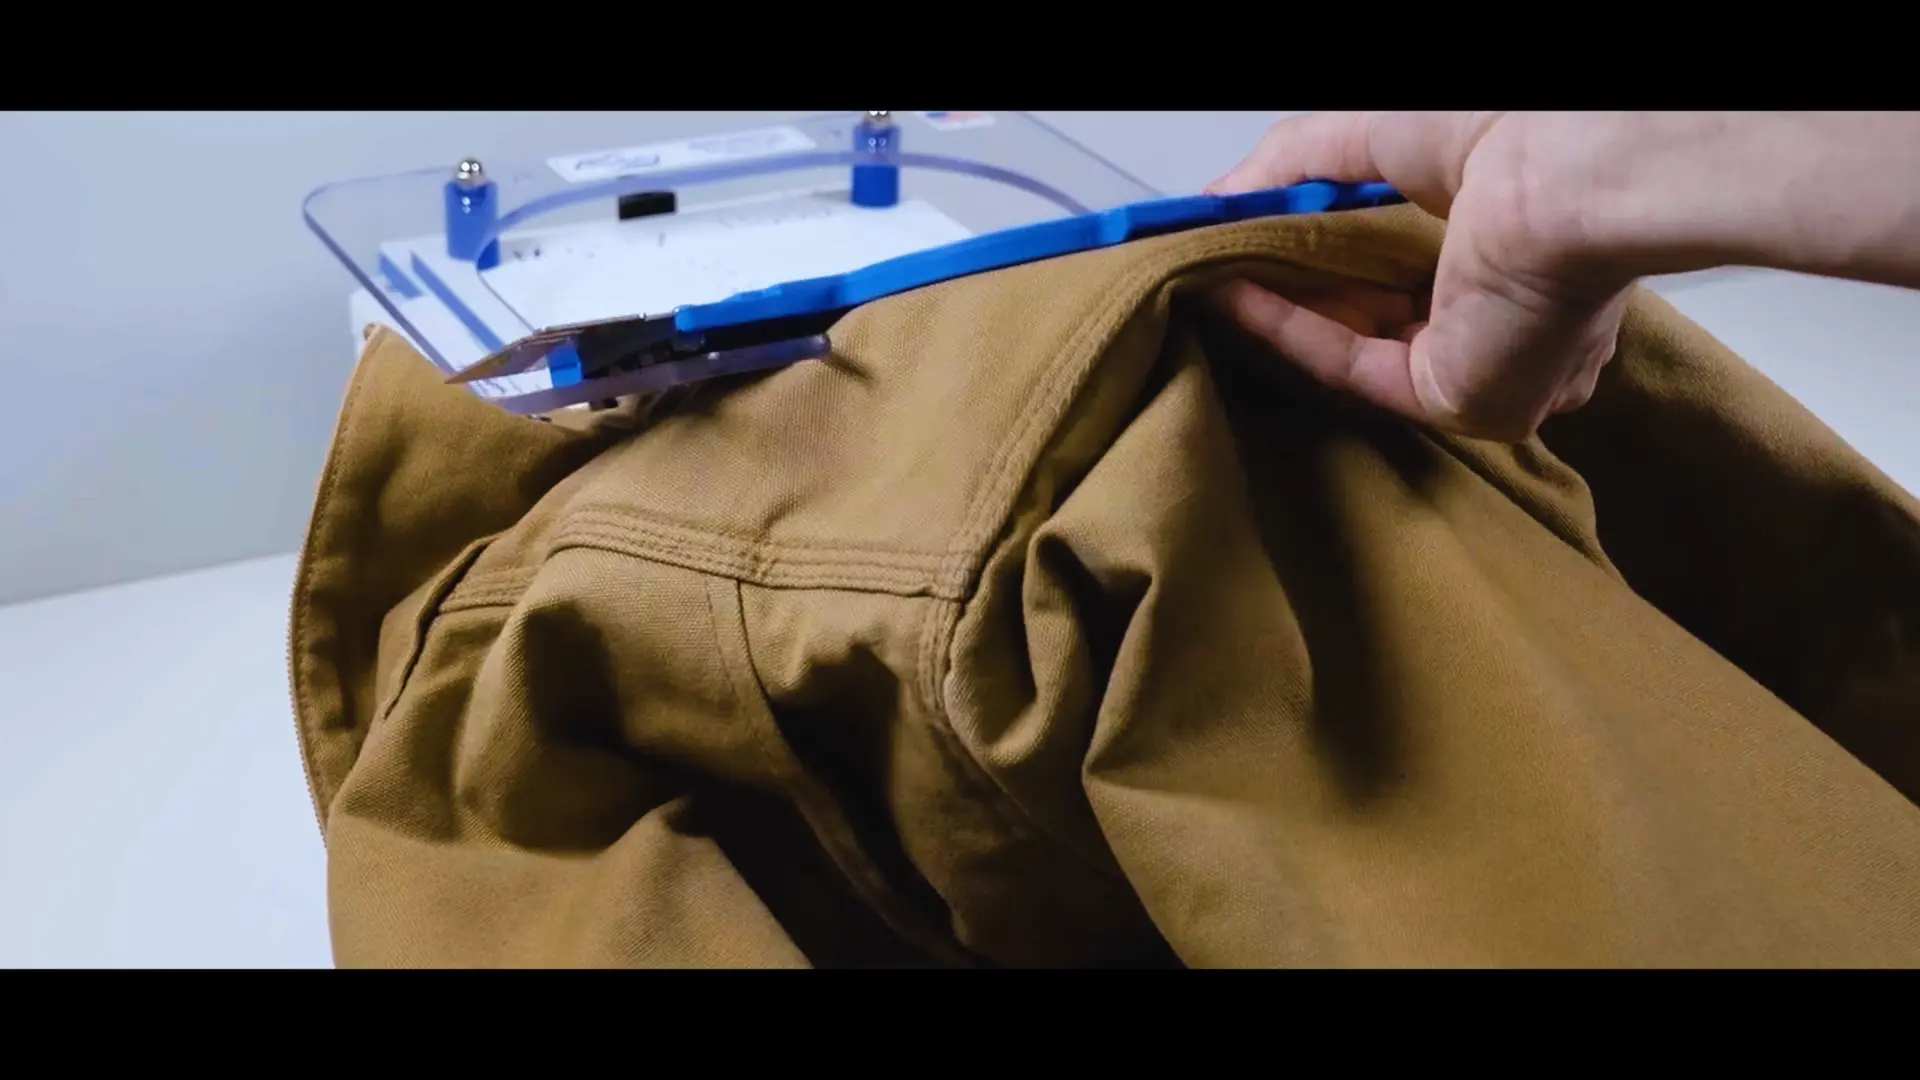
    where the hoop will go.
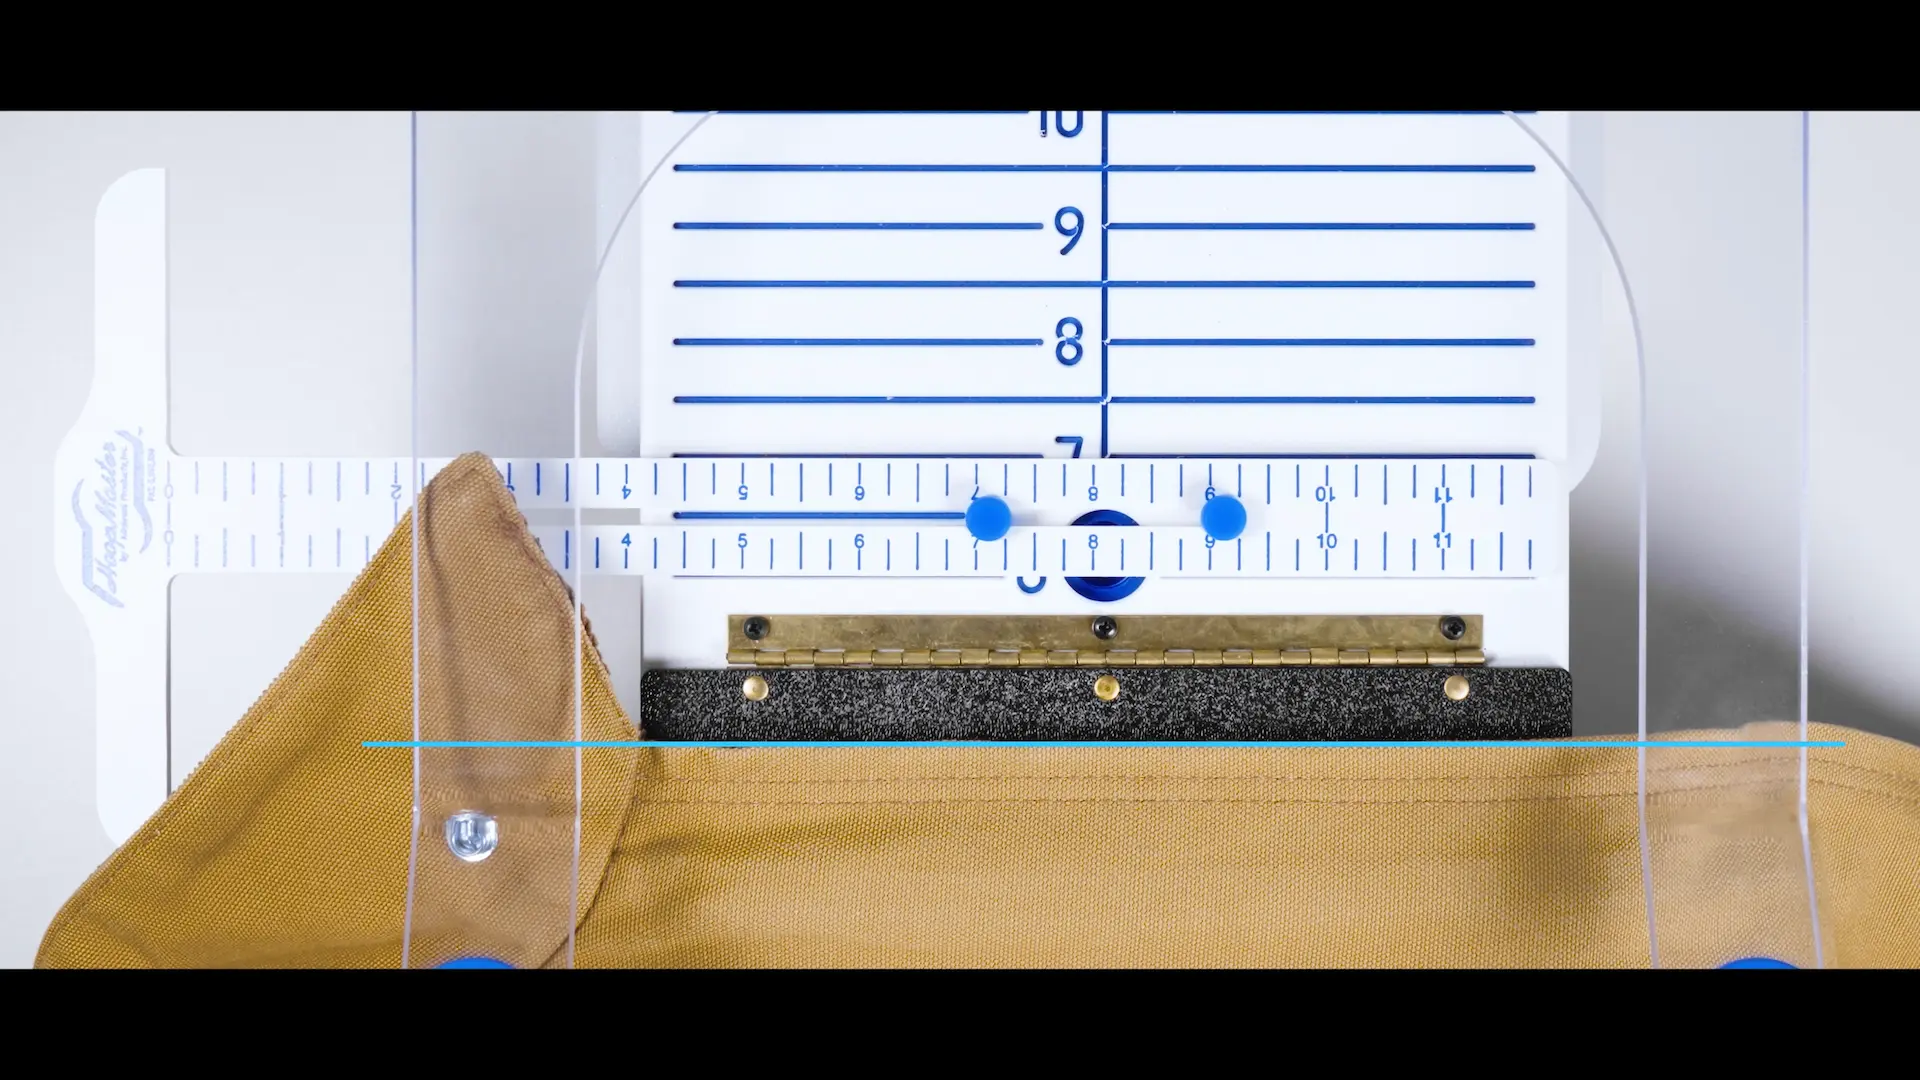
  3. Align your reference points:
    o Horizontal: Match the jacket edge with a known edge like the backing
    material holder.
    o Vertical: Use the zero point of the T-square and line it up with a fixed
    part of the jacket (e.g., the collar seam).
  4. Attach the top hoop ring to the Fixture arms and press down to engage the
    magnets.
     
lining it up

**Pro Tip: Don’t stress if your jacket doesn’t align with one of the printed ruler lines. Just use a straight edge, like the inner edge of the backing holder, to create a custom measurement you can replicate.

Step 4: Removing the Hooped Jacket Safely

removing hooped jacket safely

Thick garments can put stress on the hoop, so it’s critical to remove the jacket without damaging the hoop or shifting the garment inside it.

Follow these steps:

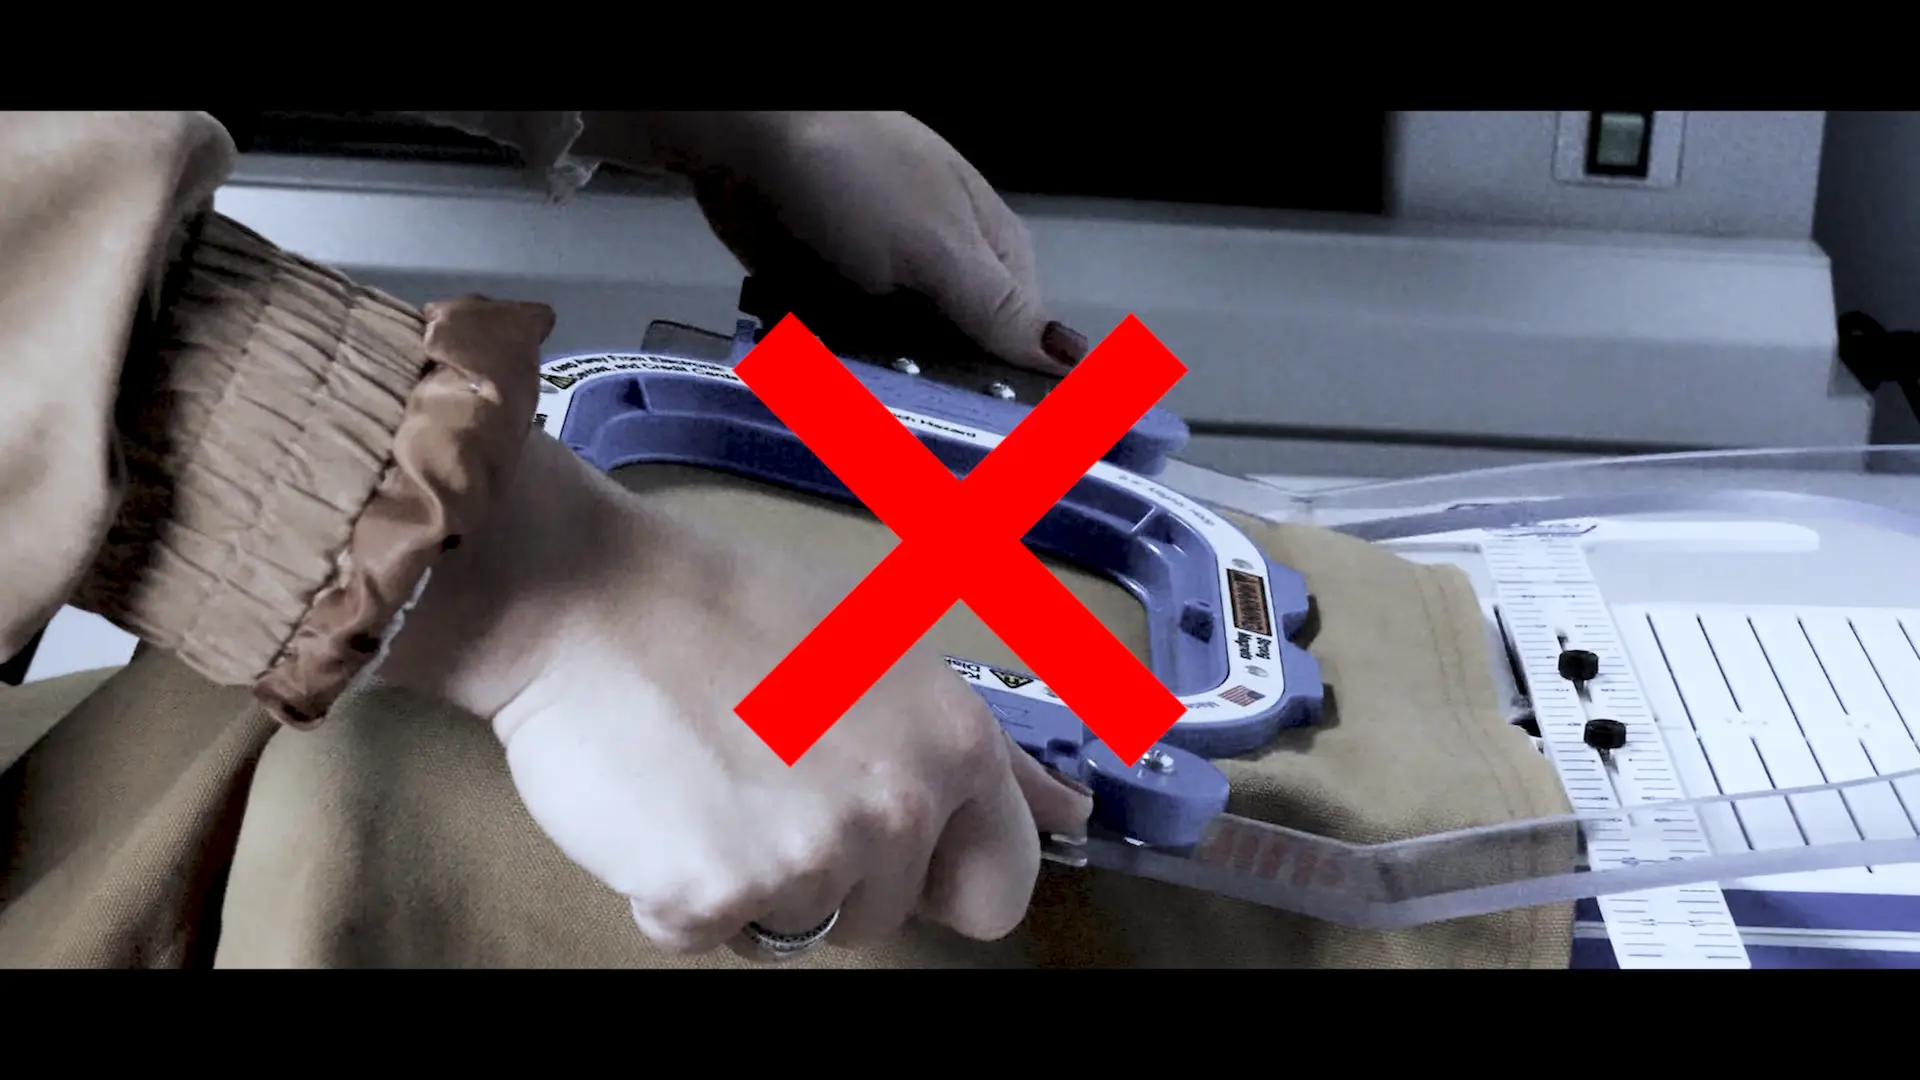
  • Never pull from the top ring alone—the jacket’s weight can cause the bottom ring to fall off.
  • Instead, reach under the hoop, grab the bottom ring, and lift both rings up and out together.
  • Once off the fixture, flip the jacket over and check the back for any puckering or bubbles in the lining.

If the lining looks loose or uneven, it’s best to rehoop the item for a cleaner result.

Step 5: Prepare for the Embroidery Machine

Before stitching, make a few final checks:

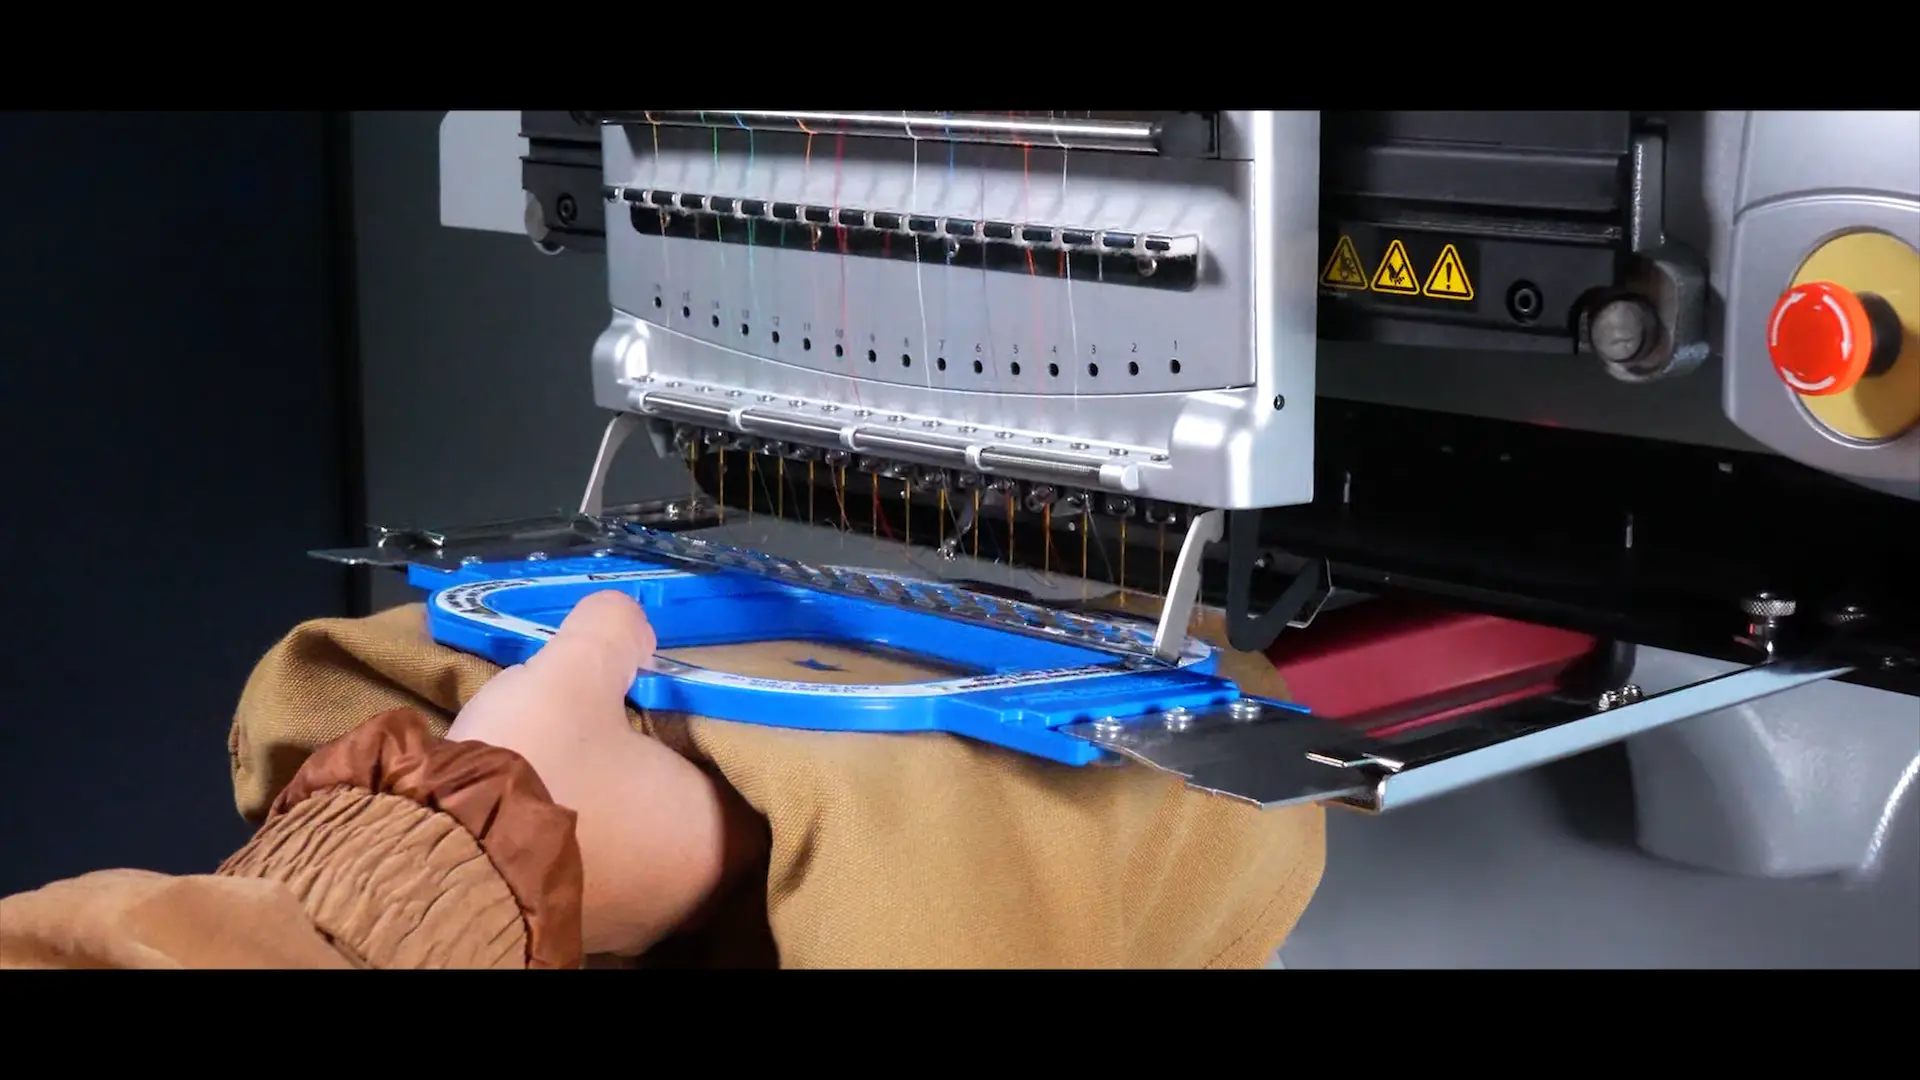
  1. Hold the top and bottom of the hoop firmly when transporting to the machine.
  2. Rotate your design 90° in your embroidery software to match the sideways hoop orientation.
    Support the weight of the jacket once hooped—don’t let it drag during stitching. Too much pull can cause the bottom ring to come loose, especially if embroidering close to an edge or seam.

Investing in a proper hooping setup and following these best practices ensures your stitch-outs are clean, centered, and securely hooped.

What About Tricky Areas Like Zippers or Pockets?

Some designs require placement near challenging features like:

  • Chest pockets
  • Heavy seams
  • Metal zippers
  • Multi-layer panels

Thanks to the strength of the Mighty HoopÂŽ magnets, these problem spots are usually not a problem at all.

  • You can hoop over most seams and zippers with no issue.
  • The magnetic pressure adjusts evenly, reducing risk of damage or misalignment.
  • The HoopMaster system gives you enough control to work around features while keeping alignment consistent.

Final Thoughts

Hooping thick jackets doesn’t have to be a challenge. With the right equipment, repeatable measurement techniques, and a few smart adjustments, you can dramatically speed up your production and reduce embroidery headaches.

If you’re ready to take the hassle out of hooping heavyweight garments, explore the tools featured in this tutorial:

Shop Mighty Hoop
Learn More about Hooping

tutorial for velveteen blanket embroidery
How-to's

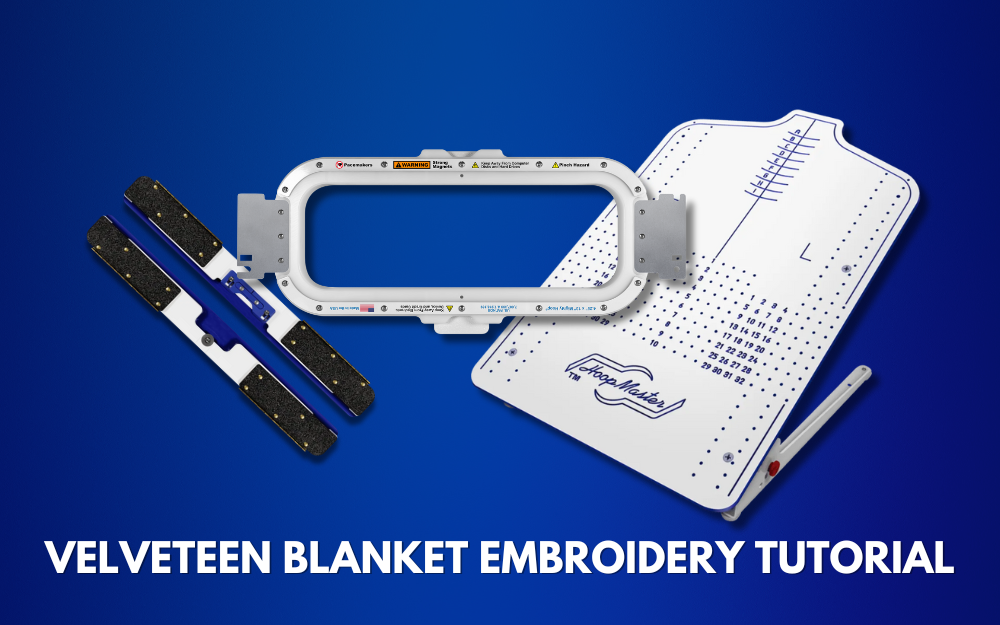
Velveteen Blanket Embroidery Tutorial (Step-by-Step with Mighty Hoop)

Looking to embroider a thick, luxurious velveteen blanket with professional results? In this step-by-step tutorial, we’ll show you how to hoop and stitch a blanket using the HoopMaster Station, Adjustable Fixture, and a 4.25×13” Horizontal Mighty Hoop. This method is perfect for thick or delicate materials and tubular embroidery machines.

🎥 Watch the full video tutorial below

Tools Used in This Tutorial

Step 1: Set Up Your HoopMaster Station

Set up your HoopMaster station

Start by adjusting the HoopMaster Station to lie flat (you can hoop at an angle, but flat is easier for thick fabrics like blankets).

  • Flip the station over.

  • Loosen the thumbscrews and wingnuts.

  • Push the legs down until flat.

  • Tighten everything back in place.

  • Flip the board right-side-up.

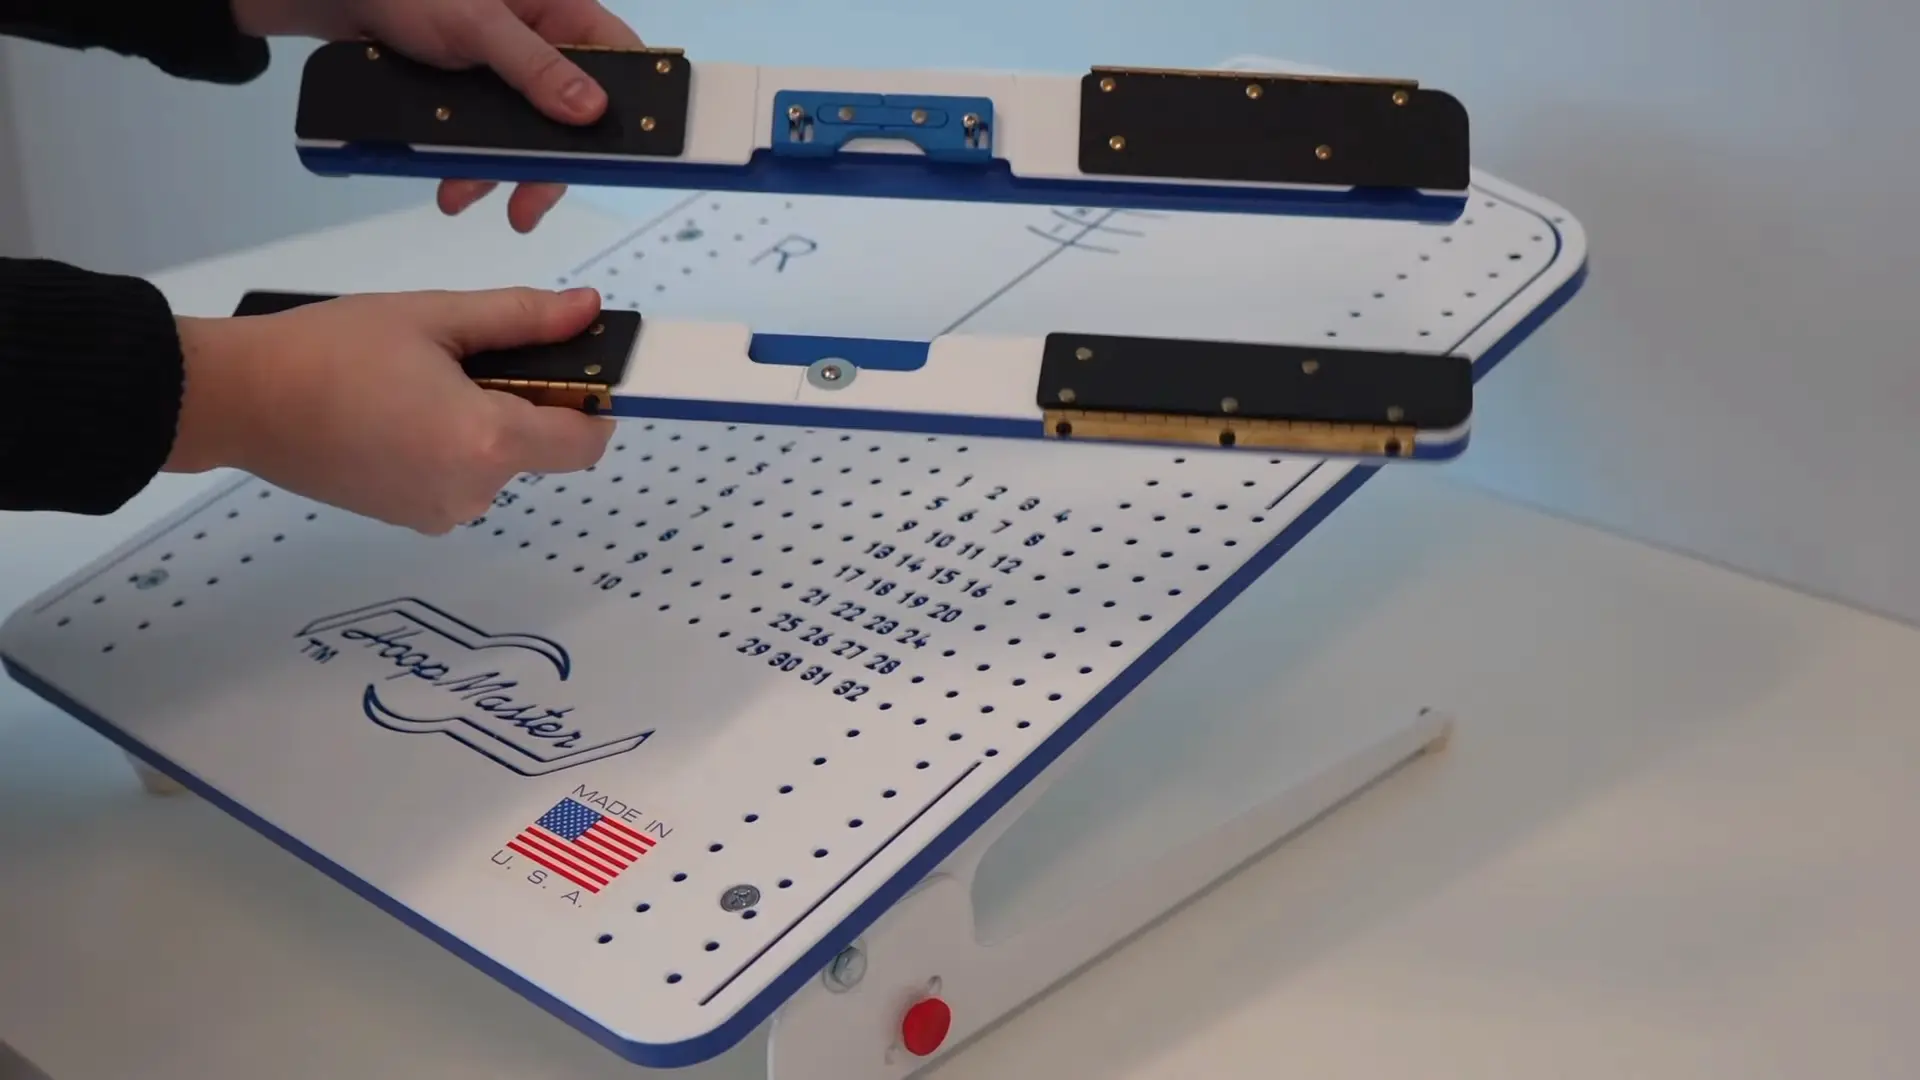
Place the Adjustable Fixture on the station. We positioned ours above the number “8” on the board for reference.

Step 2: Secure Your Mighty Hoop

Secure your MightyHoop

We’re using the 4.25×13” Horizontal Mighty Hoop, ideal for tubular embroidery machines. If you’re unsure whether it fits your machine, check our website or give us a call.

To install:

  1. Insert the bottom hoop ring into the lower fixture.

  2. Slide the top piece of the fixture down to hold it snugly.

  3. Open the magnetic flaps for hooping access.

Step 3: Choose the Right Stabilizers

Choose the correct stabilizers

We used:

  • Two layers of tearaway stabilizer (for stability and easy removal).

  • One layer of water-soluble stabilizer on top (prevents stitches from sinking into soft fabric).

Because the back of the blanket will be visible, tearaway gives a cleaner finish than cutaway on this thin material.

Step 4: Mark Your Design Placement

Mark your design placement

For accurate placement:

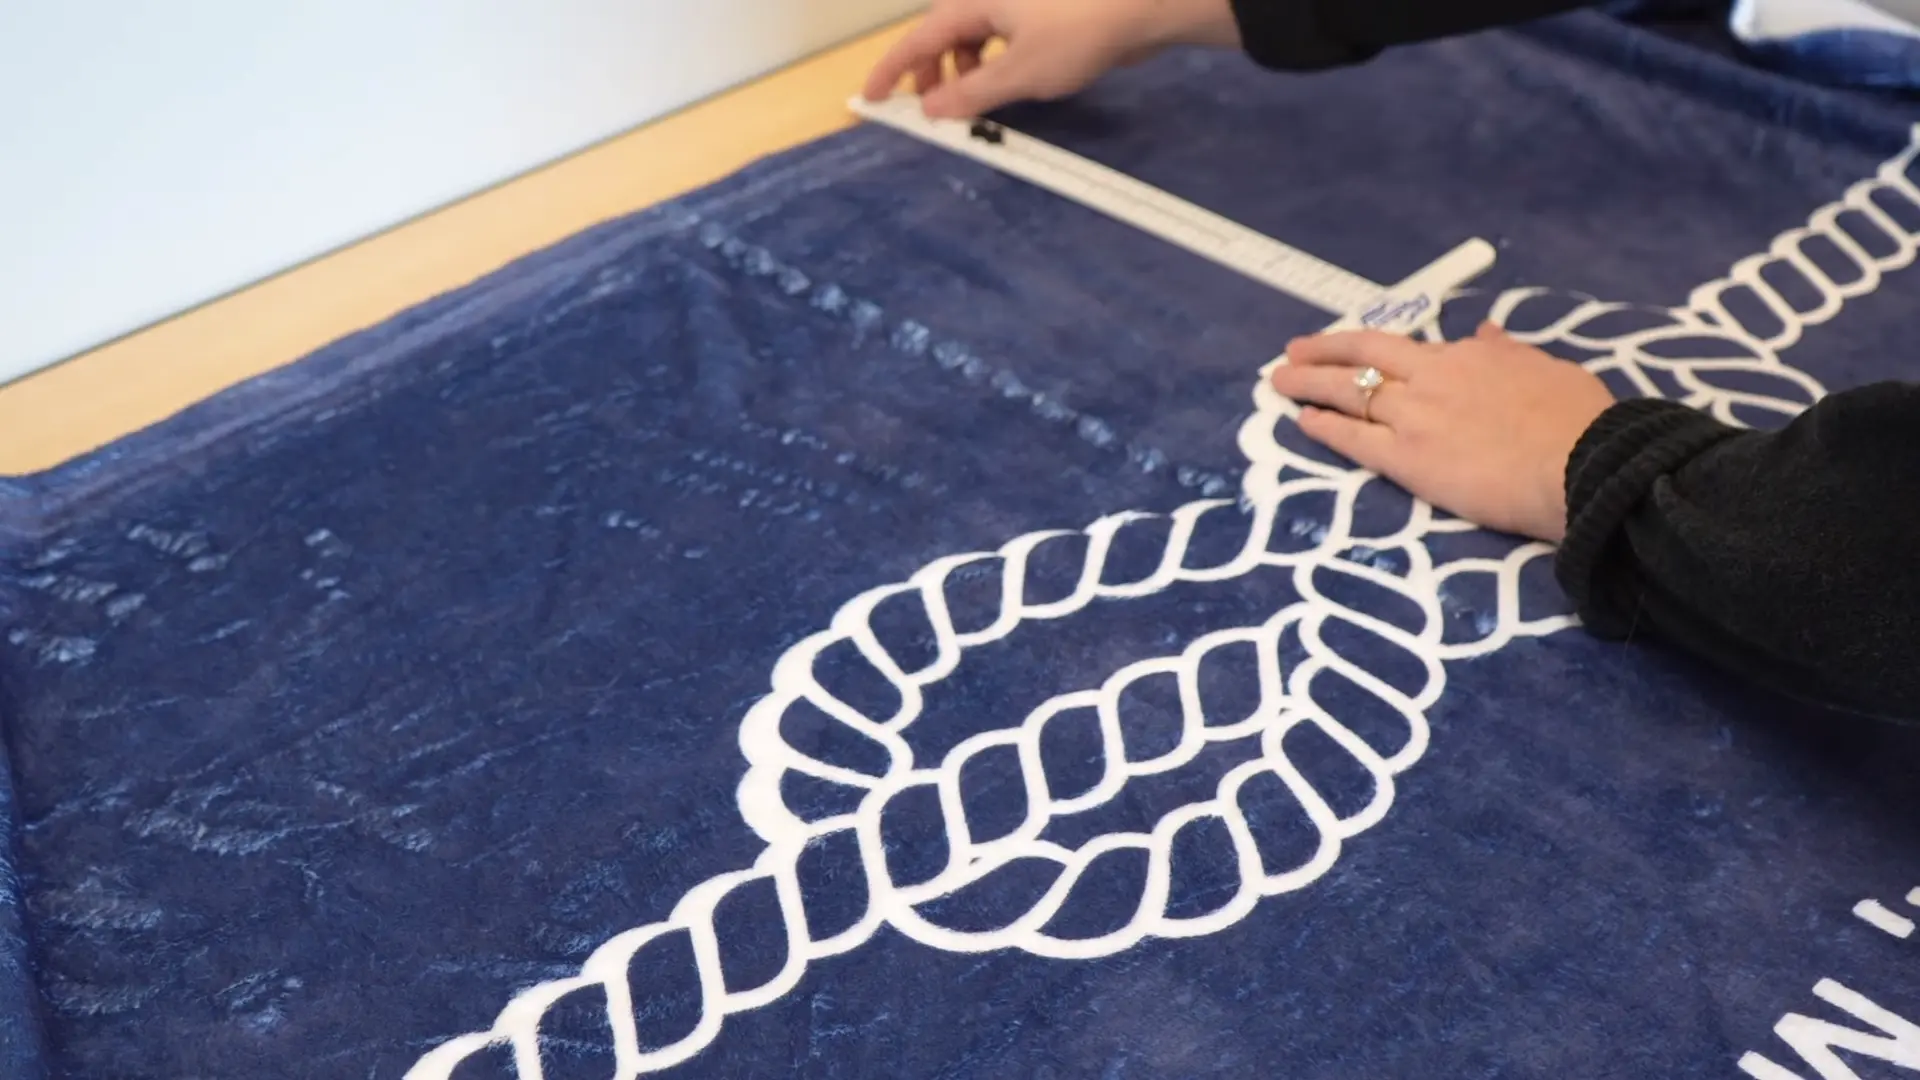
  1. Use placement dots to mark the center.

  2. Measure from the bottom of the rope design to the edge of the blanket (ours was ~11″).

  3. Place your center mark at around 5.5″, then adjust it to sit perfectly within the rope’s knot.

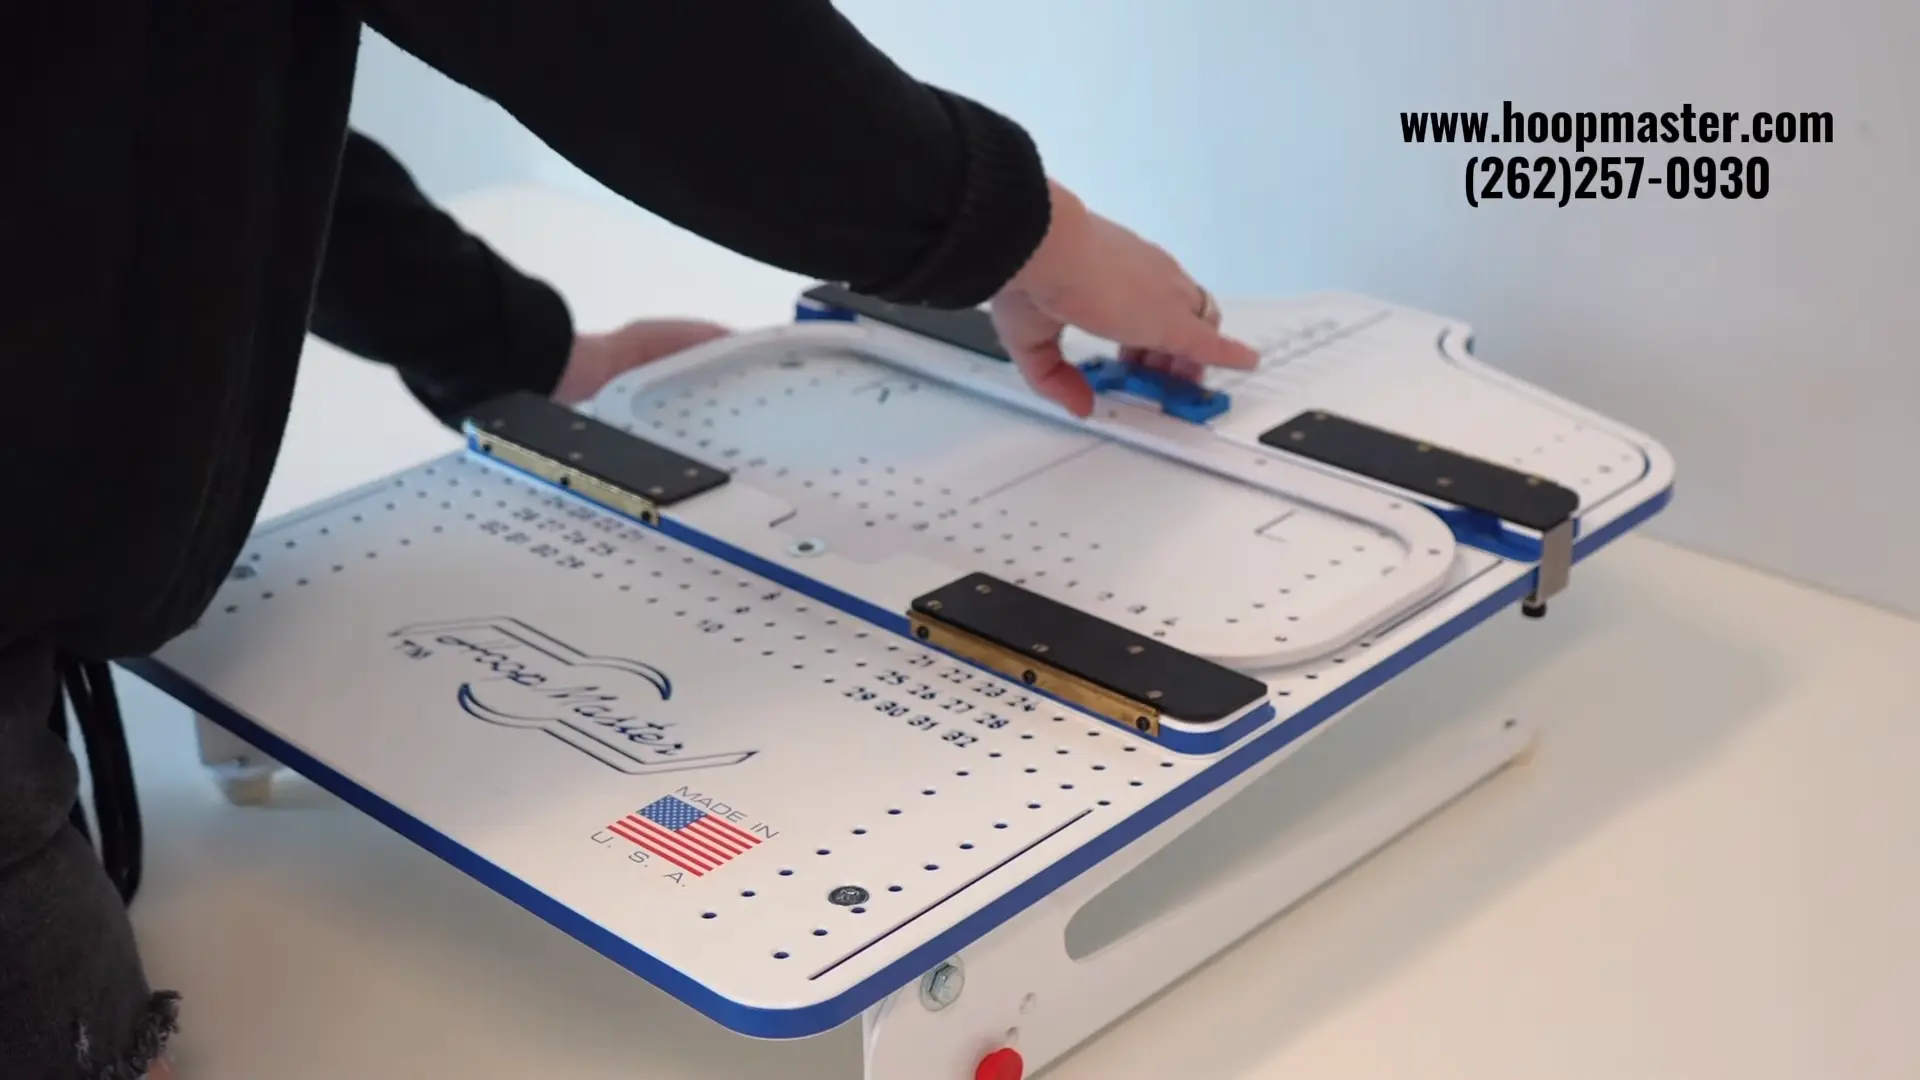
  4. Align this mark with the centerline of the station.

Step 5: Hooping the Blanket

Hooping the blanket

Once your stabilizers are clipped in:

  1. Pull the blanket onto the station.

  2. Align the placement mark with the station’s centerline.

  3. Feel for the Mighty Hoop’s inner ring to make sure it’s centered.

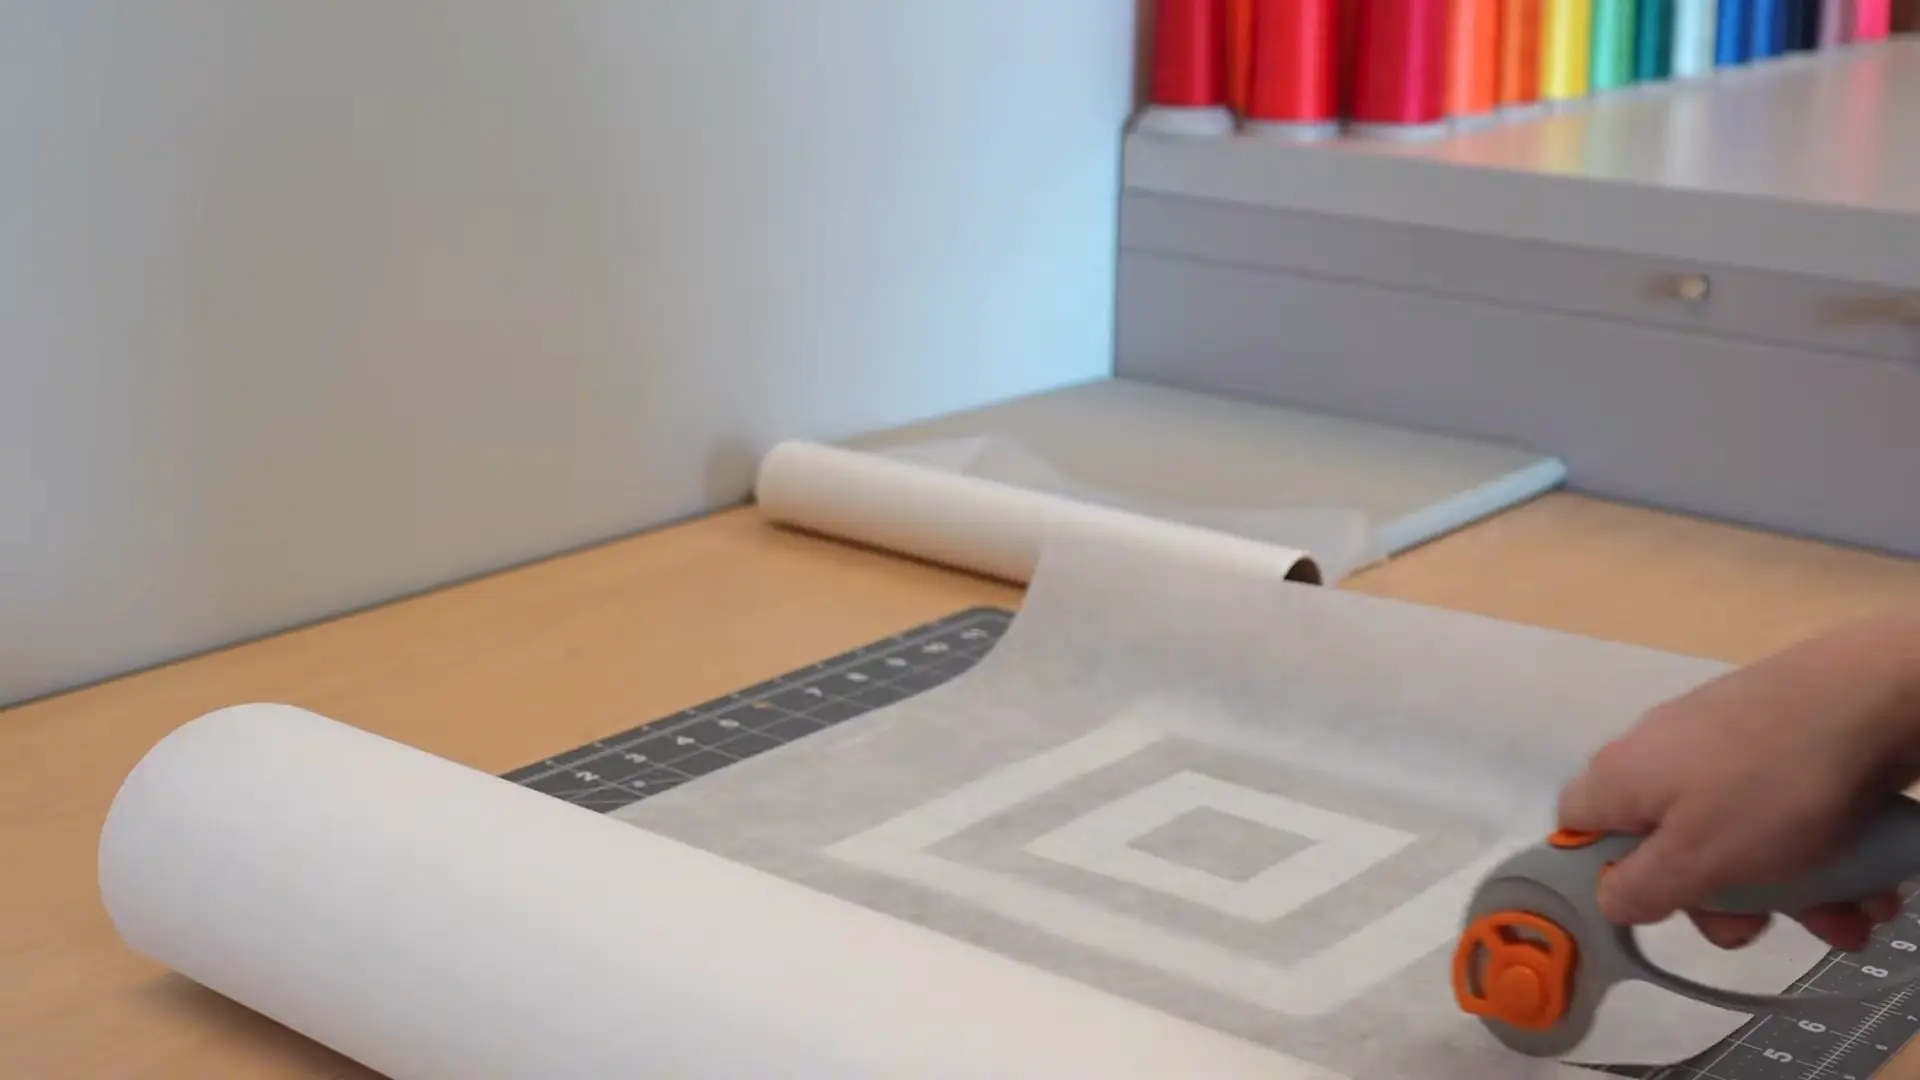
  4. Remove the dot and lay the water-soluble stabilizer over the hoop area.

  5. Press the top ring of the Mighty Hoop into place.

Step 6: Embroidering the Design

Embroidering the design

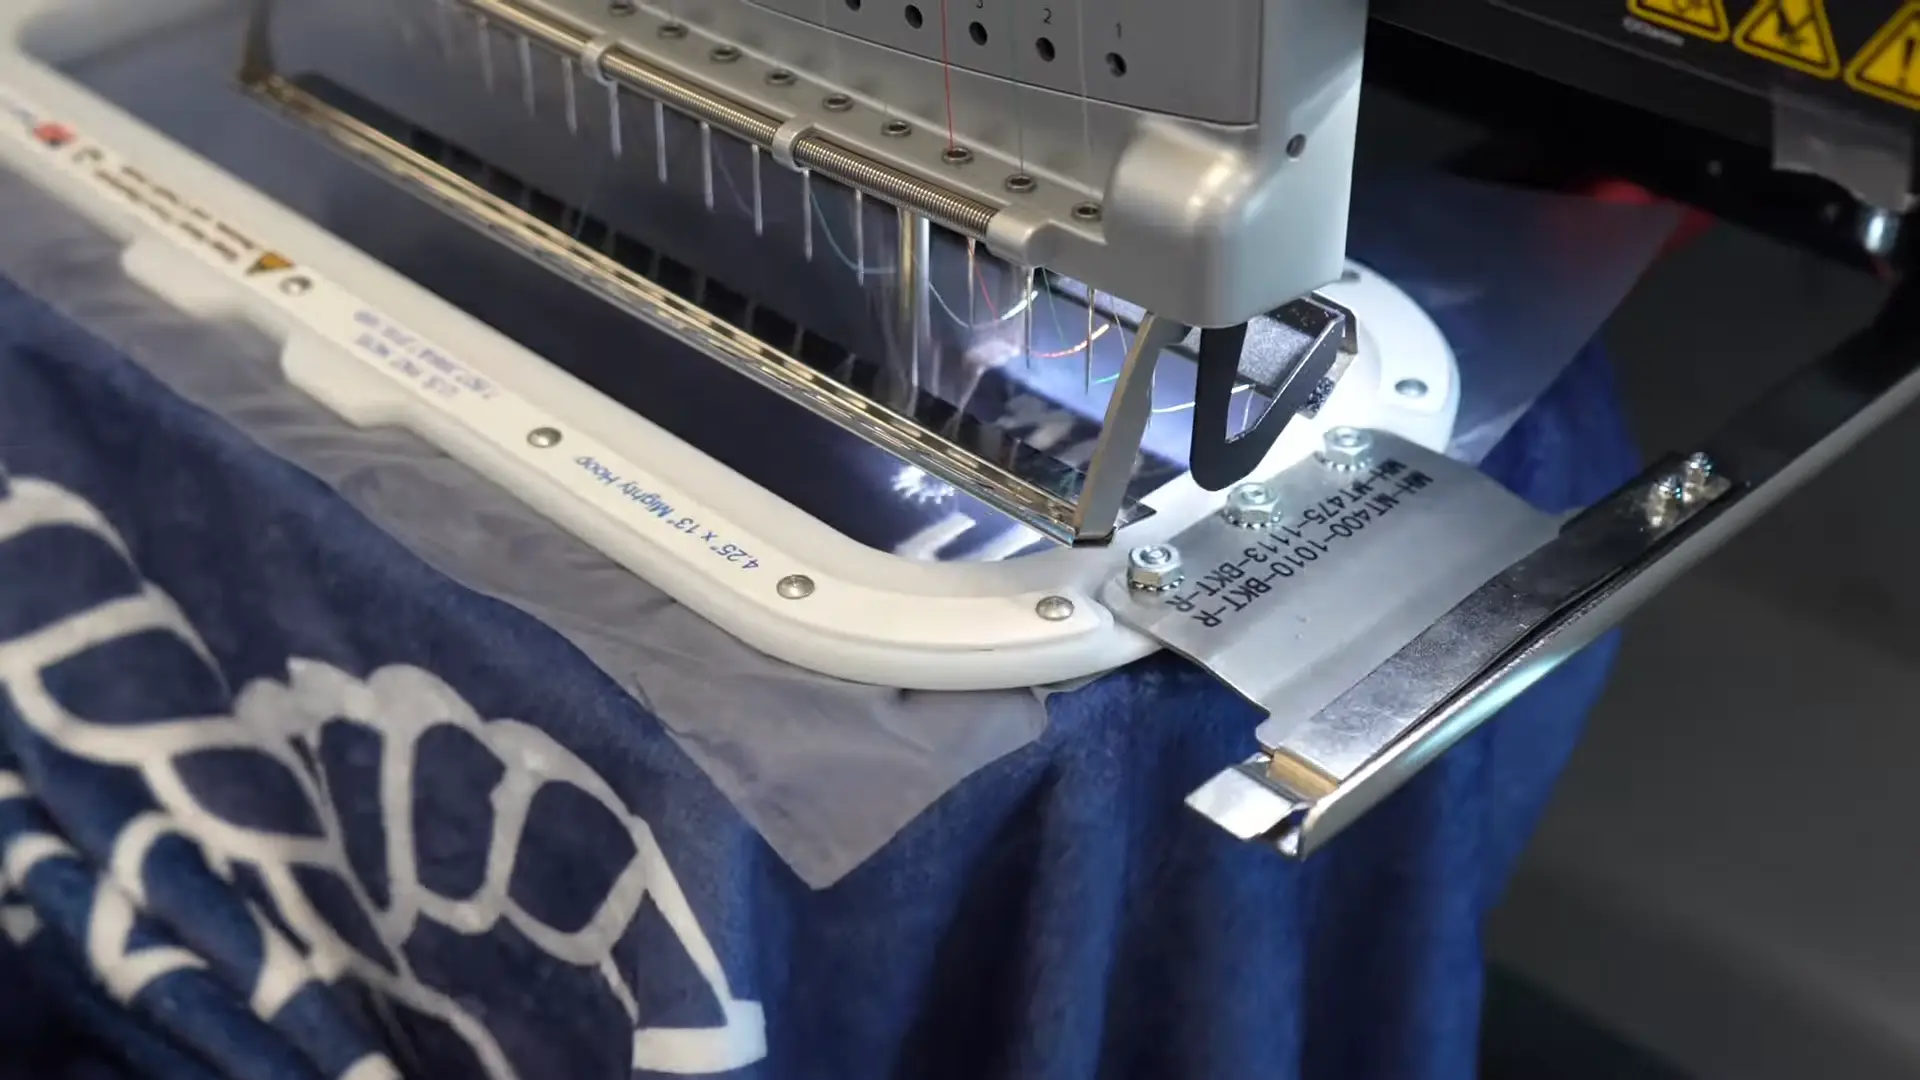
  • Mount the hooped blanket onto your machine.

  • Drape the rest of the blanket over a chair to relieve arm weight.

  • Flip your design 180° before stitching (since it’s hooped upside-down).

  • Always run a trace to ensure your design fits inside the hoop.

Step 7: Cleanup and Finishing Touches

Cleanup and final touches

Once embroidery is complete:

  • Remove the hoop from your machine.

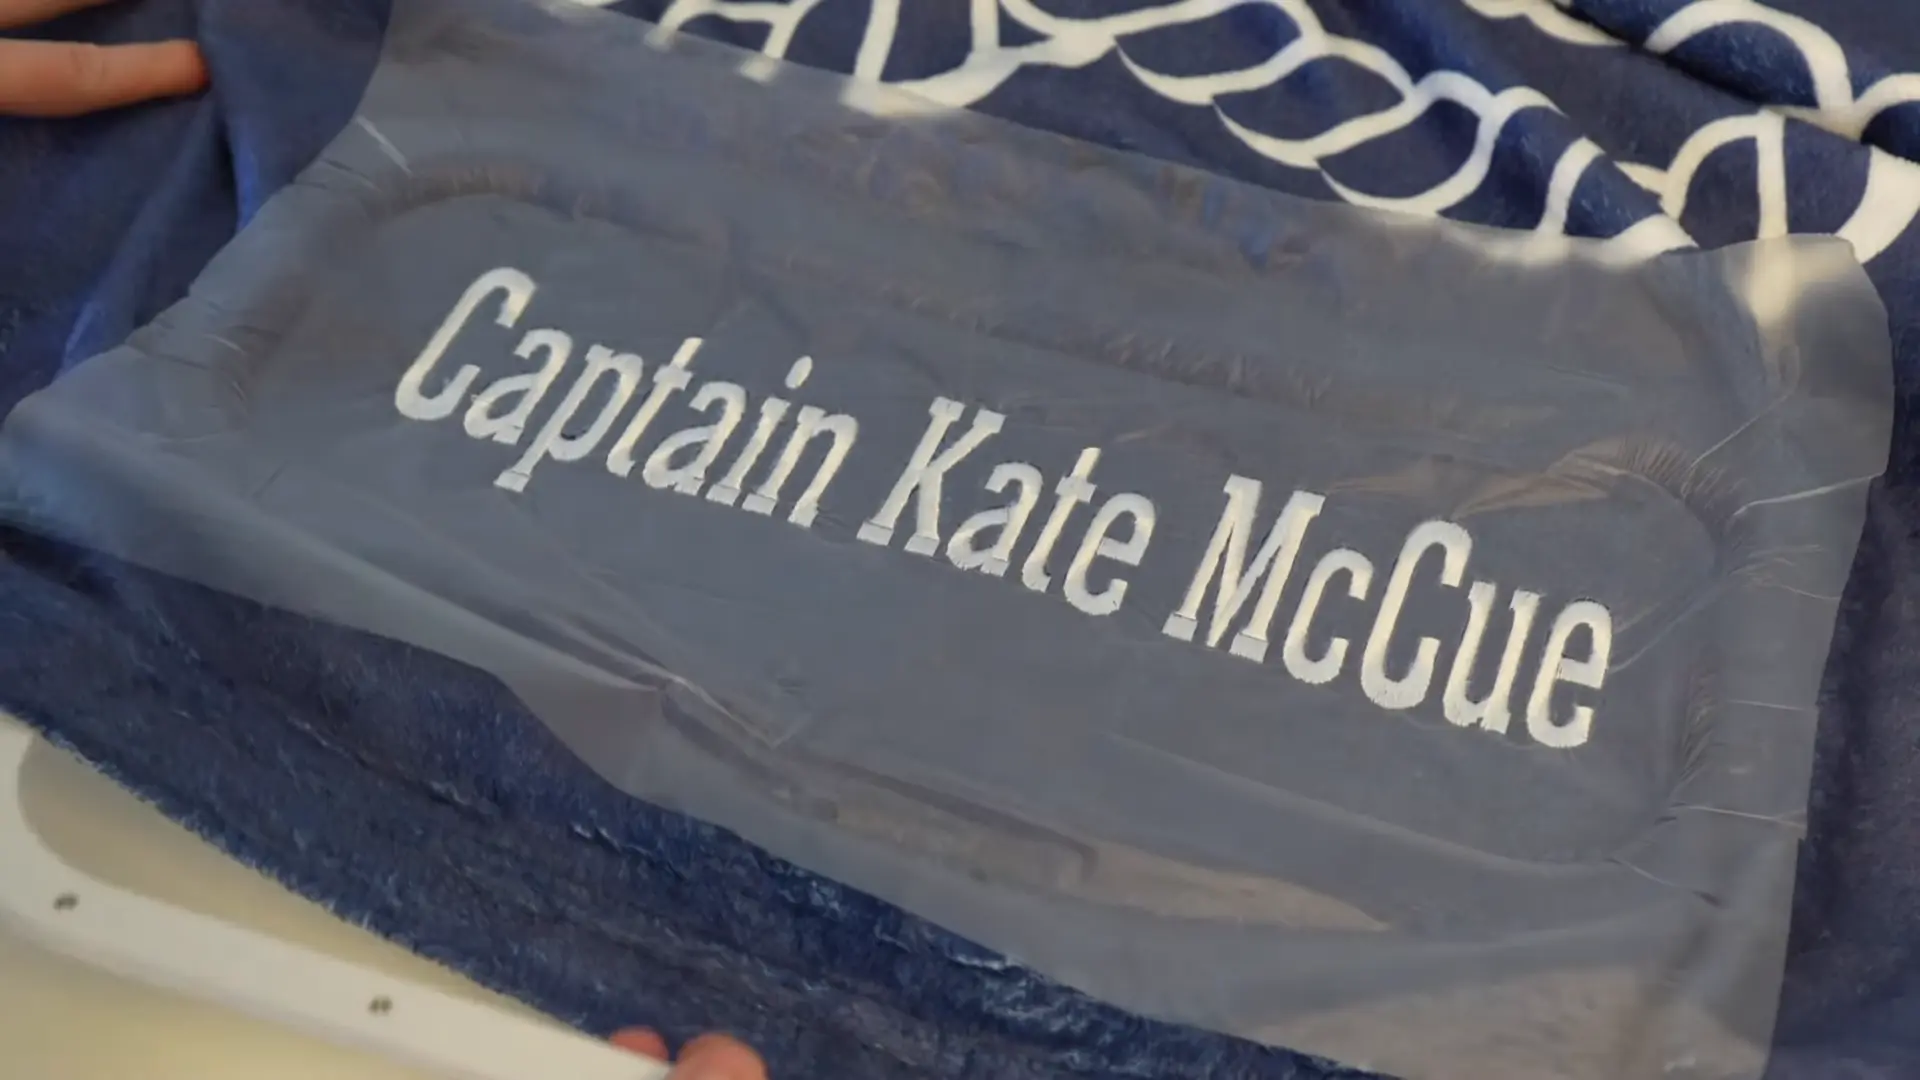
  • Tear away the water-soluble stabilizer.

  • Use tweezers or steam to remove any small bits stuck between letters.

  • Tear away the stabilizer on the back.

  • Trim any loose threads.

And that’s it — your embroidered velveteen blanket is complete!

Whether you’re personalizing a gift or tackling a thick fabric project, the HoopMaster and Mighty Hoop system makes the hooping process fast, clean, and frustration-free. This tutorial featured a special gift for Captain Kate McCue, but the techniques apply to any embroidery project involving dense designs and soft materials.

🛳️ Going on a cruise? A custom embroidered blanket makes a fantastic gift!

Need Help or Want to Order?

📞 Call us: (262) 257-0930 (Mon–Fri, 8:00am–4:30pm CST)
🌐 Shop all HoopMaster & Mighty Hoop products

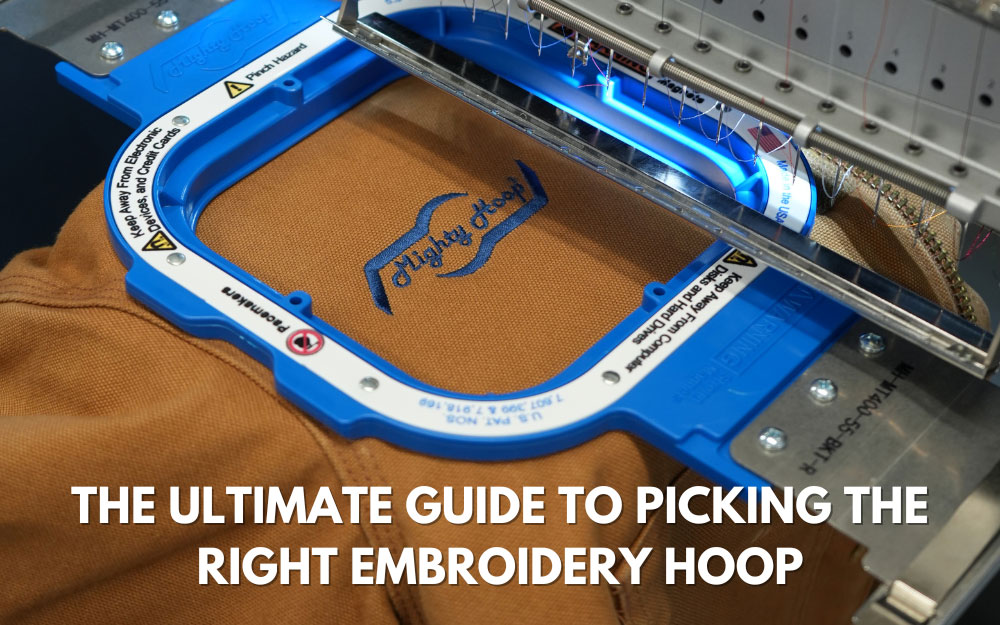
how to choose the right embroidery hoop
How-to's

The Complete Guide to Choosing the Perfect Embroidery Hoop

Embroidery hoops are one of the most crucial tools in machine embroidery. Selecting the right hoop size can make the difference between a perfect project and a frustrating failure. This detailed guide will walk you through the basics of embroidery hoops, key factors to consider when choosing the proper size, helpful tips for working with different hoop sizes, and accessories to elevate your embroidery experience.

Understanding Machine Embroidery Hoops

Machine embroidery hoops stabilize fabric during embroidery, ensuring it remains taut and in place. This prevents puckering and shifting, which can compromise intricate designs. Hoops come in various shapes and sizes, with rectangular and circular being the most common. The choice of hoop size affects the embroidery’s quality, precision, and ease of handling.

What is the Most Popular Embroidery Hoop Size?

  • The most popular embroidery hoop size is the 5.5-inch square hoop, or the equivalent 15-centimeter round hoop. This size is most common, as it is the perfect size for company logos and left chest designs. Most company logos and left chest designs are between 3.5 to 4.5 inches in size, which makes the 5.5-inch or 15-centimeter hoop the most popular size.

General Trends and Preferences in Embroidery Hoop Sizes

  • Embroidery trends and preferences in hoop sizes vary among embroiderers. This is because not all embroiderers focus on the same type of embroidery business.
  • Contract and corporate embroidery businesses tend to embroider left chest logos and designs. These designs are typically smaller and take less time to embroider. Due to this, contract embroiderers normally use smaller hoops and will have multiples of the same size hoop, so that they can be as efficient as possible.
  • Embroidery hobbyists tend to use a variety of hoop sizes, as they embroider many different items and design sizes. Unlike contract embroiderers, they typically only need one hoop of each size they use since they are not focused on speed.
  • Embroidery Businesses that focus on a specific niche market use hoop sizes that work best for the specialty items they embroider. They may only need one or two different hoop sizes, but multiples of them, or they may need a variety of sizes. Embroidery trends can also affect the hoop sizes they use.

Factors to Consider for Choosing the Right Size

When selecting the appropriate hoop size, consider the following factors:

  • Design Size: The industry standard is to always choose the smallest hoop possible to accommodate your design. Doing so will provide better fabric tension, reduced chance for misalignment while hooping, and less waste with items like embroidery stabilizers and water-soluble toppers.
  • Embroidery Machine Compatibility: Different machines have specific hoop size requirements. Ensure your hoop is compatible with your embroidery machine brand and model.
  • Product Being Embroidered: If you are embroidering a product with something that cannot be hooped over, like a thick seam, you will need to find a hoop size that can accommodate the design size while avoiding the seam.

Types of Embroidery Hoops

  • Round Hoops: Traditional and widely used, ideal for general embroidery.
  • Square/Rectangular Hoops: Typically used for larger designs and continuous patterns.
  • Oval Hoops: Offer a unique shape for specific design needs.
  • Magnetic Mighty Hoops: The newest and most efficient, user-friendly tubular embroidery hoop.

Innovative Hoop Technologies

Are Magnetic Embroidery Hoops Worth It?

  • The patented, magnetic Mighty Hoop eliminates pre-tensioning associated with traditional hoops, are suitable for thick workwear or delicate fabrics, reduce hoop burn and are built to take the daily use of the busiest commercial embroidery business.
  • Mighty Hoop benefits include:
    • Ease of Use: Quick setup and adjustments. Reduces stress on hands and wrists.
    • Consistent Tension: Ensures even fabric tension, reducing puckering.
    • Secure Hold: Strong grip without hoop marks.
    • Versatility: Suitable for different fabric types and thicknesses.
    • Time Saving: Reduces hooping time and increases efficiency and productivity.
    • Durability: Built for the commercial embroidery industry and warranted.

Accessories Recommended to Enhance Embroidery with Hoops

  • Stabilizers: Essential for supporting fabric; choose from tear-away, cut-away, no-show polymesh, or wash-away based on the project.
  • Hoop Grip Tape: Helps prevent fabric from slipping inside traditional non-magnetic embroidery hoops.
  • Hooping System: Simplifies and speeds up the embroidery hooping process, while making placement easy, accurate and consistent. The HoopMaster is the world leader in commercial hooping systems, using patented features essential to embroiderers and their business.
  • Hoop Templates: Aid in proper alignment for precision embroidery. The Pocket Guide, by HoopMaster, is a popular placement guide for both traditional hoops and magnetic Mighty Hoops.
  • Water soluble embroidery topper/stabilizer: Helps prevent embroidery stitches from sinking into thick materials like towels or fuzzy blankets for a clean embroidery look.

By carefully selecting your embroidery hoop, you can ensure high-quality results, and a smooth embroidery process every time. Happy hooping!
How-to's

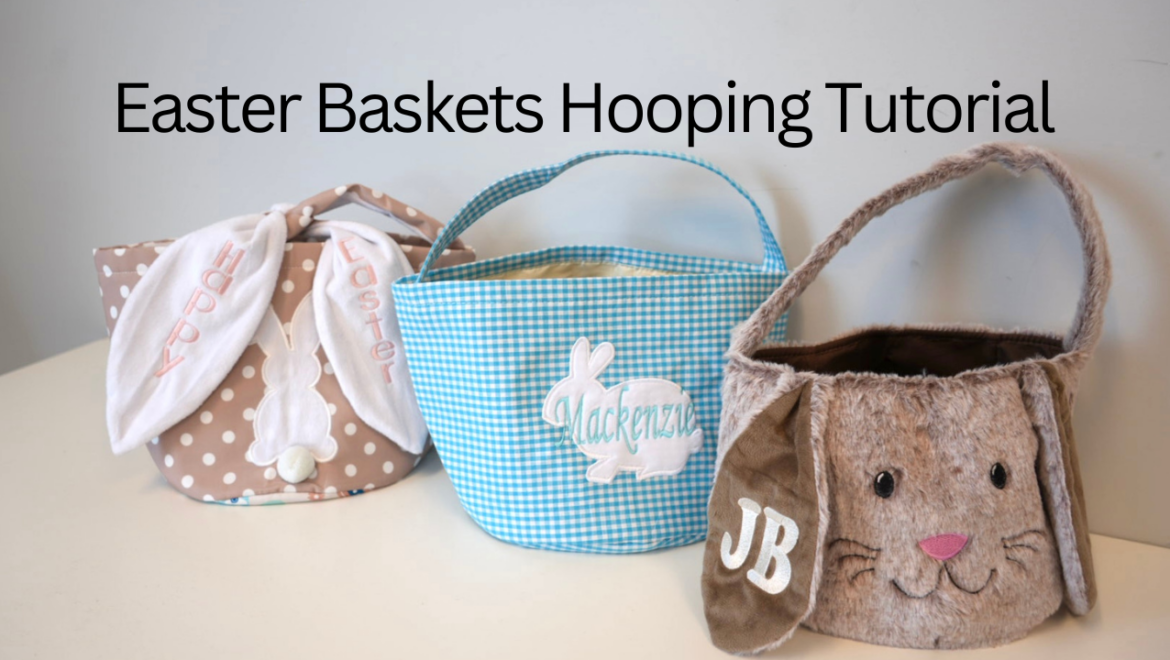
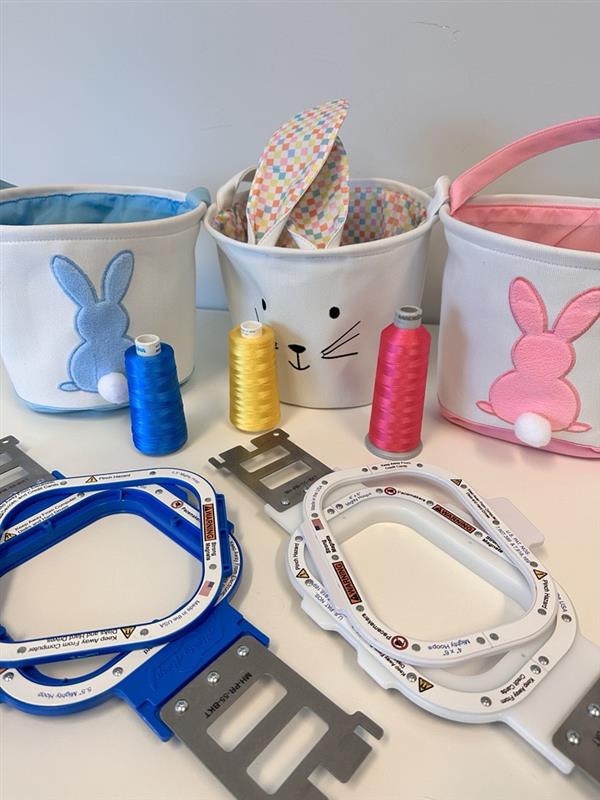
The Rise of Personalized Easter Baskets: A Timeless Tradition Made Easy with Mighty Hoops

In recent years, personalized Easter baskets have surged in popularity, becoming a cherished tradition for families looking to add a unique touch to their holiday celebrations. Embroidering names on Easter baskets has transformed them from simple seasonal accessories into keepsakes that children and loved ones can treasure for years.

Why Personalized Easter Baskets Have Become a Trend

One reason for this growing trend is the desire for meaningful, customized gifts. Rather than using generic store-bought baskets, families are opting for ones that reflect the recipient’s personality. Adding a name in colorful embroidery not only makes the basket feel more special but also helps avoid mix-ups during egg hunts and Easter morning festivities.

Social media has also played a significant role in this personalization boom. The popular blue and pink easter bunny fabric totes (from “5 Below” and “Amazon”) with a name stitched in bright thread elevates the design and adds a professional, high-end look.

The Challenge of Embroidering Easter Baskets

Despite their popularity, embroidering names on Easter baskets isn’t always straightforward. The structure of most baskets—whether stiff, curved, or thick—makes hooping a challenge. Traditional embroidery hoops struggle to grip irregularly shaped materials, and the process can be frustrating for both beginners and seasoned embroiderers.

How Mighty Hoops Makes Easter Basket Embroidery Easy

Fortunately, Mighty Hoops has revolutionized the embroidery process with their magnetic hoops, making it easier than ever to personalize Easter baskets. These powerful magnetic hoops eliminate the struggle of clamping down bulky or uneven surfaces, allowing embroiderers to securely hold baskets in place without excessive pressure or distortion.

Mighty Hoops offers a variety of techniques for hooping Easter baskets, ensuring that no matter the shape or material, there’s a simple and effective way to get the job done. Their hoops provide a strong hold without requiring constant readjustment, saving time and reducing frustration. This innovation means even embroiderers with minimal experience can achieve professional-looking results.

We created a video showcasing just how easy it is for you to hoop Easter Baskets with multiple different hoop sizes and techniques. To learn how to Hoop Easter Baskets with Mighty Hoops watch this video!

To purchase any of the Mighty Hoop Products used to hoop Easter Baskets, click the links below.

9×3″ Mighty Hoop: https://hoopmaster.com/?s=9×3&post_type=product&type_aws=true

9×3″ Backing Holder: https://hoopmaster.com/product/accessories/backing-holder
4×6″ Mighty Hoop: https://hoopmaster.com/?s=4×6&post_type=product&type_aws=true

Adjustable FreeStyle Fixture: https://hoopmaster.com/product/mighty-hoop/barudan/4-25×13-fixture

Portable Mounting Base: https://hoopmaster.com/product/accessories/portable-mounting-base

5.5″ Mighty Hoop: https://hoopmaster.com/products/mighty-hoop

5.5″ Backing Holder: https://hoopmaster.com/product/accessories/backing-holder

Tear Away Stabilizer: https://a.co/d/bsm3D4n

Water-Soluble Stabilizer: https://a.co/d/28VcdTq

Placement Dots: https://a.co/d/8tBlJft

How to use the 5.5 Mighty Hoop Starter Kit
How-to's

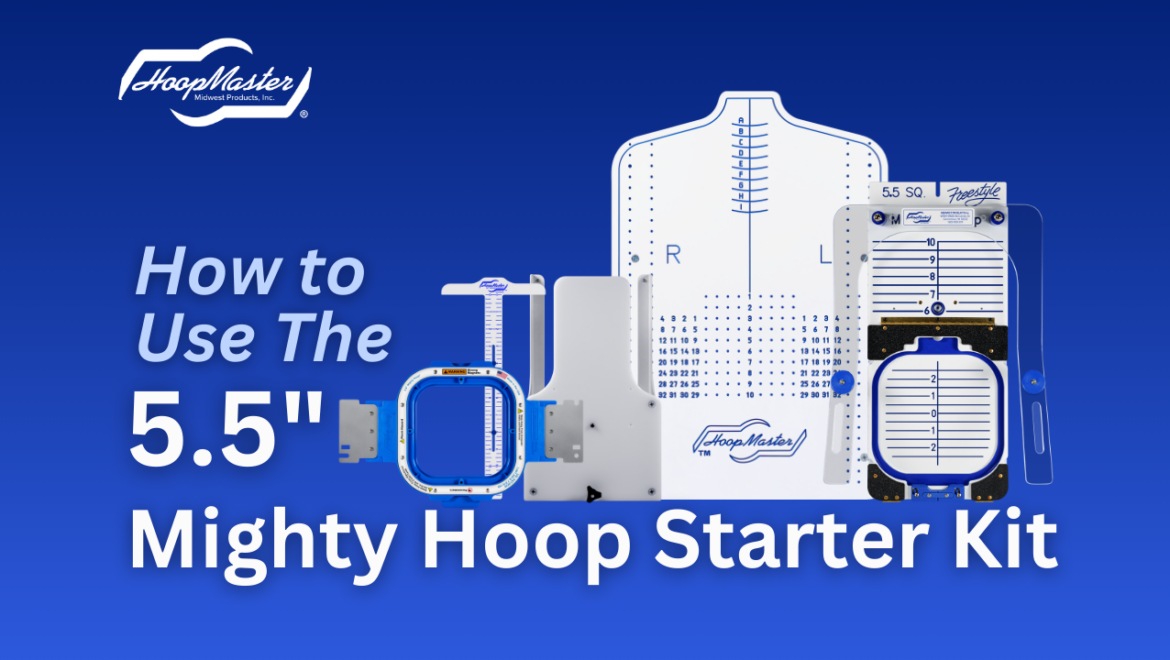
5.5″ Mighty Hoop Starter Kit

The 5.5″ Mighty Hoop Starter Kit was designed to be compatible with almost every tubular embroidery machine in the world! This kit is intended to be the perfect starting point in almost every embroiderers journey. Whether you are just starting out or you have a large embroidery shop, this system will make the embroidery hooping process seamless. Perfect design placement, consistent hooping, and increased productivity are just some of the benefits you can expect to have when using this kit.


Watch the video below to learn how to use the 5.5″ Mighty Hoop Starter Kit and see how it could benefit you.


If you just purchased the kit and want to learn how to set it up watch the video below.

Be sure to leave a “Like” and “Comment” if you found this video helpful! Don’t forget to “Subscribe” and turn on “Notifications” to get video updates! Have a question about our products? Leave us a comment or send us an email at info@hoopmaster.com.

Instagram – https://www.instagram.com/hoopmastermightyhoop/

Facebook – https://www.facebook.com/mightyhoop/

TikTok – https://www.tiktok.com/@hoopmastermightyhoop


How-to's

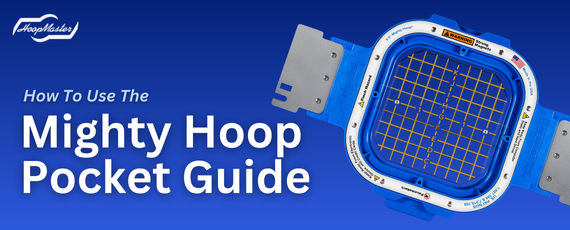
How to use the Mighty Hoop Pocket Guide

The Pocket Guide makes it easy for you to line up your garment before you hoop it, giving you precise placement when hooping above a pocket or on shirts with patterns or existing logos.

Watch the video below to learn more about the Pocket Guide and how to use it.