
So, which embroidery product is right for you? We’ve put together this comparison to help guide you to the right solution.
How to Get Consistent Embroidery Placement Across a Production Run
August 31, 20260
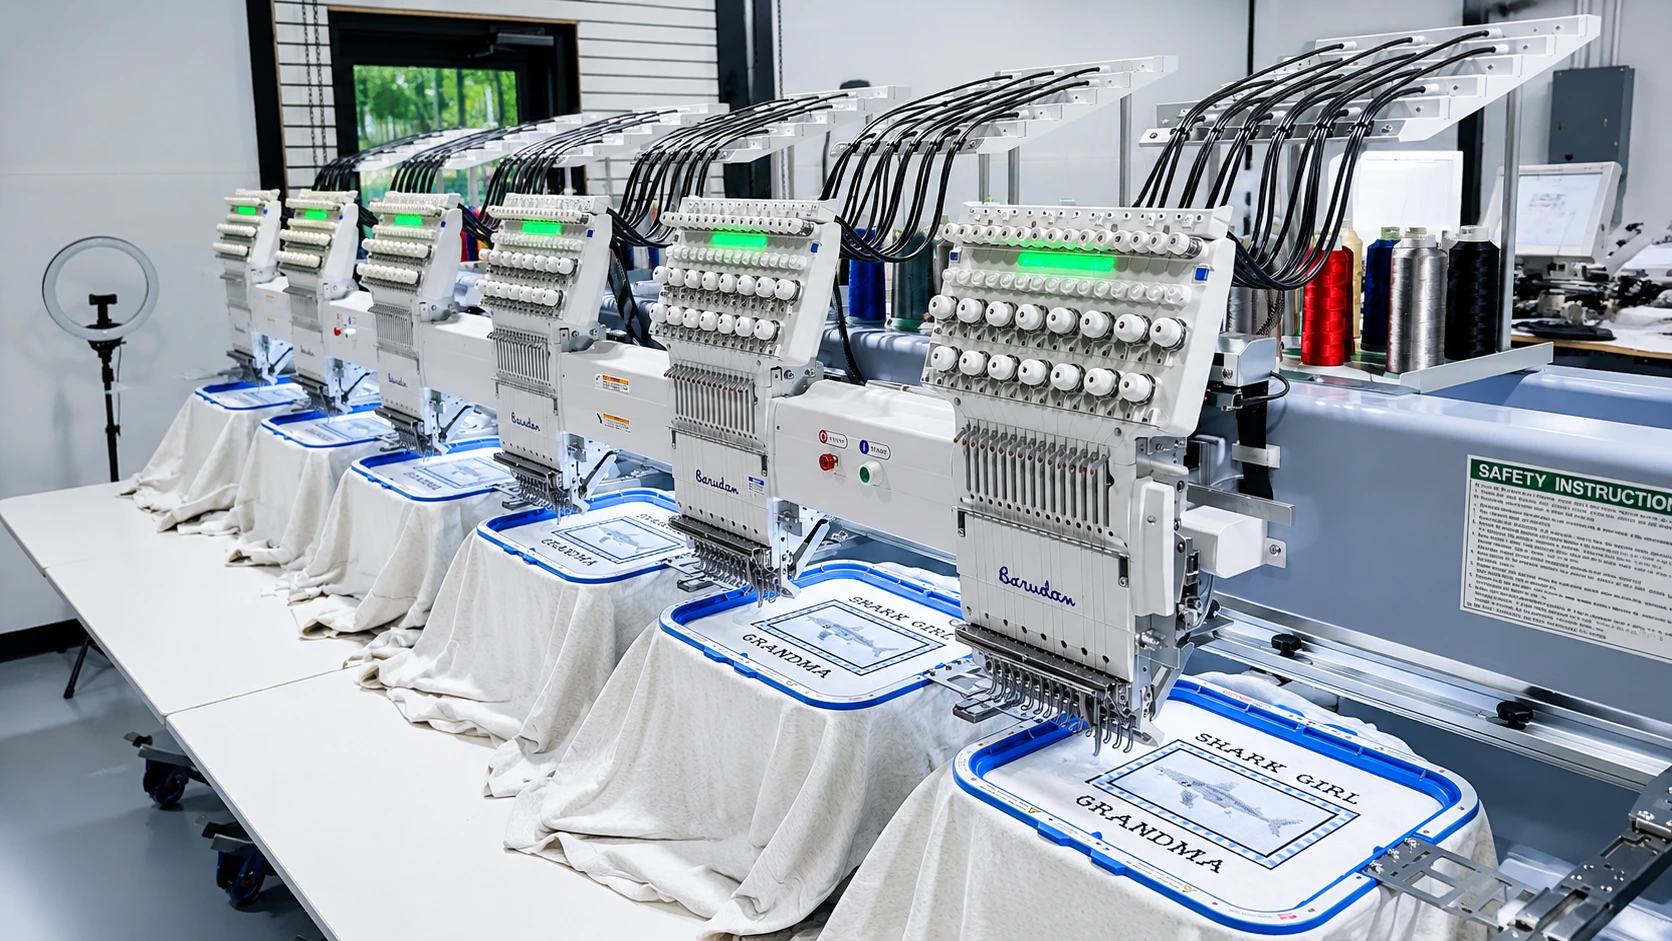
 Photo provided by Beverly Bradley from www.shop1091.com
Getting the same logo in the same spot on every piece in a run comes down to a repeatable system, not careful measuring on each garment. Standardize the placement once from stable points on the garment, write that exact position down so anyone can reproduce it, and hoop every piece with a station and fixture that hold the design square in the same place. Keep the hooping tension even from the first piece to the last so nothing distorts out of registration.
At HoopMaster, we build the world’s number one selling commercial hooping system, used by embroiderers in more than 100 countries. We started out as a high-volume contract embroidery shop with this exact problem. We built the hooping station to solve our own placement bottleneck, then invented the magnetic Mighty Hoop to keep tension consistent piece to piece.
Why embroidery placement drifts across a production run
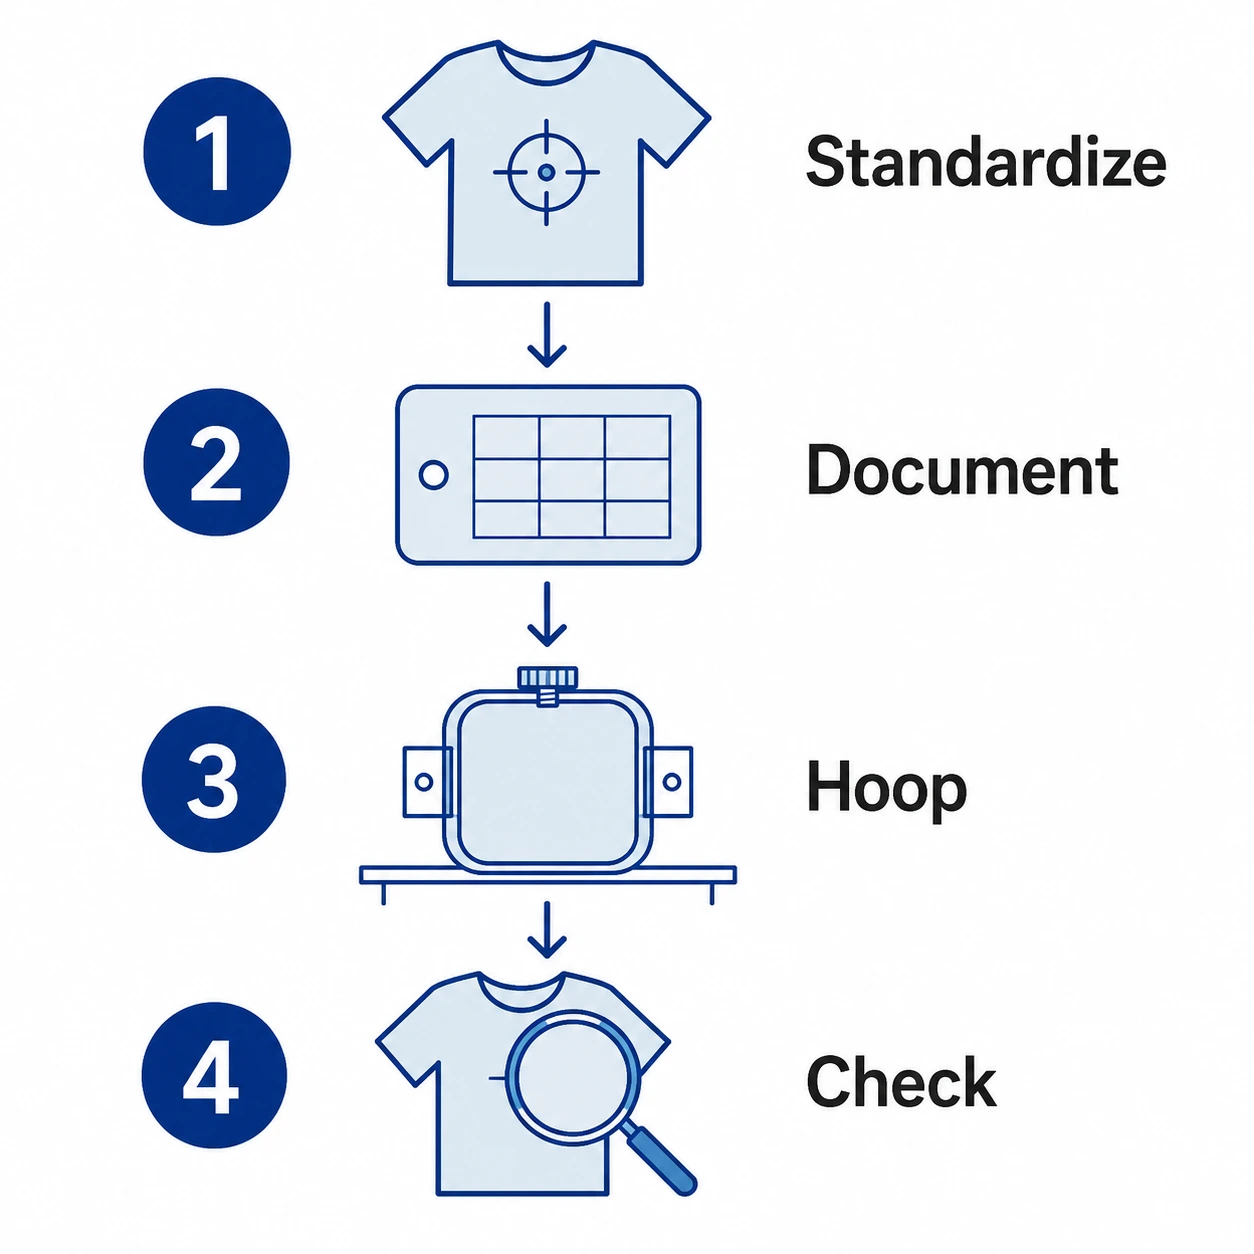 The problem is rarely that someone measured one shirt wrong. It is that the position was never locked down in a way the whole shop can repeat. A few things cause the drift:
- Measuring and marking each garment by hand introduces small variations that stack up over a run.
- Different operators read the artwork and the garment landmarks slightly differently, so the same job lands in slightly different places.
- Reorders go wrong when the original position was never recorded and the operator who set it up is gone.
- On multi-head machines, one setup mistake repeats across every head in the row instead of ruining a single piece.
Placement errors are also expensive. Every piece that is hooped in the wrong place becomes rework or scrap, and can cost you a reorder or a customer. Quality organizations classify these as internal and external failure costs, and in a production shop they add up quickly. Building the placement into a repeatable process is what keeps those costs from piling up.
Standardize placement from stable garment reference points
The first step is deciding the placement once, from points on the garment that stay consistent across the size range and across reorders. One option is to measure from where the neck seam and shoulder seam meet, and set your horizontal position from the true center front or the placket. If the garment doesn’t have a placket, find the center front by folding the garment in half and using that fold as your reference.
Avoid measuring from loose or unstable references like armholes, side seams, or a casual fold in the body. Those move around from garment to garment and from size to size, which is exactly the variation you are trying to remove.
Standard starting measurements for common placements
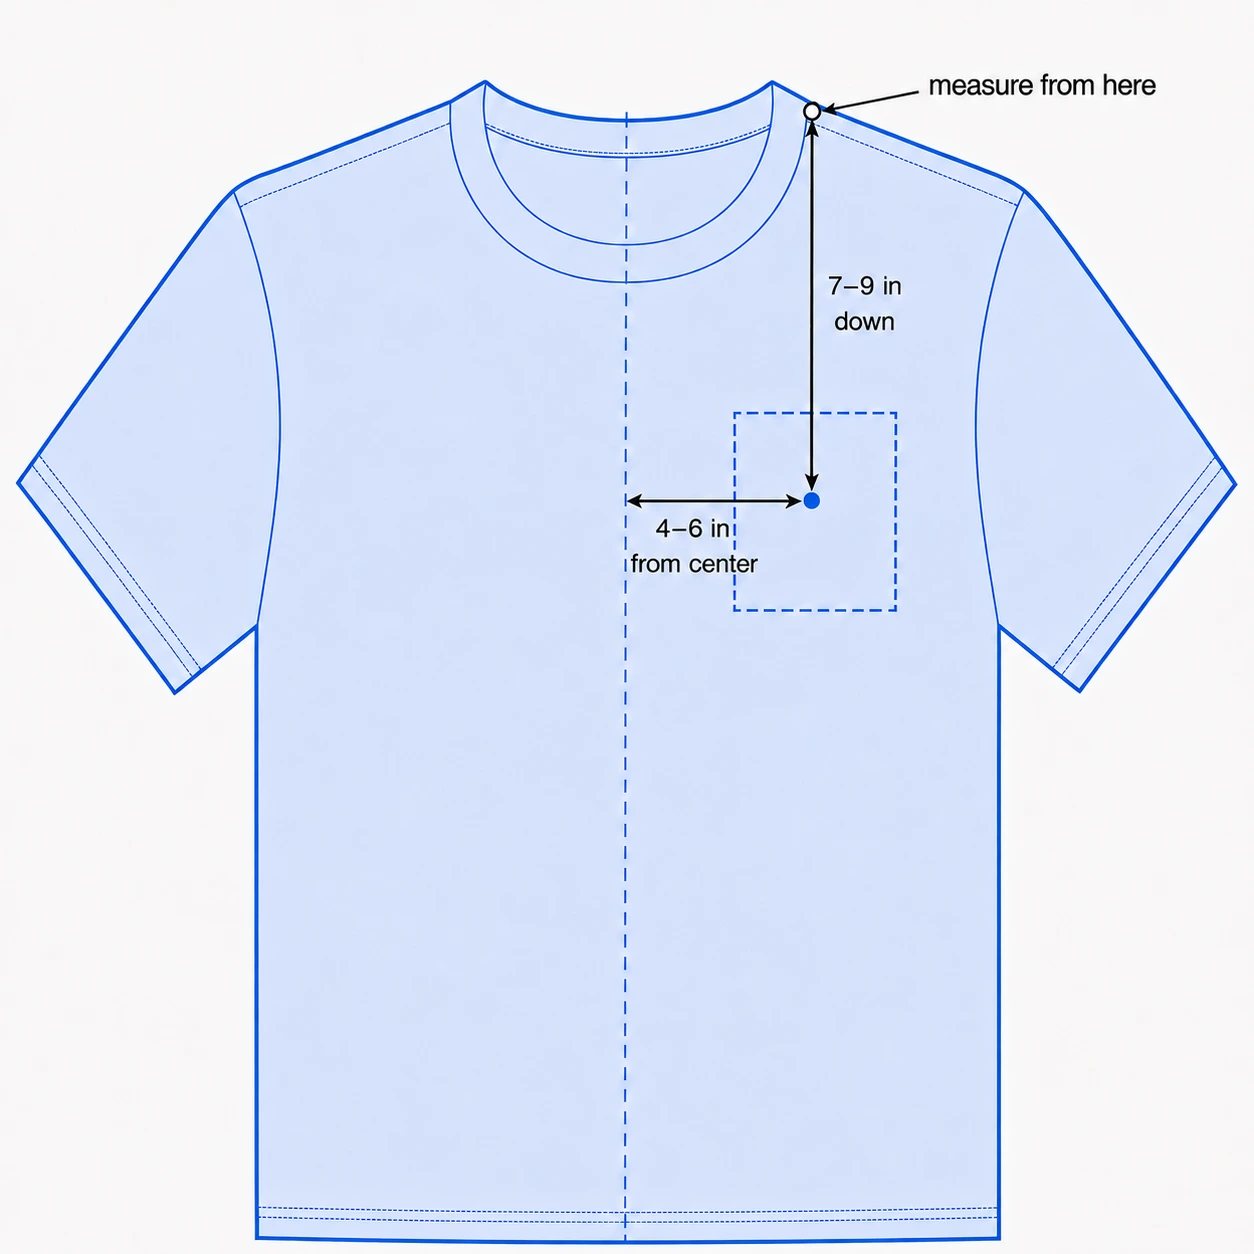 These are useful starting points for common placements, drawn from placement guidance of many sources in the industry. Treat them as a reference for building your own shop standard, not as fixed rules, and confirm the look with a full-size paper template before you commit to a run.
| Placement | Starting measurement | Reference point |
| Left or right chest | 7 to 9 inches down, 4 to 6 inches in | From where the collar and the shoulder seam meet and the center of the garment |
| Center front | 2 to 4 inches down | From the neckline |
| Center back (tees and tops) | 5 to 6 inches down | From the back neck seam |
| Center back (hoodies, sweaters, jackets) | 7 to 10 inches down | From the back neck seam, varies with style and design size |
| Sleeve | Centered, about 0.5 to 1 inch above the hem | From the sleeve hem |
Jacket and full-back placements vary the most, since the right position depends on the jacket style and how large the design is. For those, use the center seam and shoulder seams as your alignment references and prove the placement on a sample. You can find machine-manufacturer starting ranges in a published embroidery placement guide.
Scaling placement by garment size
A single adult measurement will not stay balanced from Small through 3XL. As the garment gets larger, both the vertical drop and the horizontal position need to move so the logo stays visually centered on the chest. The reliable approach is to define the placement by garment class and size band, then document those numbers so every operator uses the same scale instead of eyeballing it. Our recommended Mighty Hoop sizes for popular placements and garments can help you match hoop sizes to those placements as you build the standard.
Document the placement so any operator can reproduce it
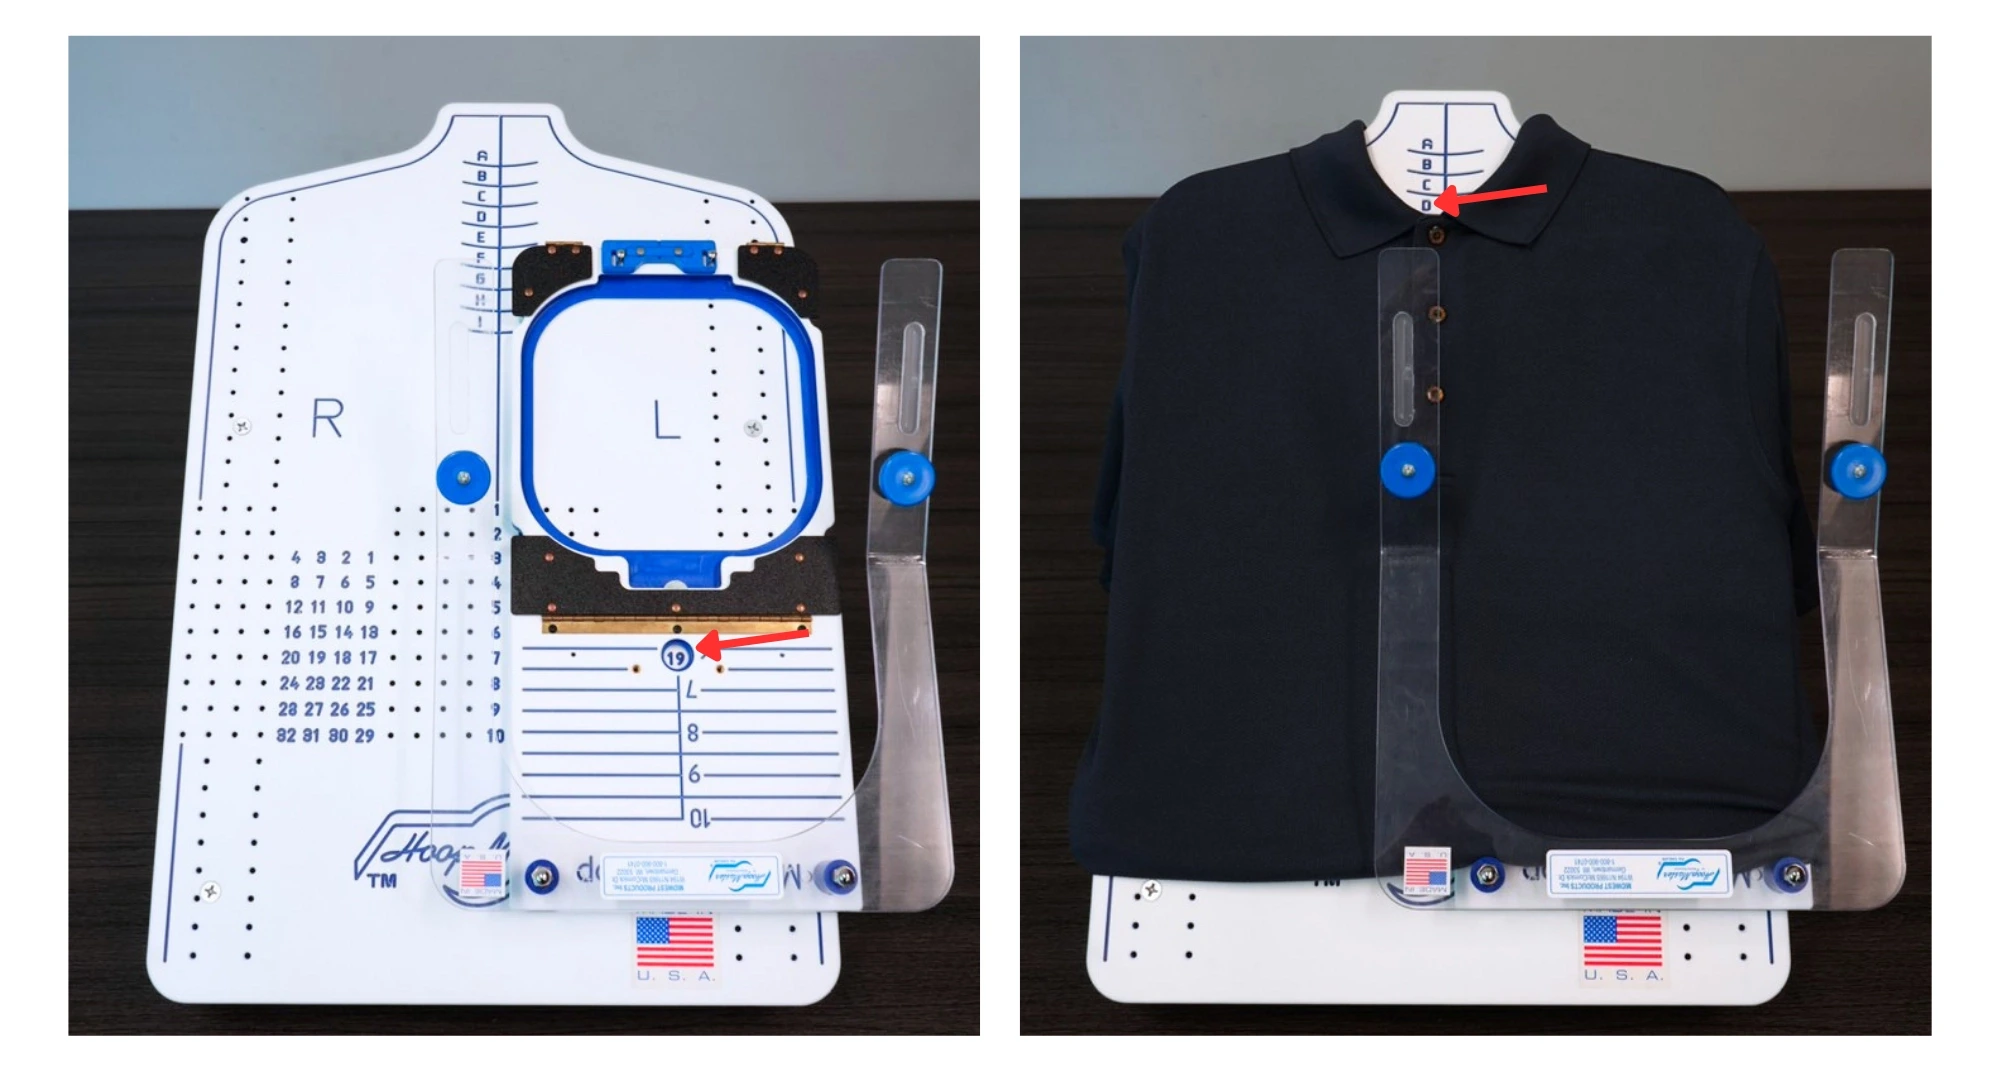 Once you have standardized a position, record it so it can be repeated without re-measuring the garment.
On a HoopMaster station, the work surface has a lettered and numbered grid. You note the coordinate where the fixture sits for a given design, garment type, and size, something like D19. Record that alongside the fixture and station size you used. On the next piece, or on a reorder six months later, any operator sets the fixture back to that recorded number and pulls the top of the shirt to the same letter making the placement consistent. There is no measuring and marking each garment.
Keep the rest of the job record with that coordinate so a reorder starts from the standard instead of from scratch:
- The approved, digitized design file and the exact version used.
- The signed-off first-article sample.
- Thread colors by manufacturer number and name, since “blue” alone will not match on a reorder.
- Garment style number and size.
- The fixture, station size, and letter and number coordinate for each placement.
A job packet that travels with the order, holding the approved sample and these setup details, is a long-standing shop-management practice. It keeps the setup out of any one operator’s memory and in something the whole shop can follow. You can read more on the station side of this in our HoopMaster hooping station overview.
Embroiderers tell us this is what protects them on repeat work. As Eddie at A1A Embroidery put it, “We use the HoopMaster and have found it to be amazing for hooping. We have had other aids as well but have found this one to be the most fool proof. It adds consistency to all the jobs that we do. When a customer reorders we know that we can place the design in the same spot every time.”
Remove freehand variation from the hooping step
Documentation only holds up if the hooping itself is repeatable. If each garment is eyeballed and marked by hand, you reintroduce the variation you just designed out.
A hooping station with a fixture holds the hoop square to the work surface and directly over the lower ring, so the design lands in the same position every time instead of depending on how carefully each garment was marked. This is what makes the documented coordinate actually repeat. It also lowers the training barrier. A new or fill-in operator can learn to hoop accurately on their first day, because the station does the aligning instead of relying on years of practice.
Correct hooping is one of the biggest drivers of placement fidelity, and most misalignment traces back to it. Common causes include slack in the fabric, a hoop that is too large for the design, a missing stabilizer on thin or stretchy fabric, and loose frame-holder screws. Two habits reduce those problems: use the smallest hoop that comfortably fits the design, and hoop the garment cleanly rather than re-tightening it afterward.
Keep hooping tension consistent piece to piece
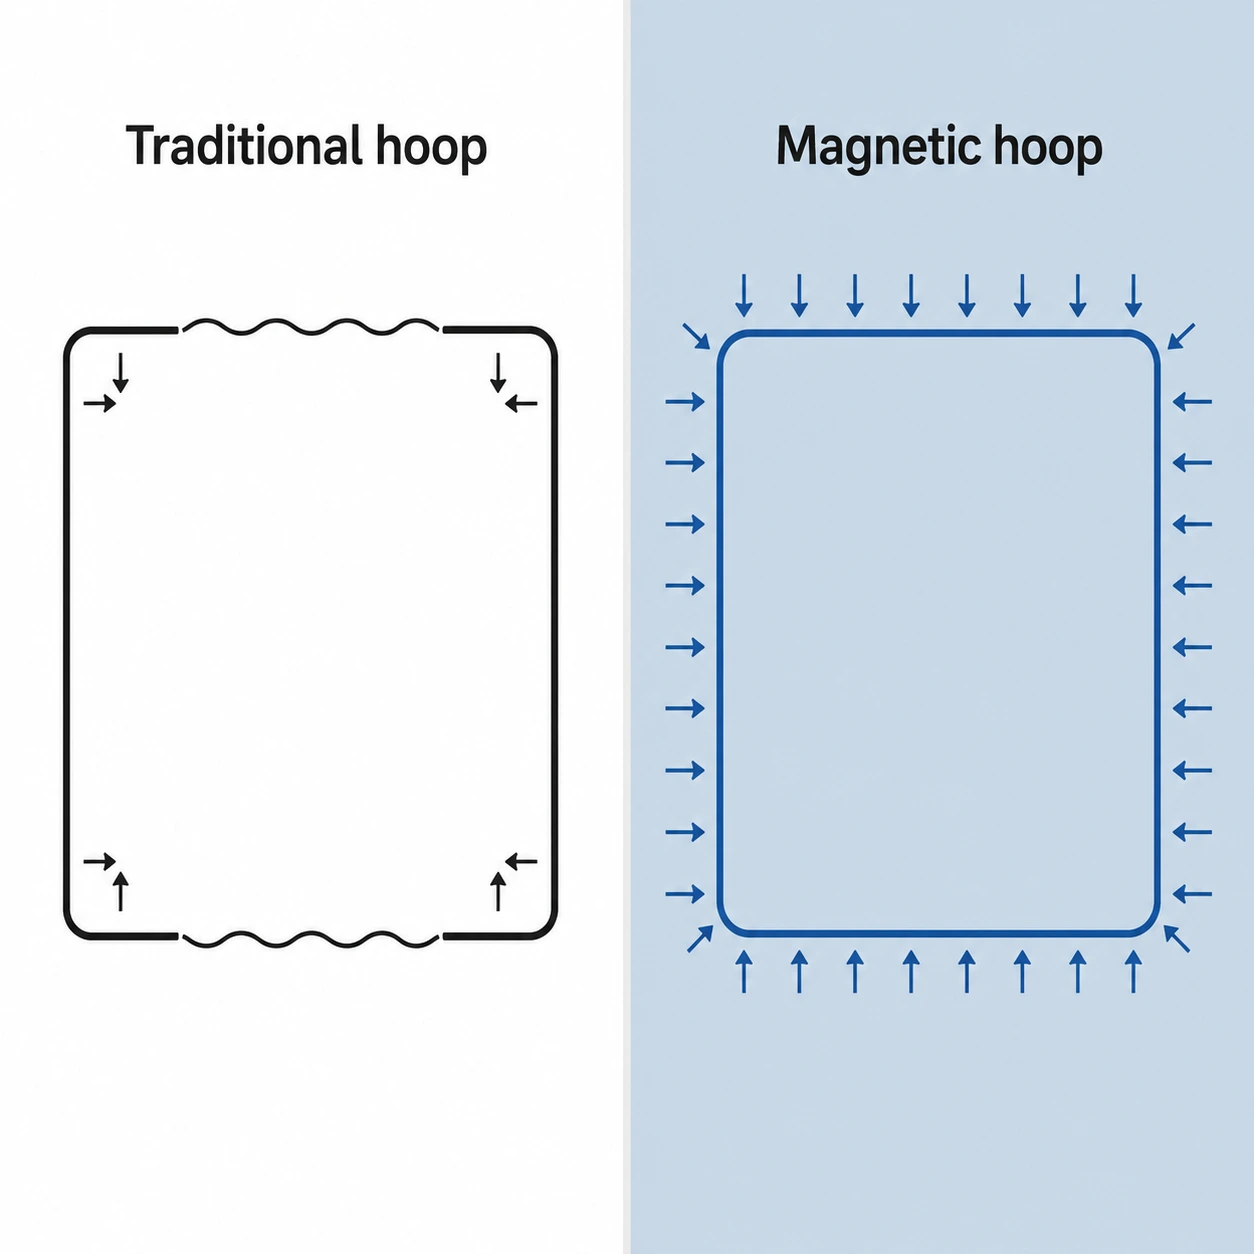 Uneven tension reads as inconsistency even when the position is correct. Puckering, distortion, and shifted registration all make a correctly placed logo look wrong. So consistent tautness, piece to piece and across different fabrics in a mixed run, is part of consistent placement.
The patented Mighty Hoop uses neodymium magnets that allow the hoop to grip with even tension across the entire hoop, every time, and they self-adjust to the thickness of the garment. That means a lightweight tee and a heavy jacket back both get held taut without the operator pre-tensioning anything or fighting a screw. Traditional and standard hoops rely on manual tensioning and can loosen along their long sides between the corners, which is where mid-run distortion creeps in.
Keep the roles of the two products clear when you build your system. Placement and repeatability are the HoopMaster station’s job, through its grid and fixtures. Even tension is the Mighty Hoop’s contribution. Both matter, and they solve different halves of the problem. We break down that distinction in our guide to HoopMaster vs Mighty Hoop, and you can see the hoop itself on our Mighty Hoop magnetic hoop page.
Prove the setup before the run and check it during
Even a well-documented, fixture-based setup should be proven before you commit a full batch. Stitch a first-article proof on the actual fabric you are running, in the actual colors, and get it approved by the customer. If possible, keep that approved sample at the workstation as the visible standard for the run.
Then check the first piece of the production run against the approved sample, and spot-check at intervals rather than waiting until the end. Catching a drift at piece three is a quick fix. Catching it at piece 200 is a reorder. This is standard quality-control practice in commercial decoration, and it is cheap insurance on a long run.
The first article also catches problems that look like placement errors but are not. If a design keeps distorting on a stretchy or high-nap fabric, the issue is often pull compensation, underlay, stabilizer choice, or digitizing issues, not the physical placement. There is no single universal recipe for every material, so the sample is where those problems surface before they scale across the run.
Keep placement consistent when the operator changes
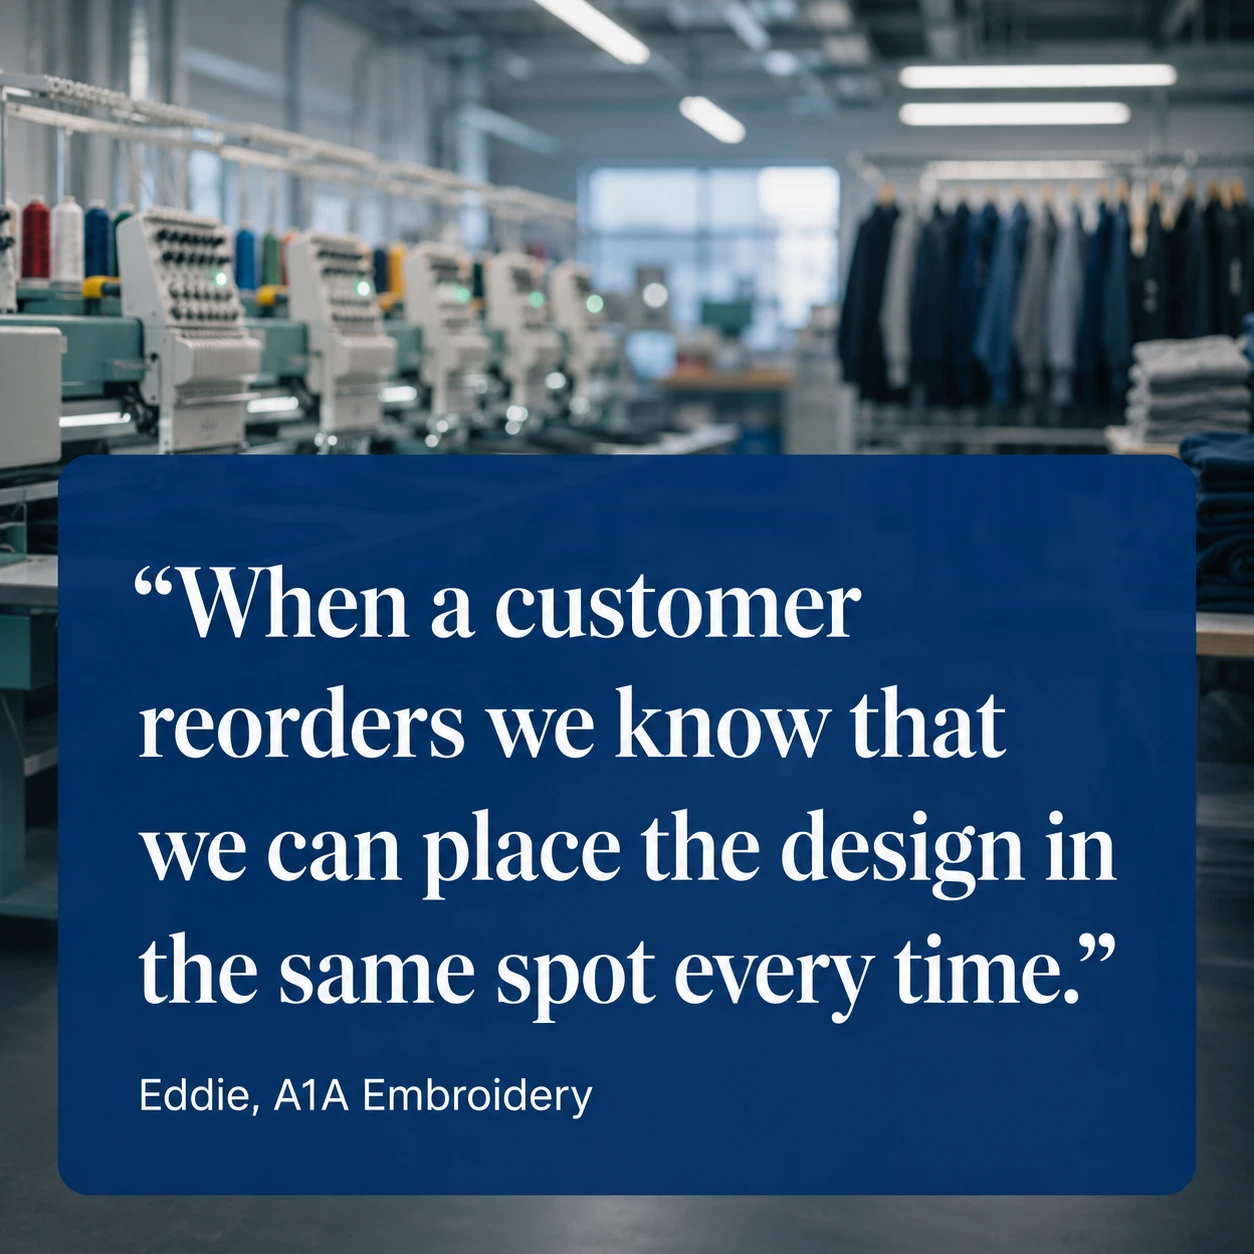 Staffing changes mid-run and reorders come back months later, often to a different operator. A documented, fixture-based system is what protects consistency through those handoffs. Because the placement lives in a recorded coordinate and a fixture setup rather than in one person’s habits, a new operator can reproduce the exact position and hoop accurately without a long ramp-up.
When you train operators, cover your shop placement standards, how to find and mark reference points, the hooping procedure, when to use a holding fixture, and how to run a first-article test. That shared standard is what lets any operator step onto a job and keep it matching the pieces that came before.
Frequently asked questions
How far down should a left chest logo sit?
For most adult tops, a left chest logo starts about 7 to 9 inches down from where the collar and the shoulder seam meet and 4 to 6 inches in from center front. Scale both numbers up as the garment size increases so the logo stays balanced.
How do you reproduce the same placement on a reorder?
Record the station grid coordinate, the fixture, and the station size used for each placement, and keep the approved digitized file and signed-off sample with the job. On the reorder, set the fixture back to the recorded coordinate rather than measuring the garment again.
Why does placement look inconsistent even when the measurements are right?
Sometimes a logo can appear crooked or out of place when you are simply holding the garment by the seams or laying it flat on a table. For a more accurate view of the logo placement, it is best to put the garment on a person or mannequin and see how it looks when worn.
Ready to make placement repeatable?
If you run repeat and bulk orders, a hooping system is what lets you reproduce that careful placement on demand. Our HoopMaster Station gives every operator a grid to document and repeat an exact position, and the Mighty Hoop makes the hooping process easy and keeps your tension even across the whole run. We started as a contract shop with your exact problem, so if you want help choosing the right station, fixtures, and hoop sizes for the garments you run most, our team is glad to walk through it with you. Give us a call at 262-257-0930 or reach out through our contact page, and we will help you build a setup that lands the design in the same spot every time. Happy Hooping!

0 comments
Write a comment