The World Leader In Commercial Embroidery Hooping Systems

Tag: Mighty Hoops

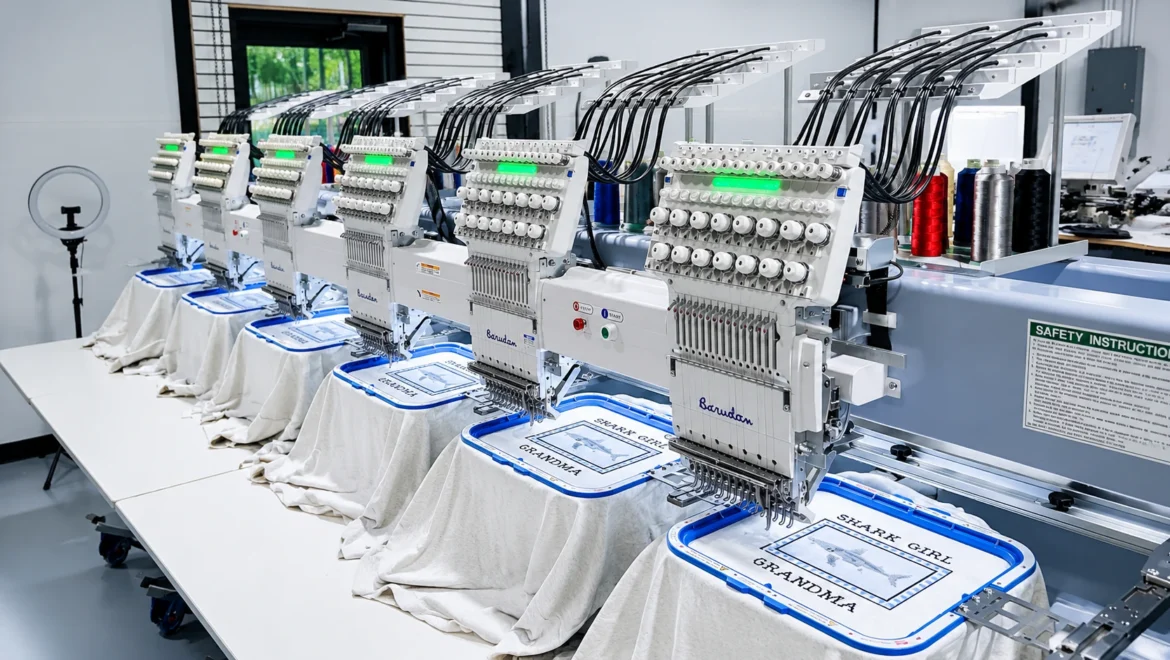
Multi-head commercial embroidery machine running matching logo placement across a production run
How-to's

How to Get Consistent Embroidery Placement Across a Production Run
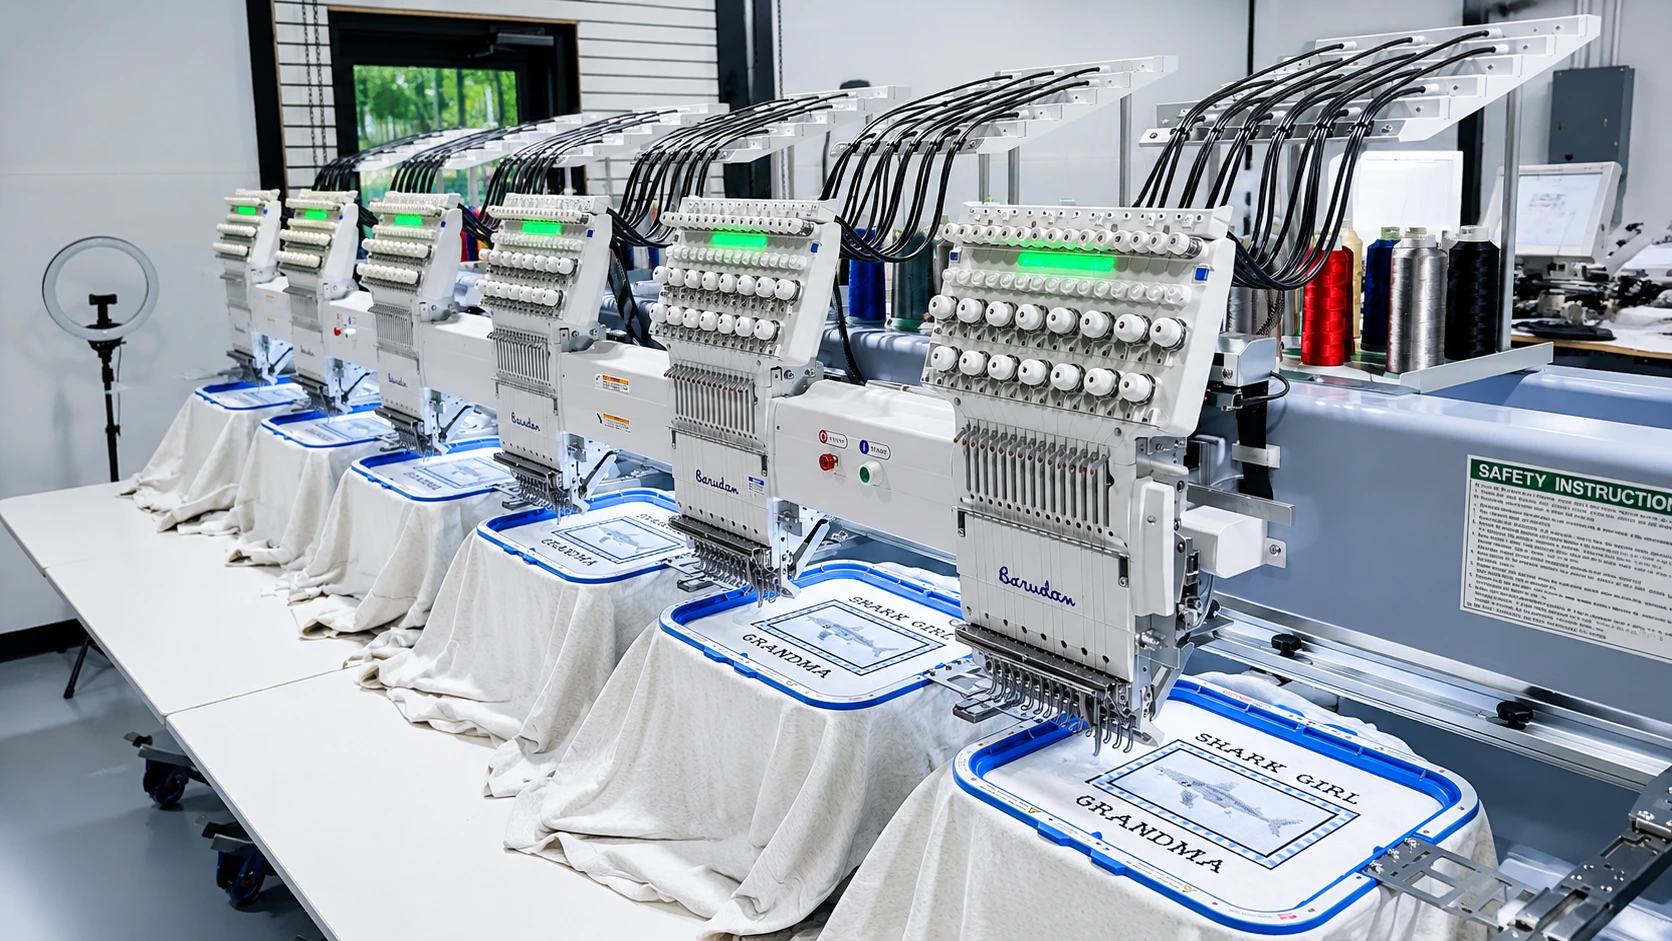
Multi-head commercial embroidery machine running matching logo placement across a production runPhoto provided by Beverly Bradley from www.shop1091.com

Getting the same logo in the same spot on every piece in a run comes down to a repeatable system, not careful measuring on each garment. Standardize the placement once from stable points on the garment, write that exact position down so anyone can reproduce it, and hoop every piece with a station and fixture that hold the design square in the same place. Keep the hooping tension even from the first piece to the last so nothing distorts out of registration.

At HoopMaster, we build the world’s number one selling commercial hooping system, used by embroiderers in more than 100 countries. We started out as a high-volume contract embroidery shop with this exact problem. We built the hooping station to solve our own placement bottleneck, then invented the magnetic Mighty Hoop to keep tension consistent piece to piece.

Why embroidery placement drifts across a production run
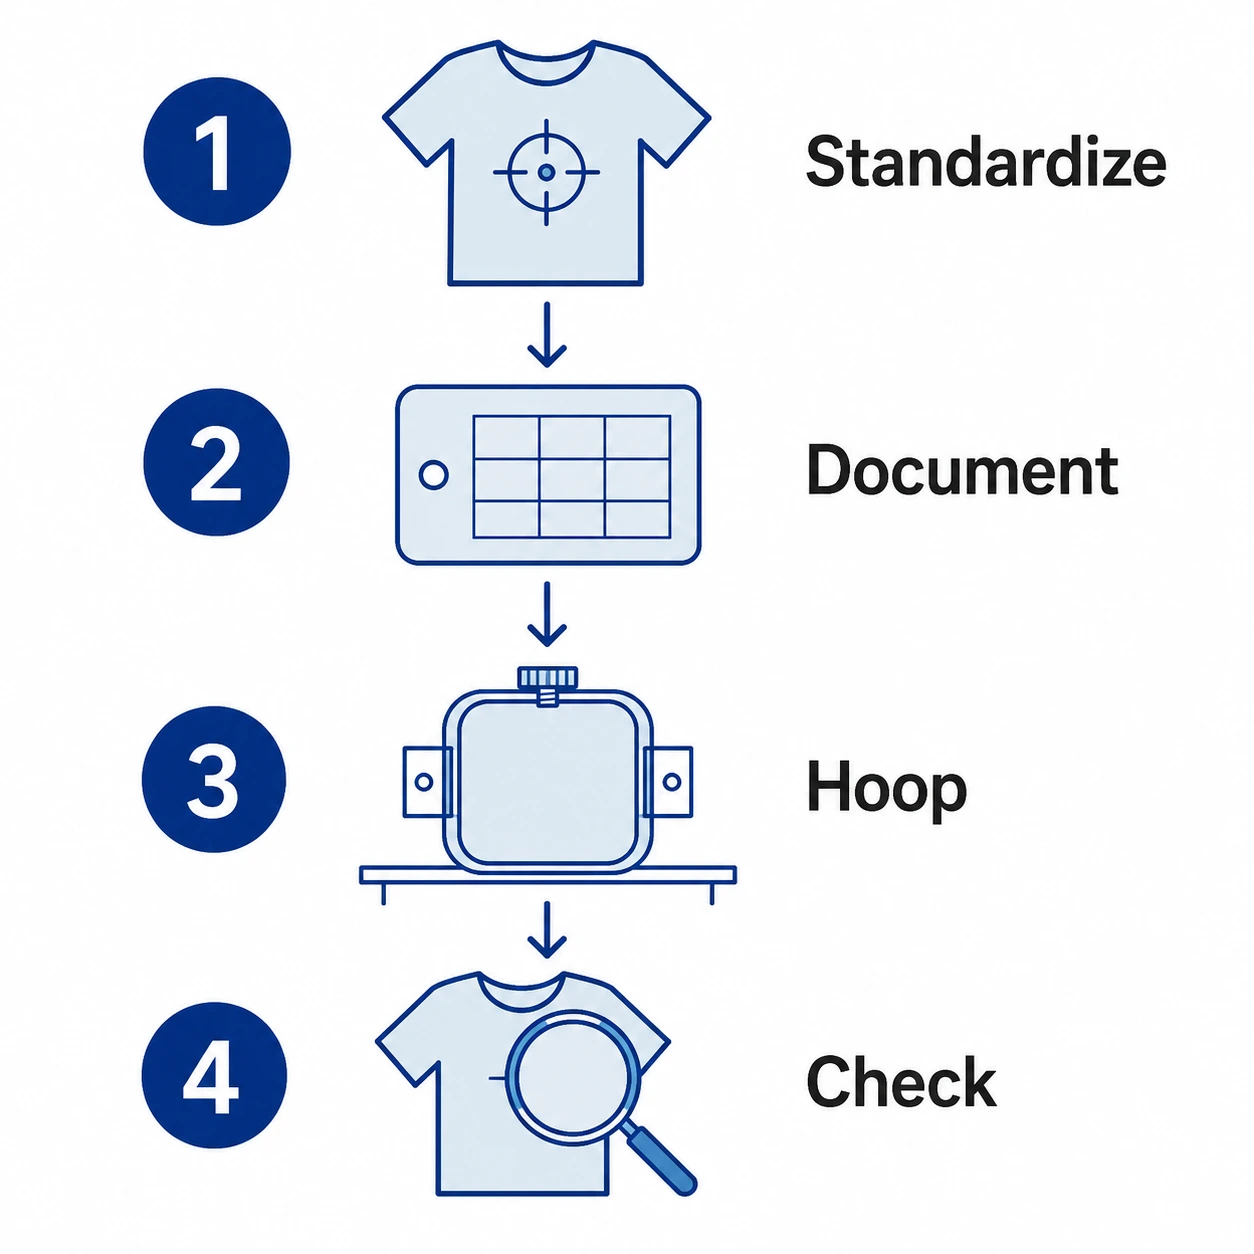
The problem is rarely that someone measured one shirt wrong. It is that the position was never locked down in a way the whole shop can repeat. A few things cause the drift:

  • Measuring and marking each garment by hand introduces small variations that stack up over a run.
  • Different operators read the artwork and the garment landmarks slightly differently, so the same job lands in slightly different places.
  • Reorders go wrong when the original position was never recorded and the operator who set it up is gone.
  • On multi-head machines, one setup mistake repeats across every head in the row instead of ruining a single piece.

Placement errors are also expensive. Every piece that is hooped in the wrong place becomes rework or scrap, and can cost you a reorder or a customer. Quality organizations classify these as internal and external failure costs, and in a production shop they add up quickly. Building the placement into a repeatable process is what keeps those costs from piling up.

Standardize placement from stable garment reference points

The first step is deciding the placement once, from points on the garment that stay consistent across the size range and across reorders. One option is to measure from where the neck seam and shoulder seam meet, and set your horizontal position from the true center front or the placket. If the garment doesn’t have a placket, find the center front by folding the garment in half and using that fold as your reference.

Avoid measuring from loose or unstable references like armholes, side seams, or a casual fold in the body. Those move around from garment to garment and from size to size, which is exactly the variation you are trying to remove.

Standard starting measurements for common placements
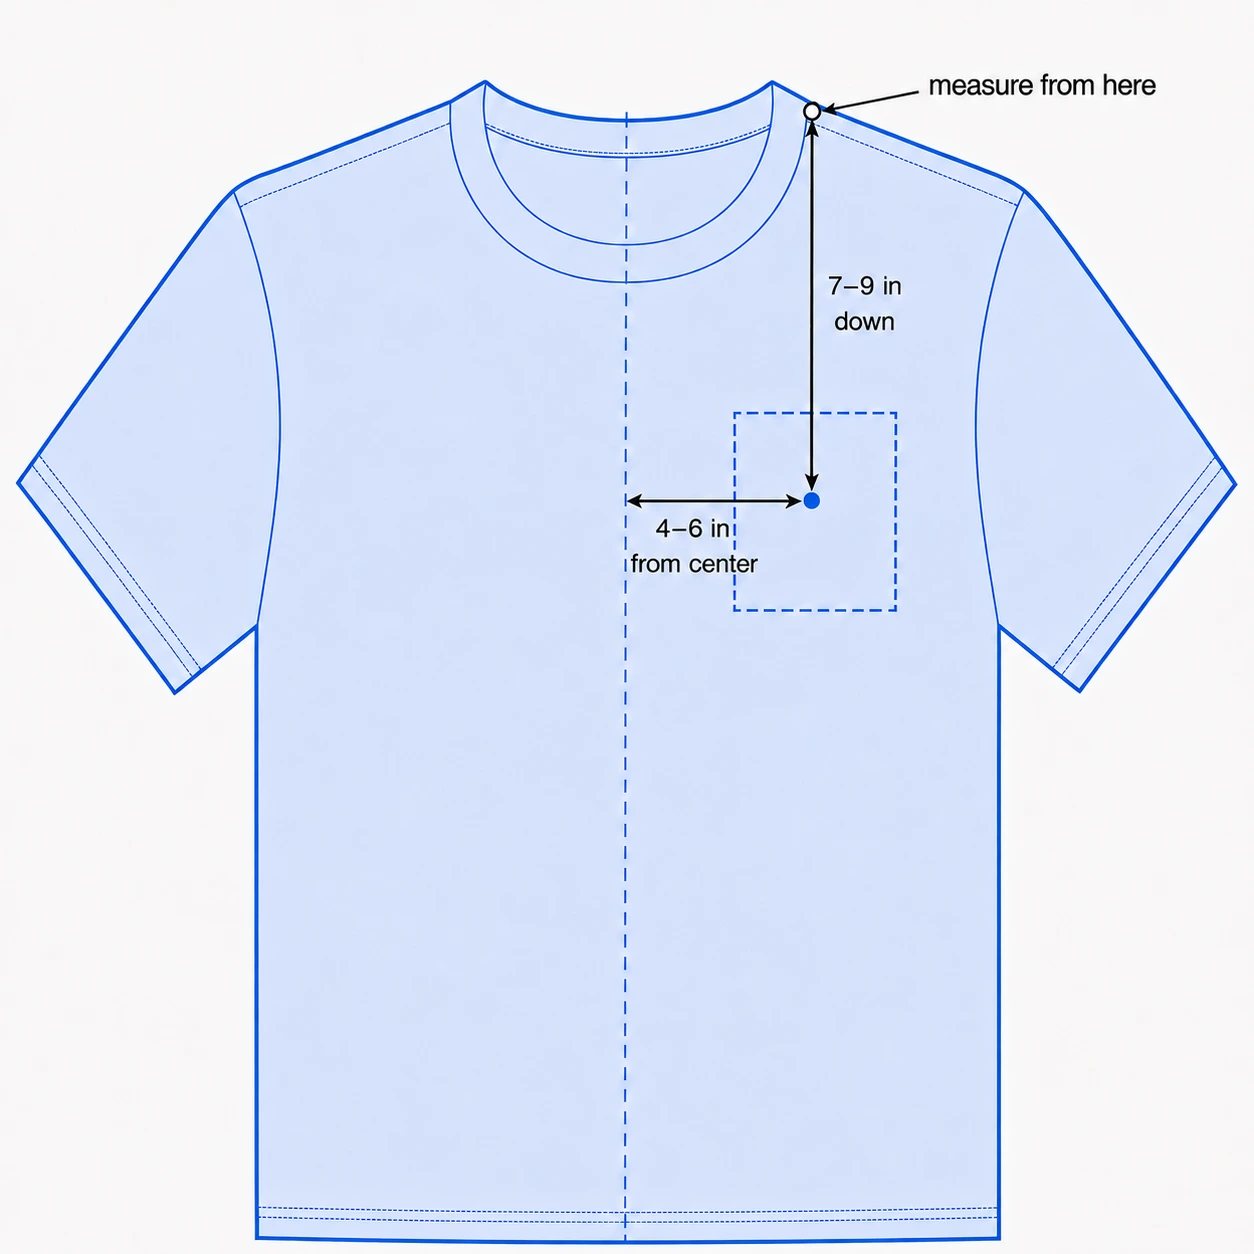
These are useful starting points for common placements, drawn from placement guidance of many sources in the industry. Treat them as a reference for building your own shop standard, not as fixed rules, and confirm the look with a full-size paper template before you commit to a run.

Placement Starting measurement Reference point
Left or right chest 7 to 9 inches down, 4 to 6 inches in From where the collar and the shoulder seam meet and the center of the garment
Center front 2 to 4 inches down From the neckline
Center back (tees and tops) 5 to 6 inches down From the back neck seam
Center back (hoodies, sweaters, jackets) 7 to 10 inches down From the back neck seam, varies with style and design size
Sleeve Centered, about 0.5 to 1 inch above the hem From the sleeve hem

Jacket and full-back placements vary the most, since the right position depends on the jacket style and how large the design is. For those, use the center seam and shoulder seams as your alignment references and prove the placement on a sample. You can find machine-manufacturer starting ranges in a published embroidery placement guide.

Scaling placement by garment size

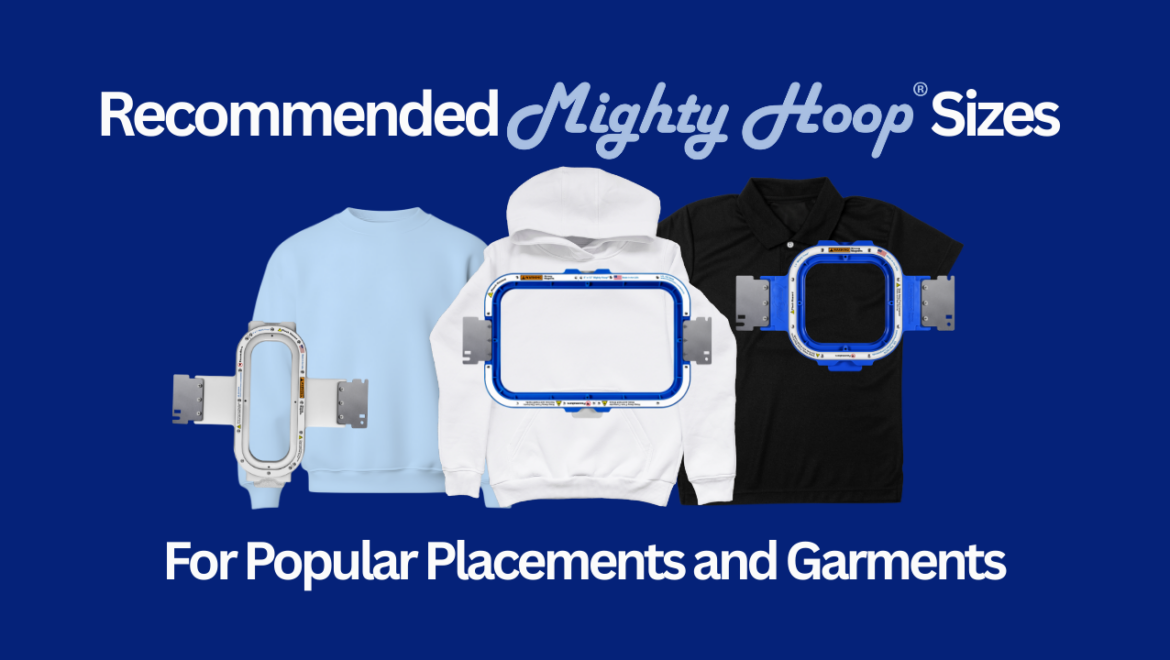
A single adult measurement will not stay balanced from Small through 3XL. As the garment gets larger, both the vertical drop and the horizontal position need to move so the logo stays visually centered on the chest. The reliable approach is to define the placement by garment class and size band, then document those numbers so every operator uses the same scale instead of eyeballing it. Our recommended Mighty Hoop sizes for popular placements and garments can help you match hoop sizes to those placements as you build the standard.

Document the placement so any operator can reproduce it
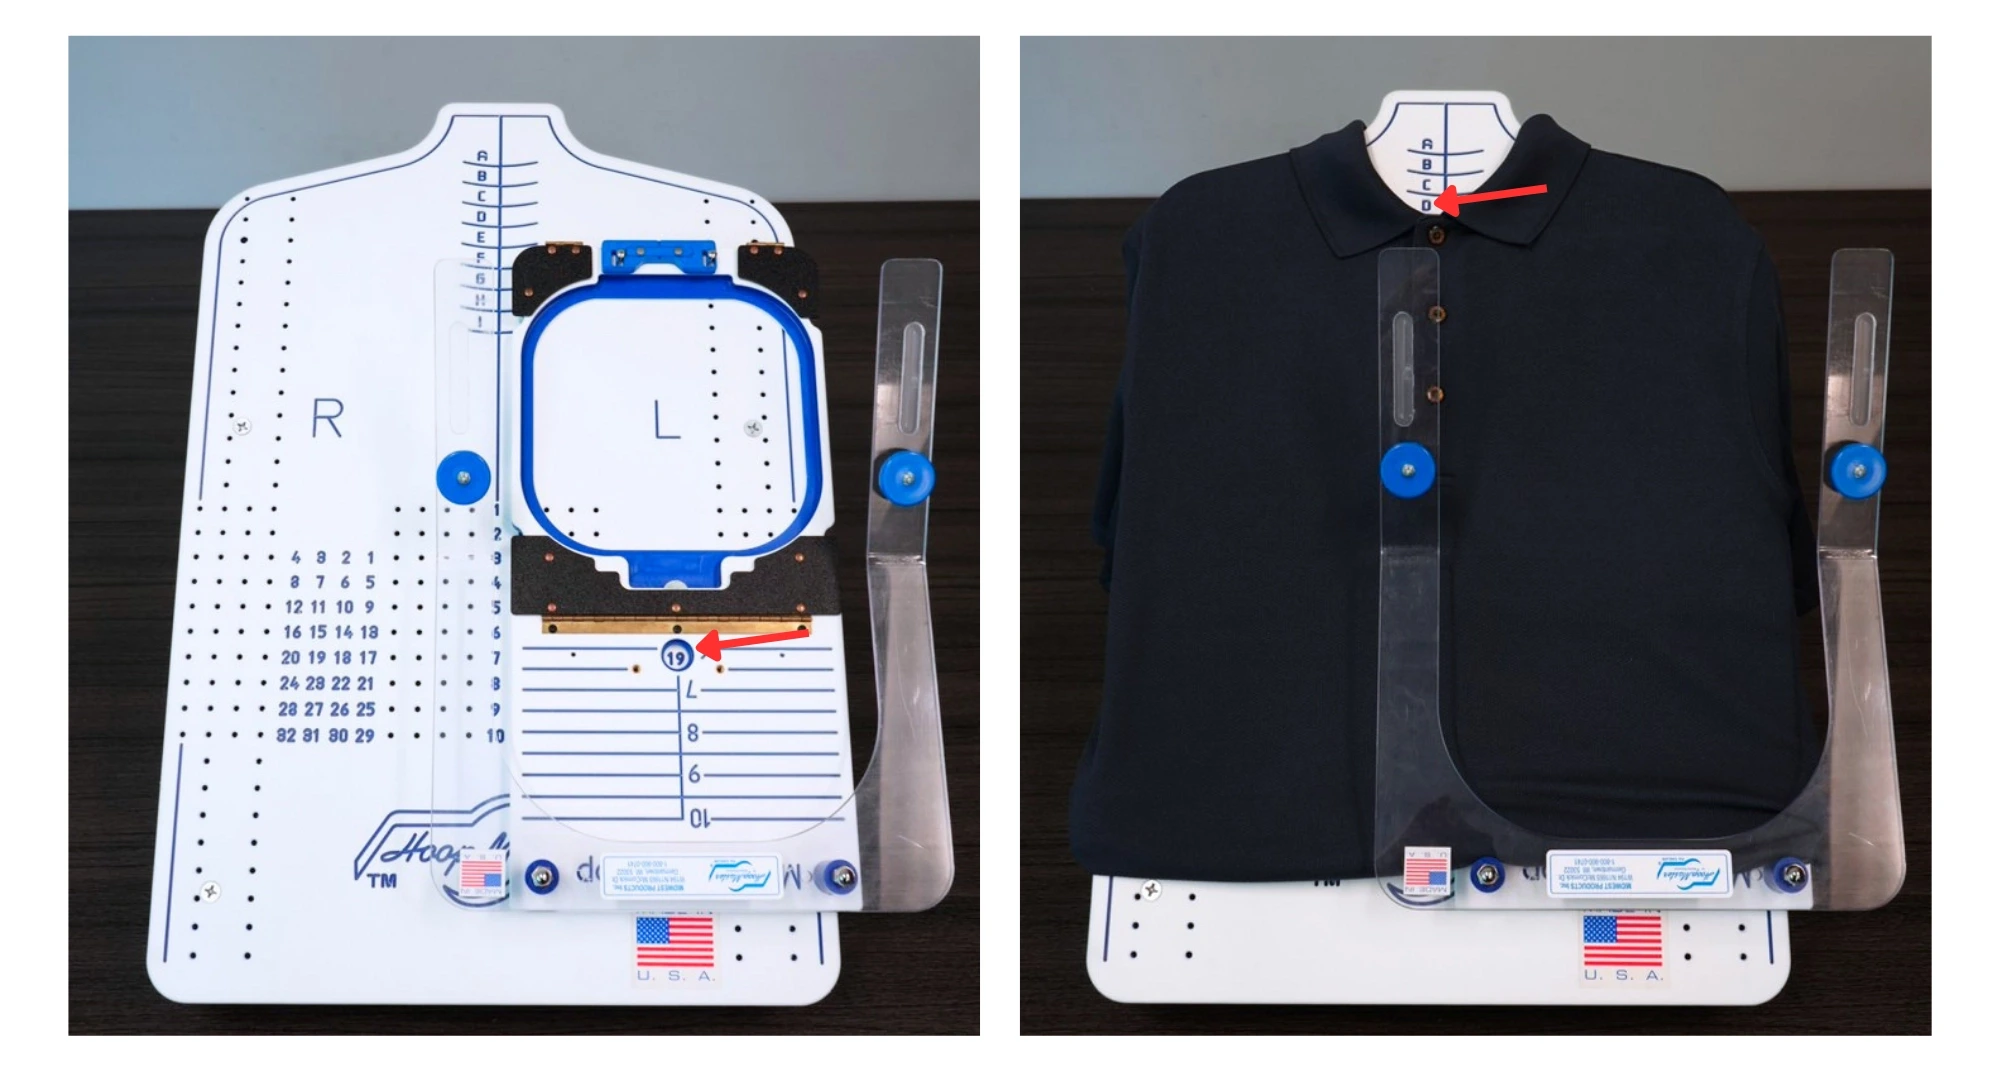
Once you have standardized a position, record it so it can be repeated without re-measuring the garment.

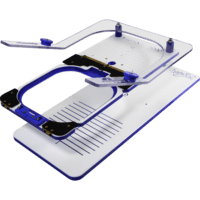
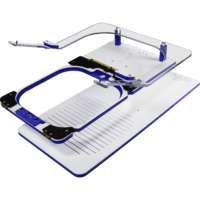
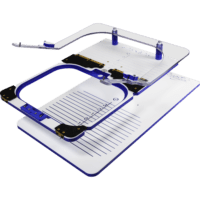
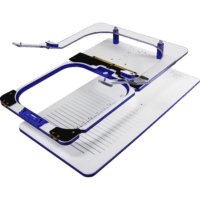
On a HoopMaster station, the work surface has a lettered and numbered grid. You note the coordinate where the fixture sits for a given design, garment type, and size, something like D19. Record that alongside the fixture and station size you used. On the next piece, or on a reorder six months later, any operator sets the fixture back to that recorded number and pulls the top of the shirt to the same letter making the placement consistent. There is no measuring and marking each garment.

Keep the rest of the job record with that coordinate so a reorder starts from the standard instead of from scratch:

  • The approved, digitized design file and the exact version used.
  • The signed-off first-article sample.
  • Thread colors by manufacturer number and name, since “blue” alone will not match on a reorder.
  • Garment style number and size.
  • The fixture, station size, and letter and number coordinate for each placement.

A job packet that travels with the order, holding the approved sample and these setup details, is a long-standing shop-management practice. It keeps the setup out of any one operator’s memory and in something the whole shop can follow. You can read more on the station side of this in our HoopMaster hooping station overview.

Embroiderers tell us this is what protects them on repeat work. As Eddie at A1A Embroidery put it, “We use the HoopMaster and have found it to be amazing for hooping. We have had other aids as well but have found this one to be the most fool proof. It adds consistency to all the jobs that we do. When a customer reorders we know that we can place the design in the same spot every time.”

Remove freehand variation from the hooping step

Documentation only holds up if the hooping itself is repeatable. If each garment is eyeballed and marked by hand, you reintroduce the variation you just designed out.

A hooping station with a fixture holds the hoop square to the work surface and directly over the lower ring, so the design lands in the same position every time instead of depending on how carefully each garment was marked. This is what makes the documented coordinate actually repeat. It also lowers the training barrier. A new or fill-in operator can learn to hoop accurately on their first day, because the station does the aligning instead of relying on years of practice.

Correct hooping is one of the biggest drivers of placement fidelity, and most misalignment traces back to it. Common causes include slack in the fabric, a hoop that is too large for the design, a missing stabilizer on thin or stretchy fabric, and loose frame-holder screws. Two habits reduce those problems: use the smallest hoop that comfortably fits the design, and hoop the garment cleanly rather than re-tightening it afterward.

Keep hooping tension consistent piece to piece
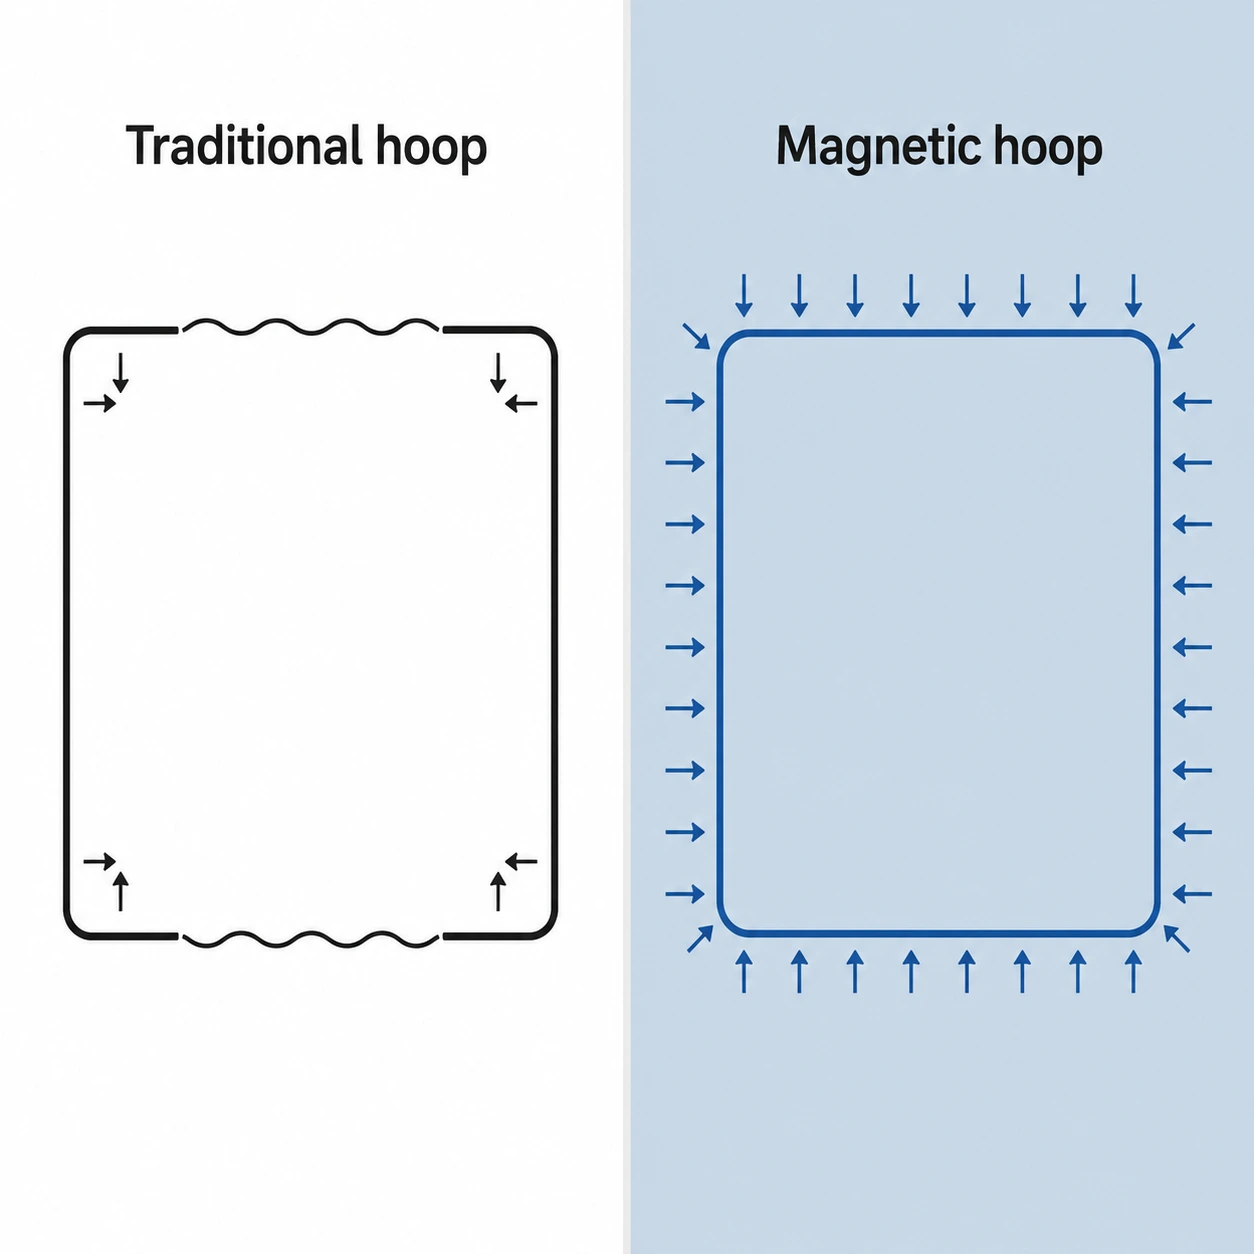
Uneven tension reads as inconsistency even when the position is correct. Puckering, distortion, and shifted registration all make a correctly placed logo look wrong. So consistent tautness, piece to piece and across different fabrics in a mixed run, is part of consistent placement.

The patented Mighty Hoop uses neodymium magnets that allow the hoop to grip with even tension across the entire hoop, every time, and they self-adjust to the thickness of the garment. That means a lightweight tee and a heavy jacket back both get held taut without the operator pre-tensioning anything or fighting a screw. Traditional and standard hoops rely on manual tensioning and can loosen along their long sides between the corners, which is where mid-run distortion creeps in.

Keep the roles of the two products clear when you build your system. Placement and repeatability are the HoopMaster station’s job, through its grid and fixtures. Even tension is the Mighty Hoop’s contribution. Both matter, and they solve different halves of the problem. We break down that distinction in our guide to HoopMaster vs Mighty Hoop, and you can see the hoop itself on our Mighty Hoop magnetic hoop page.

Prove the setup before the run and check it during

Even a well-documented, fixture-based setup should be proven before you commit a full batch. Stitch a first-article proof on the actual fabric you are running, in the actual colors, and get it approved by the customer. If possible, keep that approved sample at the workstation as the visible standard for the run.

Then check the first piece of the production run against the approved sample, and spot-check at intervals rather than waiting until the end. Catching a drift at piece three is a quick fix. Catching it at piece 200 is a reorder. This is standard quality-control practice in commercial decoration, and it is cheap insurance on a long run.

The first article also catches problems that look like placement errors but are not. If a design keeps distorting on a stretchy or high-nap fabric, the issue is often pull compensation, underlay, stabilizer choice, or digitizing issues, not the physical placement. There is no single universal recipe for every material, so the sample is where those problems surface before they scale across the run.

Keep placement consistent when the operator changes
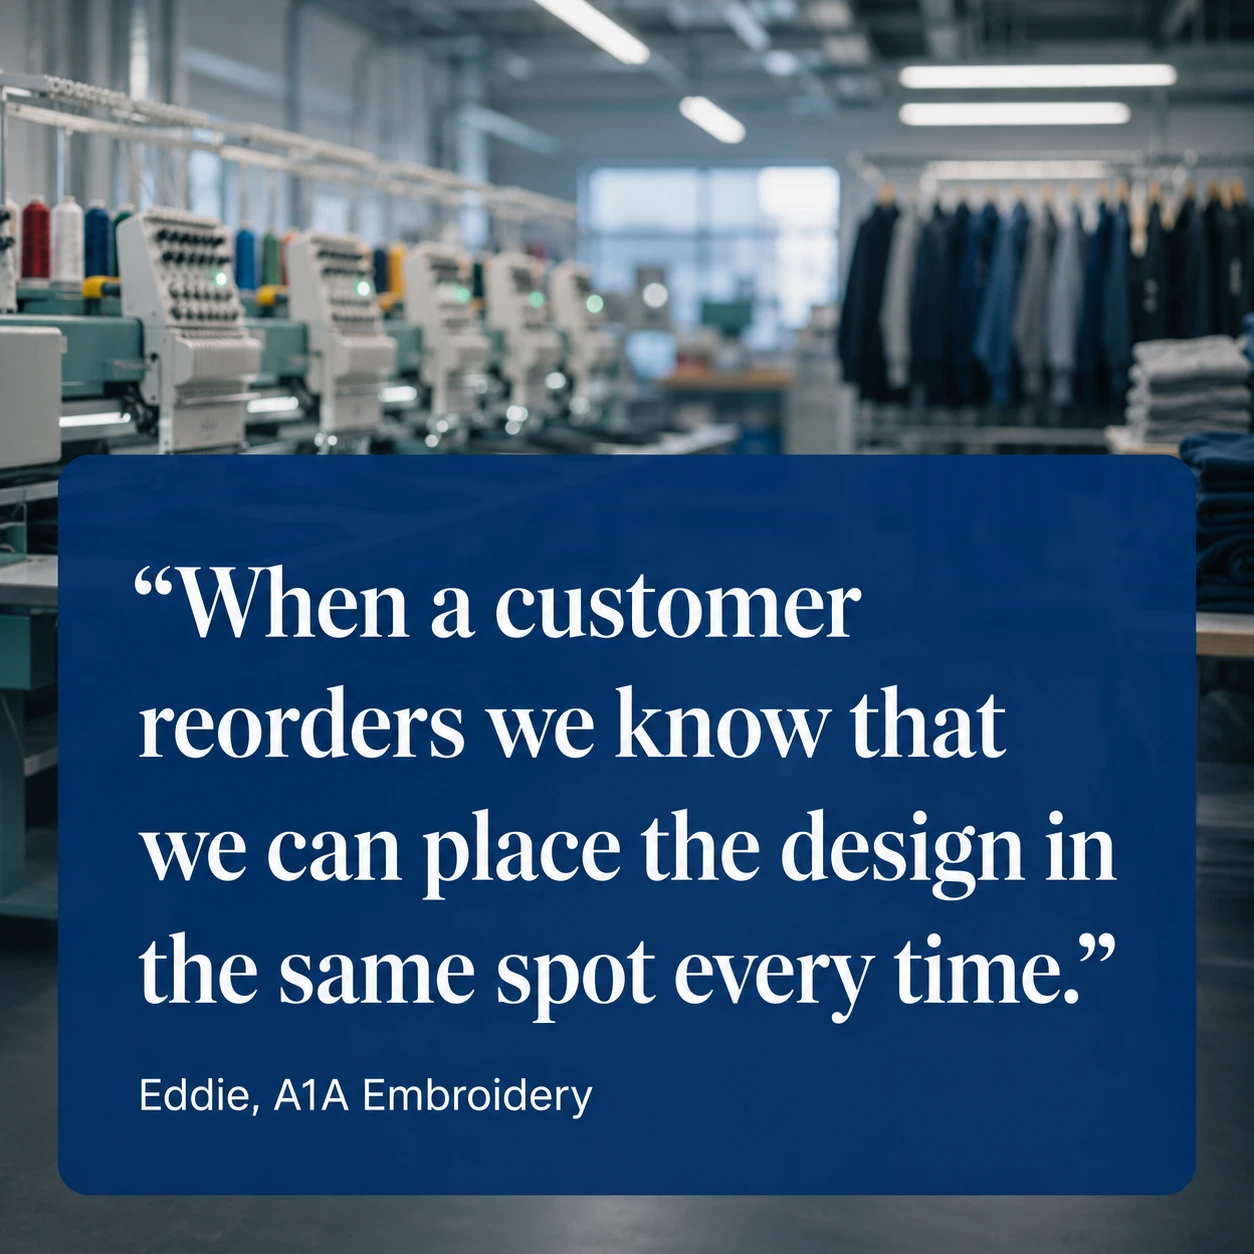
Staffing changes mid-run and reorders come back months later, often to a different operator. A documented, fixture-based system is what protects consistency through those handoffs. Because the placement lives in a recorded coordinate and a fixture setup rather than in one person’s habits, a new operator can reproduce the exact position and hoop accurately without a long ramp-up.

When you train operators, cover your shop placement standards, how to find and mark reference points, the hooping procedure, when to use a holding fixture, and how to run a first-article test. That shared standard is what lets any operator step onto a job and keep it matching the pieces that came before.

Frequently asked questions

How far down should a left chest logo sit?

For most adult tops, a left chest logo starts about 7 to 9 inches down from where the collar and the shoulder seam meet and 4 to 6 inches in from center front. Scale both numbers up as the garment size increases so the logo stays balanced.

How do you reproduce the same placement on a reorder?

Record the station grid coordinate, the fixture, and the station size used for each placement, and keep the approved digitized file and signed-off sample with the job. On the reorder, set the fixture back to the recorded coordinate rather than measuring the garment again.

Why does placement look inconsistent even when the measurements are right?

Sometimes a logo can appear crooked or out of place when you are simply holding the garment by the seams or laying it flat on a table. For a more accurate view of the logo placement, it is best to put the garment on a person or mannequin and see how it looks when worn. 

Ready to make placement repeatable?

If you run repeat and bulk orders, a hooping system is what lets you reproduce that careful placement on demand. Our HoopMaster Station gives every operator a grid to document and repeat an exact position, and the Mighty Hoop makes the hooping process easy and keeps your tension even across the whole run. We started as a contract shop with your exact problem, so if you want help choosing the right station, fixtures, and hoop sizes for the garments you run most, our team is glad to walk through it with you. Give us a call at 262-257-0930 or reach out through our contact page, and we will help you build a setup that lands the design in the same spot every time. Happy Hooping!
General

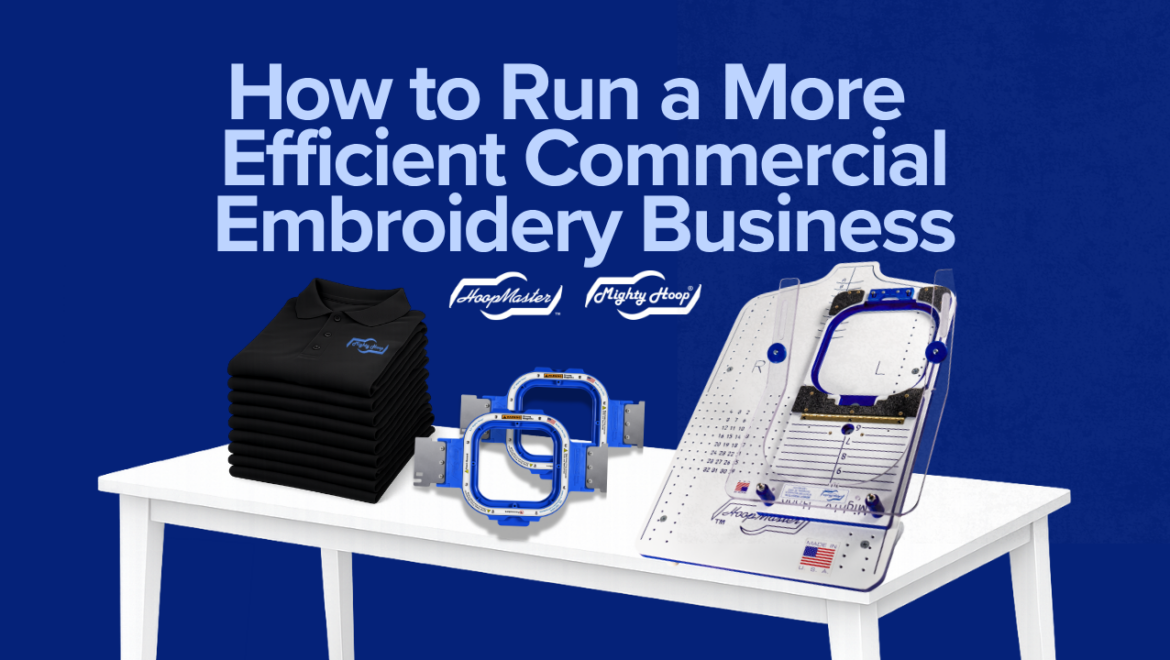
How to Run a More Efficient Embroidery Business

Running an efficient embroidery business requires the right balance of quality, speed, and consistency. As your embroidery production or business grows, maintaining accurate embroidery placement while improving workflow becomes essential. Even experienced embroidery shops can boost productivity with small changes to their daily processes.

These embroidery business tips will help you improve efficiency, reduce mistakes, and create consistent, high-quality results.

Increase Embroidery Efficiency with Magnetic Hoops

Reducing embroidery mistakes is critical for improving profitability. Traditional hooping methods can be time-consuming, and using a single hoop can slow down production. Mistakes often result in wasted garments, costing time and money.

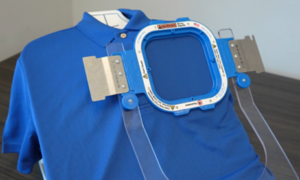
Magnetic hoops, such as Mighty Hoops, simplify embroidery hooping, enabling faster, more consistent results with less physical effort. This helps reduce errors, improve workflow, and increase overall embroidery efficiency.

Additionally, Mighty Hoops help minimize hoop burn on garments, which saves time that would otherwise be spent fixing marks or redoing items.

Maintain Consistent Embroidery Placement

Consistent embroidery placement is one of the most important factors in delivering professional results. Customers and business prospects notice alignment issues, whether in close-up photos used for social media and advertising, or in person.

Using a professional embroidery hooping system can dramatically improve accuracy. The HoopMaster System, when paired with Mighty Hoops, allows embroiderers to achieve fast, consistent, and repeatable placement. Built-in alignment guides, such as engraved numbers, letters, and lines, make it easy to document placement and eliminate the need for manual measuring and marking.

For even better results, keep a placement log or digital file for repeat orders. This ensures every embroidered garment meets the same standard every time. If you need help getting started with placement, click here for placement guides.

Learn Embroidery Techniques and Improve Hooping Skills

Continuous learning is key to running a successful embroidery business. Whether you’re a beginner or an experienced embroiderer, improving your hooping techniques and embroidery skills can increase efficiency and reduce costly errors.

The HoopMaster-MightyHoop YouTube Channel is a great resource to help you learn how to hoop or look for new embroidery ideas. You will find hooping tutorials and embroidery shorts with tips and tricks to help you with your embroidery hooping process.

Taking time to learn new embroidery techniques, understand different fabrics, and refine placement methods will help you handle a wider range of orders with confidence.

Use Multiple Hoops to Speed Up Production

If you run multiple embroidery machine heads or handle large embroidery orders, using multiple hoops can significantly improve your workflow. While one garment is being stitched, you can hoop the next item using another hoop.

This reduces downtime, keeps your embroidery machines running efficiently, and helps you complete jobs faster. Optimizing your embroidery production workflow in this way is essential for scaling your business.

Build Consistent Systems and Strong Habits

A successful embroidery business depends on more than just equipment. It also requires discipline and consistent systems. Organized workflows and repeatable processes ensure that every order meets your quality standards.

By building strong habits, documenting processes, and maintaining an efficient production system, you can improve turnaround times, reduce stress, and grow your embroidery business with confidence.

Final Throughts on Improving Your Embroidery Business

Improving embroidery efficiency doesn’t require a complete overhaul of your shop. Small changes like upgrading your hooping system, refining your workflow, and continuing to learn can make a significant impact.

Ready to upgrade your embroidery business with Mighty Hoop and HoopMaster? Click here.
Recommended Mighty Hoop Sizes
General

Recommended Mighty Hoop Sizes for Popular Placements and Garments

Whether you’re stitching a small logo or a large back design, choosing the right Mighty Hoop can make embroidery smoother and more efficient. That’s why we created this guide outlining our recommended Mighty Hoop sizes for popular placements and garments.

Note: Magnetic Hoops are compatible with tubular embroidery machines. Be sure to confirm your machine’s compatibility before purchasing. The recommendations in this guide are based on popular usage. Your specific Mighty Hoop needs may vary. Also, keep in mind that your design size should be approximately 1” smaller than the size of your hoop.

Mighty Hoop Size Recommendations by Placement:

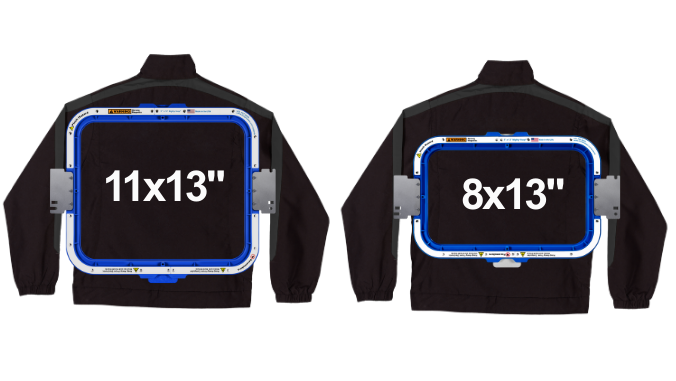
Full Back/ Jacket Back
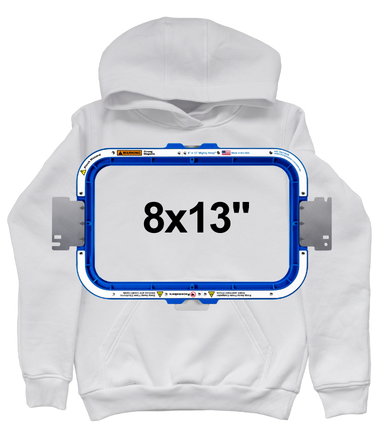
Full back embroidery is commonly used on the back of sweatshirts and jackets for larger designs. Mighty Hoops, such as the 8 x 13” or the 11 x 13”, provide adequate sewing area for large embroidery.
Recommended Mighty Hoop Sizes: 8 x 13″, 11 x 13″

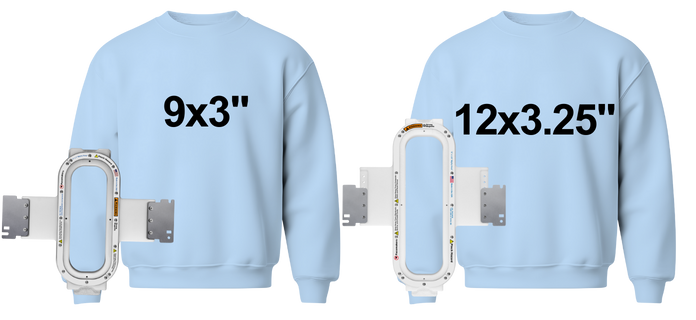
Sleeves
Sleeve embroidery typically involves narrow design areas that require slimmer hoops like the 9 x 3” and 12 x 3.25” Mighty Hoop. Choosing the right magnetic hoop size helps prevent sleeves from stretching. Smaller Mighty Hoops also allow room for the bobbin arm to move freely. For best results, we recommend using a Backing Holder to help keep the stabilizer in place while hooping.
Recommended Mighty Hoop Sizes: 9 × 3″, 12 × 3.25″

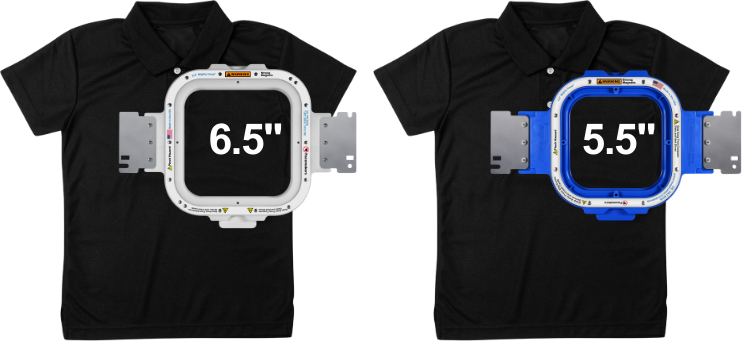
Left or Right Chest
Left and right chest placements are among the most popular embroidery locations for polos, shirts, and sweatshirts. The average left chest design size is between 3″ – 4.5″, making the 5.5” or 6.5″ Mighty Hoop the perfect size for this application.
Recommended Mighty Hoop Size: 5.5”, 6.5″


Mighty Hoop Size Recommendations by Garment:

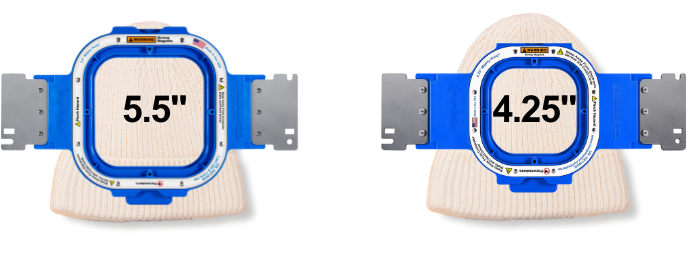
Beanie
Typically, embroidery designs on beanies are smaller. Using the smallest hoop possible for your design guarantees taut tension while not over stretching the beanie which can cause design distortion. The 4.25″ and 5.5″ Mighty Hoops are the most preferred sizes by embroiderers for beanies.
Recommended Mighty Hoop Sizes: 4.25″, 5.5″

Sweatshirts and Hoodies
Sweatshirts and hoodies are popular for larger embroidery designs. The 8×13″ Mighty Hoop is a great size for these designs, including the very popular applique designs.
Recommended Mighty Hoop Size: 8 × 13″


Youth Shirts
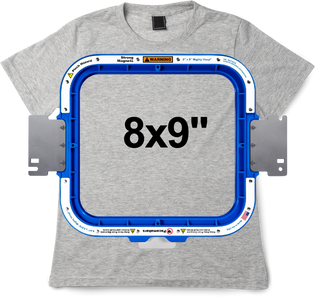
Youth garments require hoop sizes that match smaller embroidery areas while maintaining proper tension. Using the correct size helps reduce bunching and improves stitch quality. The 8×9″ Mighty Hoop works great with toddler and youth sizes. If you are embroidering infant and newborn shirts, we would recommend the 5.5″ or 7.25″ Mighty Hoop to prevent stretching.
Recommended Mighty Hoop Size: 8 × 9″

Bodysuits
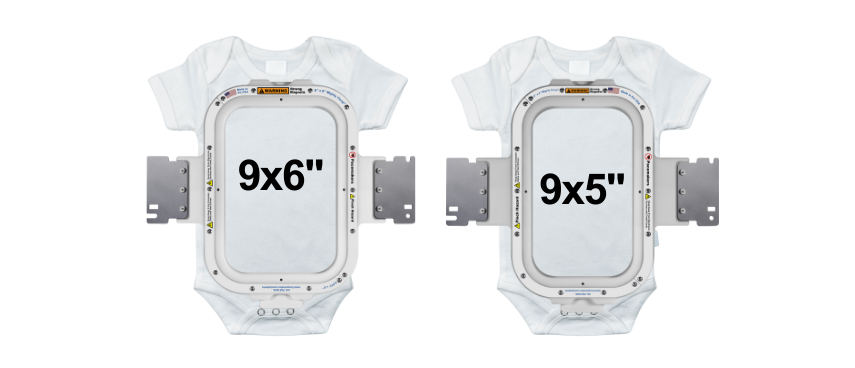
Bodysuits feature smaller embroidery widths but offer the opportunity for longer designs. The 9×5″ and 9×6″ Mighty Hoops both allow plenty of space for your creative infant and young toddler designs. Smaller Mighty Hoop sizes allow for accurate placement and accurate stitching without distorting the garment.
Recommended Mighty Hoop: 9×5”, 9×6″

Choosing the right Mighty Hoop size is very important. The right magnetic hoop size will help you obtain clean, consistent embroidery results, while also making the hooping process easier. Remembering to choose the embroidery hoop closest to your design size will help eliminate puckering, uneven tension, and distorted stitches. This guide was designed to help guide you in choosing the correct size Mighty Hoop for your design placement and garment. We offer a variety of magnetic Mighty Hoop sizes to fit your individual needs.

If you’re interested in exploring additional Mighty Hoop sizes or need help confirming machine compatibility, please contact us. If you are interested in embroidery design placement guides when using the HoopMaster Hooping System, click here.

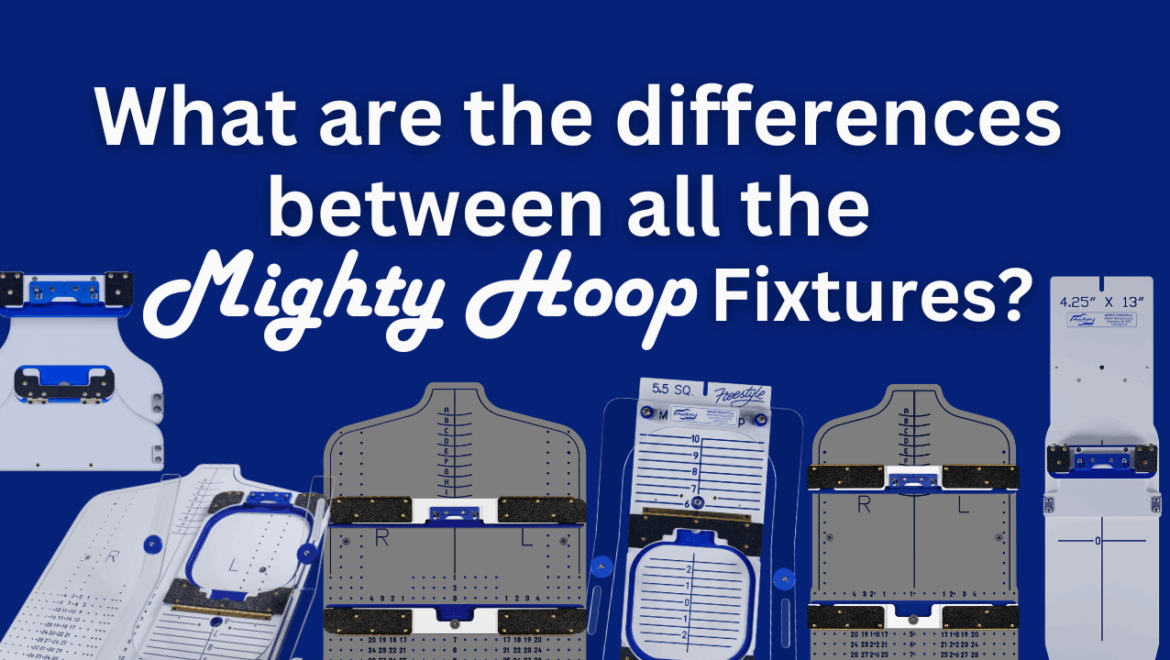
What are the differences between all the Mighty Hoop Fixtures?
General

Which Mighty Hoop Fixture Do You Need for Embroidery?

Why are they helpful and what are the options?

When it comes to embroidery, getting your items hooped easily, accurately, and consistently can make all the difference. That’s where Mighty Hoop Fixtures come in. HoopMaster Fixtures for Mighty Hoops have many key features that aid in the embroidery hooping process.

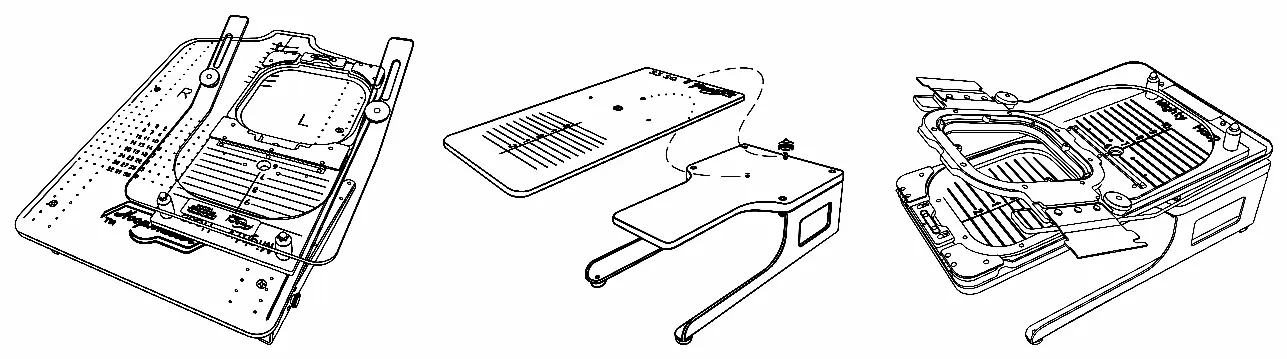
These features include magnetic backing holder flaps to securely hold your stabilizer, the patented Blue Clip to secure your magnetic Mighty Hoop in the Fixture while adjusting your garment, and lines and numbers for alignment and repeat placement.

If you’ve ever wondered why there are so many different Fixture sizes (and which one is best for your embroidery business, you’re in the right place!

Here’s the scoop

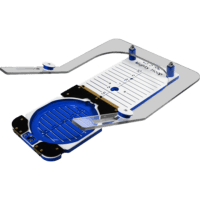
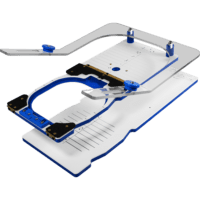
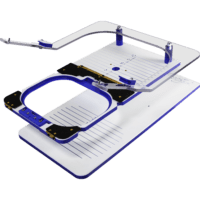
Every magnetic Mighty Hoop Fixture size (with a few exceptions we’ll talk about below) comes with the Fixture itself and the FreeStyle Arm. You can use the Fixture with the FreeStyle Arm and attach it to the Portable Mounting Base.

This setup is great for hooping smaller items like tote bags, infant and toddler items, beanies, backpacks, and more! All Fixture sizes with a FreeStyle Arm fit on the Portable Mounting Base.

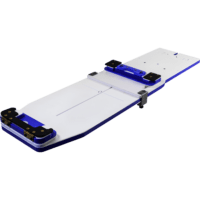
You can also use the Fixture without the FreeStyle Arm by removing it from the FreeStyle Arm, flipping it upside down and placing it on any of our HoopMaster Stations. (The Standard Station is the most common and is included in most Kits.)

Paired with one of our Stations, the Fixture allows you to hoop left and right chest and center front and back designs with ease. You can place the Fixtures anywhere within the Station holes, so placement possibilities are endless.

With all these options, how do you know which Mighty Hoop Fixture is right for you? Let’s break down each size and its most common uses.


Mighty Hoop Fixtures


4.375” Mighty Hoop Fixture

  • This Fixture does NOT come with a FreeStyle Arm.
  • This Fixture is placed directly onto the Portable Mounting Base.
  • Compatible only with the 4.375” Mighty Hoop, a lighter strength magnetic hoop. This hoop can handle items like a lightweight sweatshirt or thinner. 
  • 4.375" Fixture

    4.375″ Fixture

    $175.00
    Add to cart

4.25” Mighty Hoop Fixture

  • Includes the FreeStyle Arm for use on the Portable Mounting Base.
  • Works exclusively with the 4.25” Mighty Hoop.
  • Perfect for smaller embroidery designs or monograms on infant and toddler clothing, backpack pockets, small purses, napkins, and more.
  • 4.25" Mighty Hoop Fixture

    4.25″ Mighty Hoop Fixture

    $206.00
    Add to cart

4×6” Mighty Hoop Fixture

  • Includes the FreeStyle Arm for the Portable Mounting Base.
  • Compatible only with the 4×6” Mighty Hoop.
  • Great size for backpacks, pouches, toddler and youth shirts, and towels.
  • 4x6" Mighty Hoop Fixture

    4×6″ Mighty Hoop Fixture

    $231.00
    Add to cart

5.5” Mighty Hoop Fixture

  • Comes with the FreeStyle Arm for use on the Portable Mounting Base.
  • Compatible only with the 5.5” Mighty Hoop.
  • The most popular size for left and right chest designs! Ideal for standard corporate logos, and smaller embroidery monogram projects. (Included in our Kits)
  • 5.5" Mighty Hoop Fixture

    5.5″ Mighty Hoop Fixture

    $206.00
    Add to cart

6.5” Mighty Hoop Fixture

  • Includes the FreeStyle Arm for pairing with the Portable Mounting Base.
  • Fits the 6.5” Mighty Hoop only.
  • Another go-to size for left/right chest designs. When an embroidery design exceeds the standard logo design size, this Fixture is helpful. It is also a great size for infant bodysuits, larger monograms, and center chest designs on youth garments.
  • 6.5" Mighty Hoop Fixture

    6.5″ Mighty Hoop Fixture

    $231.00
    Add to cart

6.25×8.25” Mighty Hoop Fixture

  • Comes with the FreeStyle Arm to use on the Portable Mounting Base.
  • Works with the 6.25×8.25” Mighty Hoop.
  • Perfect for 5×7” embroidery designs on sweatshirts, crewnecks, youth shirts, or tote bags.
  • 6.25x8.25" Mighty Hoop Fixture

    6.25×8.25″ Mighty Hoop Fixture

    $231.00
    Add to cart

7.25” Mighty Hoop Fixture

  • Includes the FreeStyle Arm for the Portable Mounting Base.
  • Compatible with the 7.25” Mighty Hoop.
  • The perfect size for larger monogram embroidery designs on towels, totes, and youth shirts.
  • 7.25" Mighty Hoop Fixture

    7.25″ Mighty Hoop Fixture

    $231.00
    Add to cart

What are the Adjustable Fixtures?

By now, you might be thinking: “Wait a second… Isn’t there a Fixture that will fit all my magnetic Mighty Hoop sizes?” Fear not! 

For many embroiderers, one size Fixture is all they’ll ever need because they focus on a specific style of embroidery, like many contract embroiderers do. But if you work with a variety of garments and design sizes, our Mighty Hoop Adjustable Fixtures might just be the perfect option for you. 

The Adjustable Fixture slides onto the HoopMaster Station and adjusts to hold multiple sized Mighty Hoops. (All Mighty Hoops with a depth of 14” or less fit on the Standard Station Adjustable Fixture.) 

An important note: Adjustable Fixtures are for center hooping only. They do not allow left or right chest positioning like the size-specific Fixtures above. Be sure to order the corresponding Adjustable Fixture size for the Station size you have. Station Adjustable Fixtures are not universal for the different Station Sizes. For example: The Standard HoopMaster Station would require the Standard Station Adjustable Fixture, and the Infant Station would require the Infant Station Adjustable Fixture.

  • Infant Station Adjustable Fixture

    Infant Station Adjustable Fixture

    $95.00
    Add to cart
  • Medium Station Fixture

    Medium Station Adjustable Fixture

    $94.00
    Add to cart
  • Standard Station Fixture

    Standard Station Adjustable Fixture

    $125.00
    Add to cart
  • XL Station Adjustable Fixture

    XL Station Adjustable Fixture

    $125.00
    Add to cart

Finally, let’s talk about the Adjustable FreeStyle Fixture. This tool works much like the Fixtures with the FreeStyle Arm but isn’t tied to one specific Mighty Hoop size. It attaches to the Portable Mounting Base and adjusts to fit almost any Mighty Hoop 13” tall and under. (It is not compatible with the 4.375” round Mighty Hoop.)

Adjustable FreeStyle Fixture

  • Attaches to the Portable Mounting Base and adjusts to fit most Mighty Hoops 13” tall and under (except the 4.375” round).
  • Works like a Fixture with a FreeStyle Arm but isn’t limited to one specific hoop size.
  • Ideal for hooping sleeves, pant legs, beanies, tote bags, infant/toddler garments, and other tricky items.
  • Provides flexible, economical hooping without needing multiple size-specific Fixtures (not recommended for left or right chest hooping).
  • Adjustable FreeStyle Fixture

    Adjustable FreeStyle Fixture

    $140.00
    Add to cart

At the end of the day, choosing the right Fixture depends on the type of embroidery you do most often. If your work is consistent and you primarily use one hoop size, a single Fixture may be all you ever need.

But if you’re tackling everything from corporate polos, baby bodysuits and jacket backs, investing in multiple size Fixtures will give you the flexibility to handle it all. We even offer Kits with one or multiple Fixture options to get you off and running. 

That’s the beauty of our Mighty Hoop Fixtures and Hoops: Whether you’re a high-volume embroidery shop or just getting started, our Fixtures are designed to make hooping faster, accurate, and consistent.

With the right setup, you’ll save time, reduce mistakes, and focus more on what matters most, creating amazing embroidery!

Still not sure what is best for you…No need to fret! Our amazing in-house Customer Service and Support Team will help you determine the most economical and efficient way to get you started.

Give us a call at 262-257-0930 or email us at info@hoopmaster.com. Happy Hooping!
Article on why you should invest in Mighty Hoops
General

Stop the Hooping Struggle: How Magnetic Mighty Hoops End the Battle of Embroidery Hooping

Tired of the traditional hooping tug-of-war? Feel like you’re wrestling garments into place, especially thick or heavy items? The short video “Investing in the HoopMaster & Mighty Hoops” perfectly captures the frustration embroiderers face—and delivers the easy solution: No more fighting your hoop. Magnetic Mighty Hoops make embroidery hooping fast, precise, and pain-free.

Why Traditional Hooping Feels Like a Struggle?

Using classic screw-based embroidery hoops often means:

  • Constant tension adjustments, especially with changing fabric thickness.
  • Hoop burn or stretch marks on delicate or plush materials.
  • Wrist and hand strain, especially in commercial settings.
  • Misalignment, leading to crooked designs and production hiccups.

These everyday pains are exactly why embroiderers are switching to magnetic Mighty Hoops —and why should you?

Introducing magnetic Mighty Hoops: The Instant Hooping Revolution!

In the video, the narrator asks, “Why continue the endless fight?”  Then demonstrates how the patented magnetic Mighty Hoop snaps together instantly, gripping soft to thick layers—denim, towels, jackets—without fuss. https://www.youtube.com/shorts/5cAEx-Zjzwk

Core Mighty Hoop Magnetic Embroidery Hoop Benefits:

  • Zero Tension Adjustments: Magnets automatically adapt to any thickness.
  • Hoop Burn Be Gone: No outward ring means no fabric scorching or distortion.
  • Ergonomic & Safe: No pinching clips, fast magnetic alignment, gentle on hands .
  • Compatibility & Precision: Works with nearly all machine brands and HoopMaster fixtures for perfect alignment every time.

Learn more about the benefits of using Mighty Hoops (magnetic hoops for machine embroidery) and what other people have to say about Mighty Hoops. https://hoopmaster.com/about

Real Results – What Users Are Seeing

Embroiderers using magnetic Mighty Hoops report:

  • Dramatic time savings—no wrestling hoops, quick setup each time.
  • Consistent, straight designs—especially vital for commercial runs.
  • Reduced hand fatigue—everyday hooping becomes a smoother, easier process.

HoopMaster and Mighty Hoops’s magnetic hooping system seamlessly extends these benefits to high-production commercial embroidery environments and home embroidery. businesses alike. Don’t be fooled by illegal Chinese copies, like MaggieFrame, SewTalent, MagnaHoops, or SewTech Magnetic Embroidery Hoops, made with inferior materials and long shipping times. Interested in learning about Midwest Products, Inc’s. patents? Click here to find out more. https://hoopmaster.com/patents

Invest in HoopMaster and Mighty Hoops today! www.hoopmaster.com. Our embroidery hooping supplies will make your embroidery hooping process seamless, and most orders ship same or next day.

How to Avoid Hoop Burn from Embroidery Hoops
How-to's

How to Avoid Hoop Burn

Say Goodbye to Hoop Burn: Why Mighty Hoops Are the Burn-Free Solution for Embroidery

We’ve all been there—you finish a beautiful embroidery design, unhoop the fabric, and boom… hoop burn. That awful ring around your design where the fabric was pinched too tight. Whether it’s a plush sweatshirt, a soft tee, or a specialty garment, traditional embroidery hoops can leave behind unwanted marks that ruin the look (and the customer experience).

But here’s the good news: Magnetic Mighty Hoops have entered the chat—and hoop burn is officially canceled.

What Is Embroidery Hoop Burn?

Hoop burn happens when a traditional hoop—especially one with a tight outer ring—compresses the fabric so much that it leaves a permanent mark or crease. It’s most common on:

  • Soft cotton or tri-blend T-shirts
  • Sweatshirts and hoodies
  • Plush fabrics like fleece or minky
  • Any garment that’s sensitive to pressure or stretch

In short, hoop burn is what happens when your fabric says, “Ouch.”

Why Mighty Hoops Don’t Cause Hoop Burn

Unlike traditional hoops that pinch, twist, and pull the material to stay in place, Mighty Hoops use magnetic force to gently but firmly secure your fabric. That means:

No over-compression
No harsh pressure points
No weird rings left behind

Instead of squishing the fabric, Mighty Hoops hold it evenly and effortlessly—perfect for delicate materials and high-stakes projects where appearance matters.

How It Works: The Magnetic Advantage

Mighty Hoops are designed with powerful rare-earth magnets that snap together around your fabric and stabilizer. The pressure is distributed evenly across the hoop, which keeps the material flat without crushing the fibers.

That’s why you can use them on everything from thick Carhartt jackets to soft onesies and come away with a clean, professional finish—every single time.

Traditional Hoops vs. Mighty Hoops

Feature Traditional Hoop Mighty Hoop
Hoop Burn Risk High Practically zero
Pressure Points Tight rings pinch fabric Magnetic grip holds evenly
Time to Hoop Slow, requires adjustment Fast snap-and-go
Wrist/Hand Strain Common with tight hoops Minimal with ergonomic design
Best for Plush or Stretchy? Not ideal Perfectly suited

Real Talk: You’ll Never Go Back

Once you hoop a T-shirt, sweatshirt, or jacket with a Mighty Hoop, you’ll instantly notice the difference:

  • No visible rings or marks after unhooping
  • No need to steam out pressure lines
  • No tug-of-war with screw-tightening hoops
  • Just smooth, centered embroidery that looks professional

It’s a game-changer for custom apparel shops, high-volume embroiderers, or hobbyists who just want things to look perfect without the stress.

Pair with a HoopMaster Station for Even More Magic

Want to avoid hoop burn and get perfect placement every time? Use Mighty Hoops with the HoopMaster Station and adjustable fixture. It lines up your garments perfectly and helps you hoop faster—without the guesswork, stretching, or misalignment that can cause damage to your fabric.

Ready to Ditch Hoop Burn for Good?

Explore the full lineup of Mighty Hoops and placement tools at www.hoopmaster.com

Your embroidery should turn heads—not leave marks. Let Mighty Hoops help you stitch clean, smooth, and stress-free.