The World Leader In Commercial Embroidery Hooping Systems

Yearly: 2025

How-to's

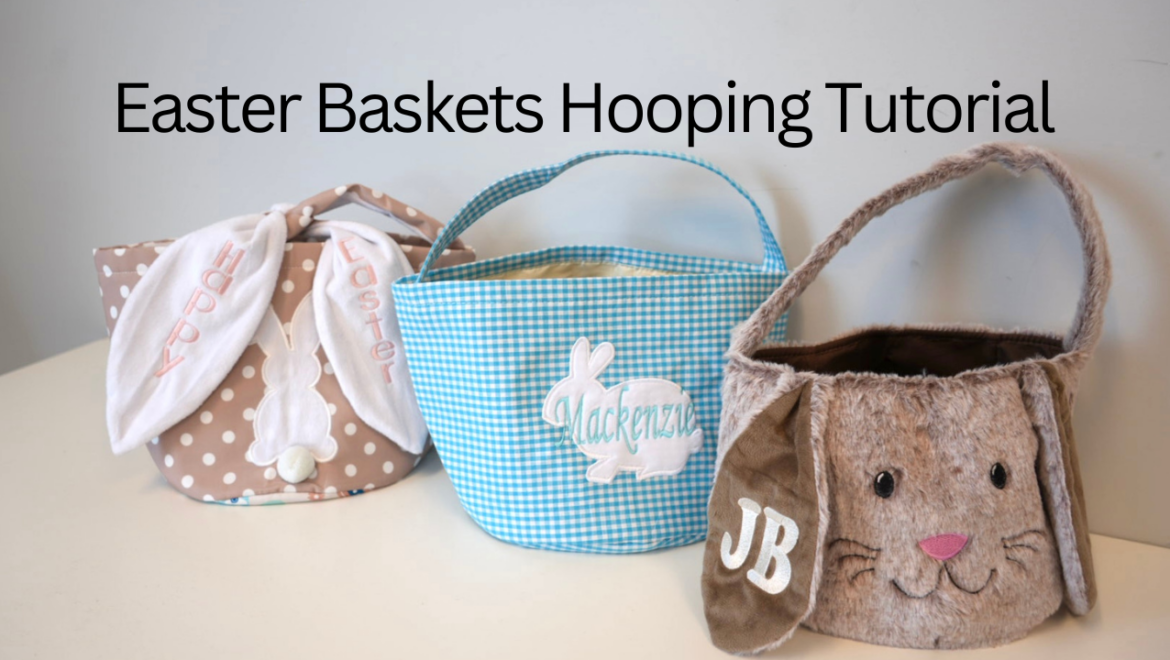
The Rise of Personalized Easter Baskets: A Timeless Tradition Made Easy with Mighty Hoops

In recent years, personalized Easter baskets have surged in popularity, becoming a cherished tradition for families looking to add a unique touch to their holiday celebrations. Embroidering names on Easter baskets has transformed them from simple seasonal accessories into keepsakes that children and loved ones can treasure for years.

Why Personalized Easter Baskets Have Become a Trend

One reason for this growing trend is the desire for meaningful, customized gifts. Rather than using generic store-bought baskets, families are opting for ones that reflect the recipient’s personality. Adding a name in colorful embroidery not only makes the basket feel more special but also helps avoid mix-ups during egg hunts and Easter morning festivities.

Social media has also played a significant role in this personalization boom. The popular blue and pink easter bunny fabric totes (from “5 Below” and “Amazon”) with a name stitched in bright thread elevates the design and adds a professional, high-end look.

The Challenge of Embroidering Easter Baskets

Despite their popularity, embroidering names on Easter baskets isn’t always straightforward. The structure of most baskets—whether stiff, curved, or thick—makes hooping a challenge. Traditional embroidery hoops struggle to grip irregularly shaped materials, and the process can be frustrating for both beginners and seasoned embroiderers.

How Mighty Hoops Makes Easter Basket Embroidery Easy

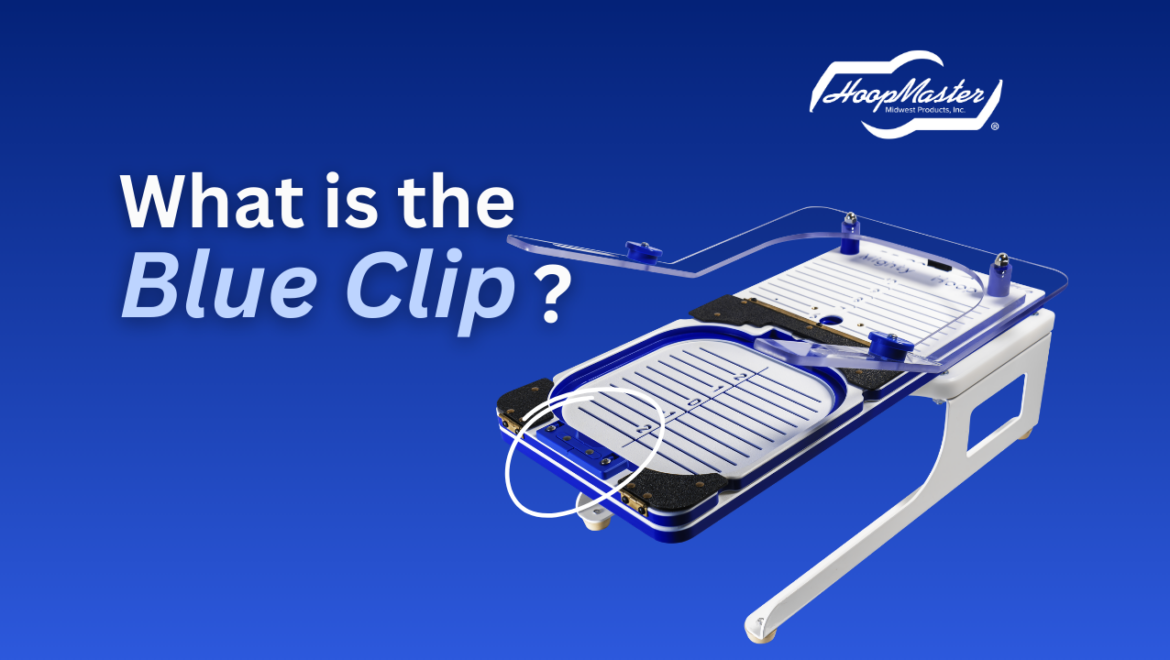
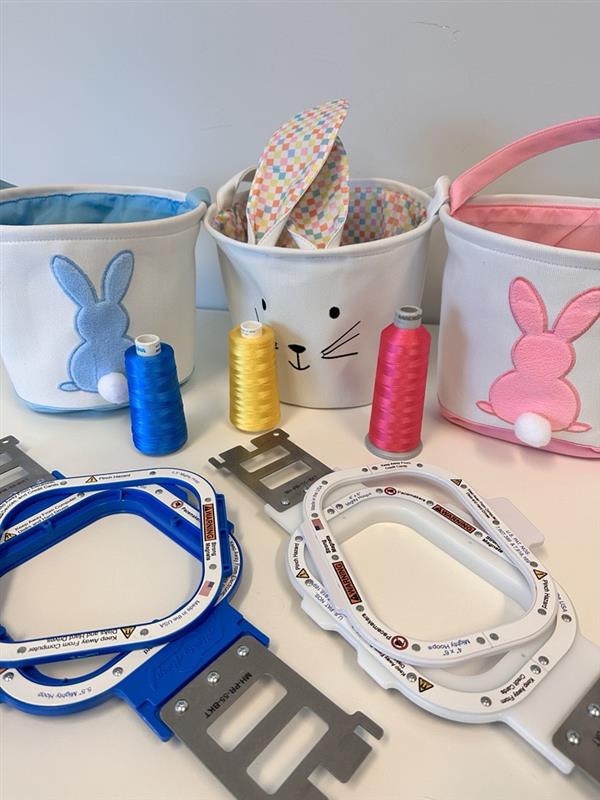
Fortunately, Mighty Hoops has revolutionized the embroidery process with their magnetic hoops, making it easier than ever to personalize Easter baskets. These powerful magnetic hoops eliminate the struggle of clamping down bulky or uneven surfaces, allowing embroiderers to securely hold baskets in place without excessive pressure or distortion.

Mighty Hoops offers a variety of techniques for hooping Easter baskets, ensuring that no matter the shape or material, there’s a simple and effective way to get the job done. Their hoops provide a strong hold without requiring constant readjustment, saving time and reducing frustration. This innovation means even embroiderers with minimal experience can achieve professional-looking results.

We created a video showcasing just how easy it is for you to hoop Easter Baskets with multiple different hoop sizes and techniques. To learn how to Hoop Easter Baskets with Mighty Hoops watch this video!

To purchase any of the Mighty Hoop Products used to hoop Easter Baskets, click the links below.

9×3″ Mighty Hoop: https://hoopmaster.com/?s=9×3&post_type=product&type_aws=true

9×3″ Backing Holder: https://hoopmaster.com/product/accessories/backing-holder
4×6″ Mighty Hoop: https://hoopmaster.com/?s=4×6&post_type=product&type_aws=true

Adjustable FreeStyle Fixture: https://hoopmaster.com/product/mighty-hoop/barudan/4-25×13-fixture

Portable Mounting Base: https://hoopmaster.com/product/accessories/portable-mounting-base

5.5″ Mighty Hoop: https://hoopmaster.com/products/mighty-hoop

5.5″ Backing Holder: https://hoopmaster.com/product/accessories/backing-holder

Tear Away Stabilizer: https://a.co/d/bsm3D4n

Water-Soluble Stabilizer: https://a.co/d/28VcdTq

Placement Dots: https://a.co/d/8tBlJft

What is the purpose of the blue clip on the Mighty Hoop Fixtures?
Tips & Tricks

Mastering the Mighty Hoop: Answering Your Top Questions About the Blue Clip

When it comes to embroidery, efficiency and precision are key. Enter the World Leader in commercial embroidery hooping systems designed to make the embroidery process faster, easier, and more reliable. If you’ve used or considered using  Mighty Hoop systems, you may have noticed a unique feature on all Mighty Hoop Fixtures: the blue clip. This small but mighty component often sparks curiosity among users. What is it? What does it do? And why does it matter? Let’s dive in and answer your top questions about the patented blue clip.

What Is the Blue Clip?

The blue clip is a patented clip located on all Mighty Hoop Fixtures. Its design is deceptively simple, yet it serves a critical purpose in optimizing your hooping setup. Made with durable materials and designed to integrate seamlessly with Mighty Hoops, the blue clip plays a crucial role in stabilizing the bottom ring of your Mighty Hoop when hooping lightweight fabrics.

What Does the Blue Clip Do?

The blue clip is specifically designed to hold the bottom ring of the Mighty Hoop when hooping lightweight garments. While the magnetic force of the Mighty Hoop is already strong enough to secure many materials, certain items—like thin shirts, delicate fabrics, or stretchy materials—may cause the hoop to snap together causing the garment to shift. The blue clip ensures:

  • Improved Alignment: Keeps the bottom ring from snapping together with the top ring during the hooping process. This ensures that you are hooping exactly where you placed your garment.
  • Versatility: Allows the Mighty Hoop to accommodate an even broader range of fabric types and thicknesses.

How Do You Use the Blue Clip?

The blue clip has two adjustable positions: locked and unlocked, designed for quick setup and versatility. Here’s how each position works:

  1. Locked Position (Long Slot)
    • Purpose: Retains the lower ring of the Mighty Hoop.
    • Ideal For: Lightweight fabrics and garments.
    • How It Works: The locked position holds the lower ring securely until the top ring comes down and releases it during the hooping process. This setup allows you to align garments more precisely, reducing alignment errors and ensuring professional results.
  2. Unlocked Position (Short Slot)
    • Purpose: Frees the lower ring for easier movement.
    • Ideal For: Heavy or thick items like Carhartt jackets.
    • How It Works: In the unlocked position, the top and bottom rings come together effortlessly to hoop bulky items without resistance.

To see the blue clip in action and learn step-by-step instructions for its use, check out this informative YouTube video. Visual demonstrations can often make the process even clearer!

Troubleshooting Tips

If you ever find your item stuck in the Fixture, don’t worry and don’t unhoop your garment! Check the position of the blue clip:

  • If it’s in the locked position, simply push the clip aside to release the hoop.
  • Remember, this situation often indicates that the clip should be in the unlocked position for the type of item you’re hooping.

Special Considerations

Not all Mighty Hoops have the two bumps on the top ring that allow automatic release from the Fixture. The presence of these bumps depends on your embroidery machine’s brand and the hoop size.

  • If your hoop lacks these bumps: Use the locked position for lightweight garments as usual but manually release the hoop from the Fixture after hooping. This process only takes a moment!

Now that you’re a blue clip expert, you can confidently use Mighty Hoops for all your embroidery projects, ensuring accurate alignment and hassle-free setup every time.

Ready to enhance your embroidery experience? Explore the full range of HoopMaster and Mighty Hoop products by visiting www.HoopMaster.com. Happy embroidering!

General

How Our New Space is Shaping the Future of Midwest Products

At Midwest Products, growth isn’t just a goal—it’s a necessity. Our commitment to innovation and providing top-notch products for our customers has always driven us to think ahead. Recently, this approach led us to secure an incredible new space, shaping the next chapter of our journey in ways we never imagined.

A Twist of Fate: From Breaking Ground to Moving In

In our newsletters, we’ve shared exciting updates about our expansion plans. Initially, we purchased land and began preparations to construct a brand-new warehouse. But just as we were ready to break ground, an unexpected opportunity knocked on our door— right across the street!

The building we had long hoped would become available went on the market, and we knew this was the moment we had been waiting for. Seizing the chance to expand our footprint without new construction delays, we pivoted our plans and purchased the building. Since then, the Midwest Products team has been hard at work renovating and modernizing the space to align with our operational needs and vision for the future.

A Move with Minimal Disruption

The big day is almost here! In early November, we began transitioning into our new facility, and over the next few weeks, we’ll complete the move while ensuring operations continue without interruption. Some team members will remain in the original building, while others have already moved across the street to the new location. This strategic split allows our departments to continue collaborating seamlessly, ensuring we maintain the high level of service our customers rely on.

Why We Bought Instead of Built

So why did we decide to buy and not build? The answer is simple: urgency. As a growing company, we needed more space—immediately. Building from the ground up, while exciting, would have meant months of waiting and dealing with potential delays. Purchasing the existing building allowed us to fast-track our expansion plans and work on what matters most: creating innovative new products for our valued customers.

What This Means for You

With the addition of this second building, we’re setting the stage for exciting advancements. The extra space will enable us to:

  • Increase production capacity to meet growing demand.
  • Innovate more efficiently, bringing new ideas to life faster.
  • Enhance customer service with streamlined operations.

This expansion reaffirms our commitment to exceeding expectations and ensuring that our customers continue to enjoy the same “scary fast” shipping times and exceptional quality they’ve come to rely on.

Making It Our Own

As renovations continue, we’re blending functionality with our signature Midwest Products style. The goal is to create a space that supports our operational needs and reflects who we are as a company—dedicated, forward-thinking, and deeply connected to our community.

Our move marks a significant milestone, and we’re thrilled to have you with us as we take this next big step. Your support has been instrumental in our growth, and we can’t wait to show you what the future holds.

Stay tuned for updates as we settle into our new space. Together, we’re shaping the future of Midwest Products—one innovation at a time.

Thank you for being a part of our journey! Follow us on Instagram, Facebook, TikTok, and YouTube for real-time updates on our move and exciting new developments.

How to use the 5.5 Mighty Hoop Starter Kit
How-to's

5.5″ Mighty Hoop Starter Kit

The 5.5″ Mighty Hoop Starter Kit was designed to be compatible with almost every tubular embroidery machine in the world! This kit is intended to be the perfect starting point in almost every embroiderers journey. Whether you are just starting out or you have a large embroidery shop, this system will make the embroidery hooping process seamless. Perfect design placement, consistent hooping, and increased productivity are just some of the benefits you can expect to have when using this kit.


Watch the video below to learn how to use the 5.5″ Mighty Hoop Starter Kit and see how it could benefit you.


If you just purchased the kit and want to learn how to set it up watch the video below.

Be sure to leave a “Like” and “Comment” if you found this video helpful! Don’t forget to “Subscribe” and turn on “Notifications” to get video updates! Have a question about our products? Leave us a comment or send us an email at info@hoopmaster.com.

Instagram – https://www.instagram.com/hoopmastermightyhoop/

Facebook – https://www.facebook.com/mightyhoop/

TikTok – https://www.tiktok.com/@hoopmastermightyhoop